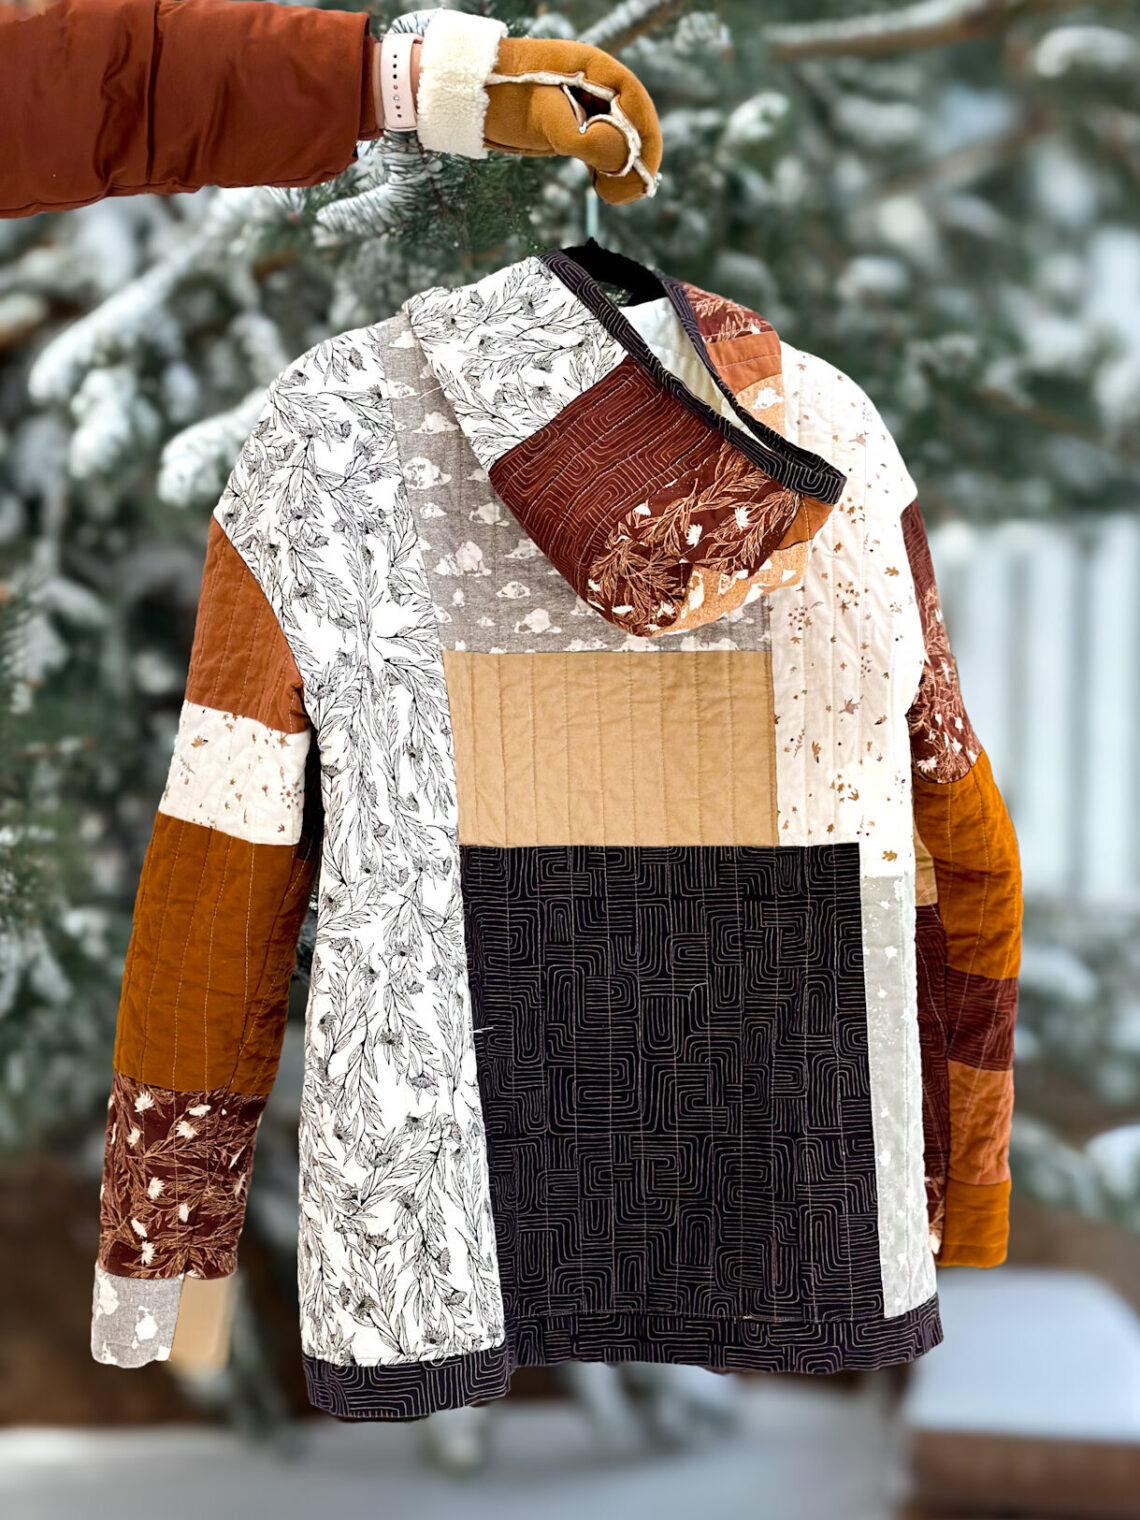
DIY Quilted Hoodie Pattern!
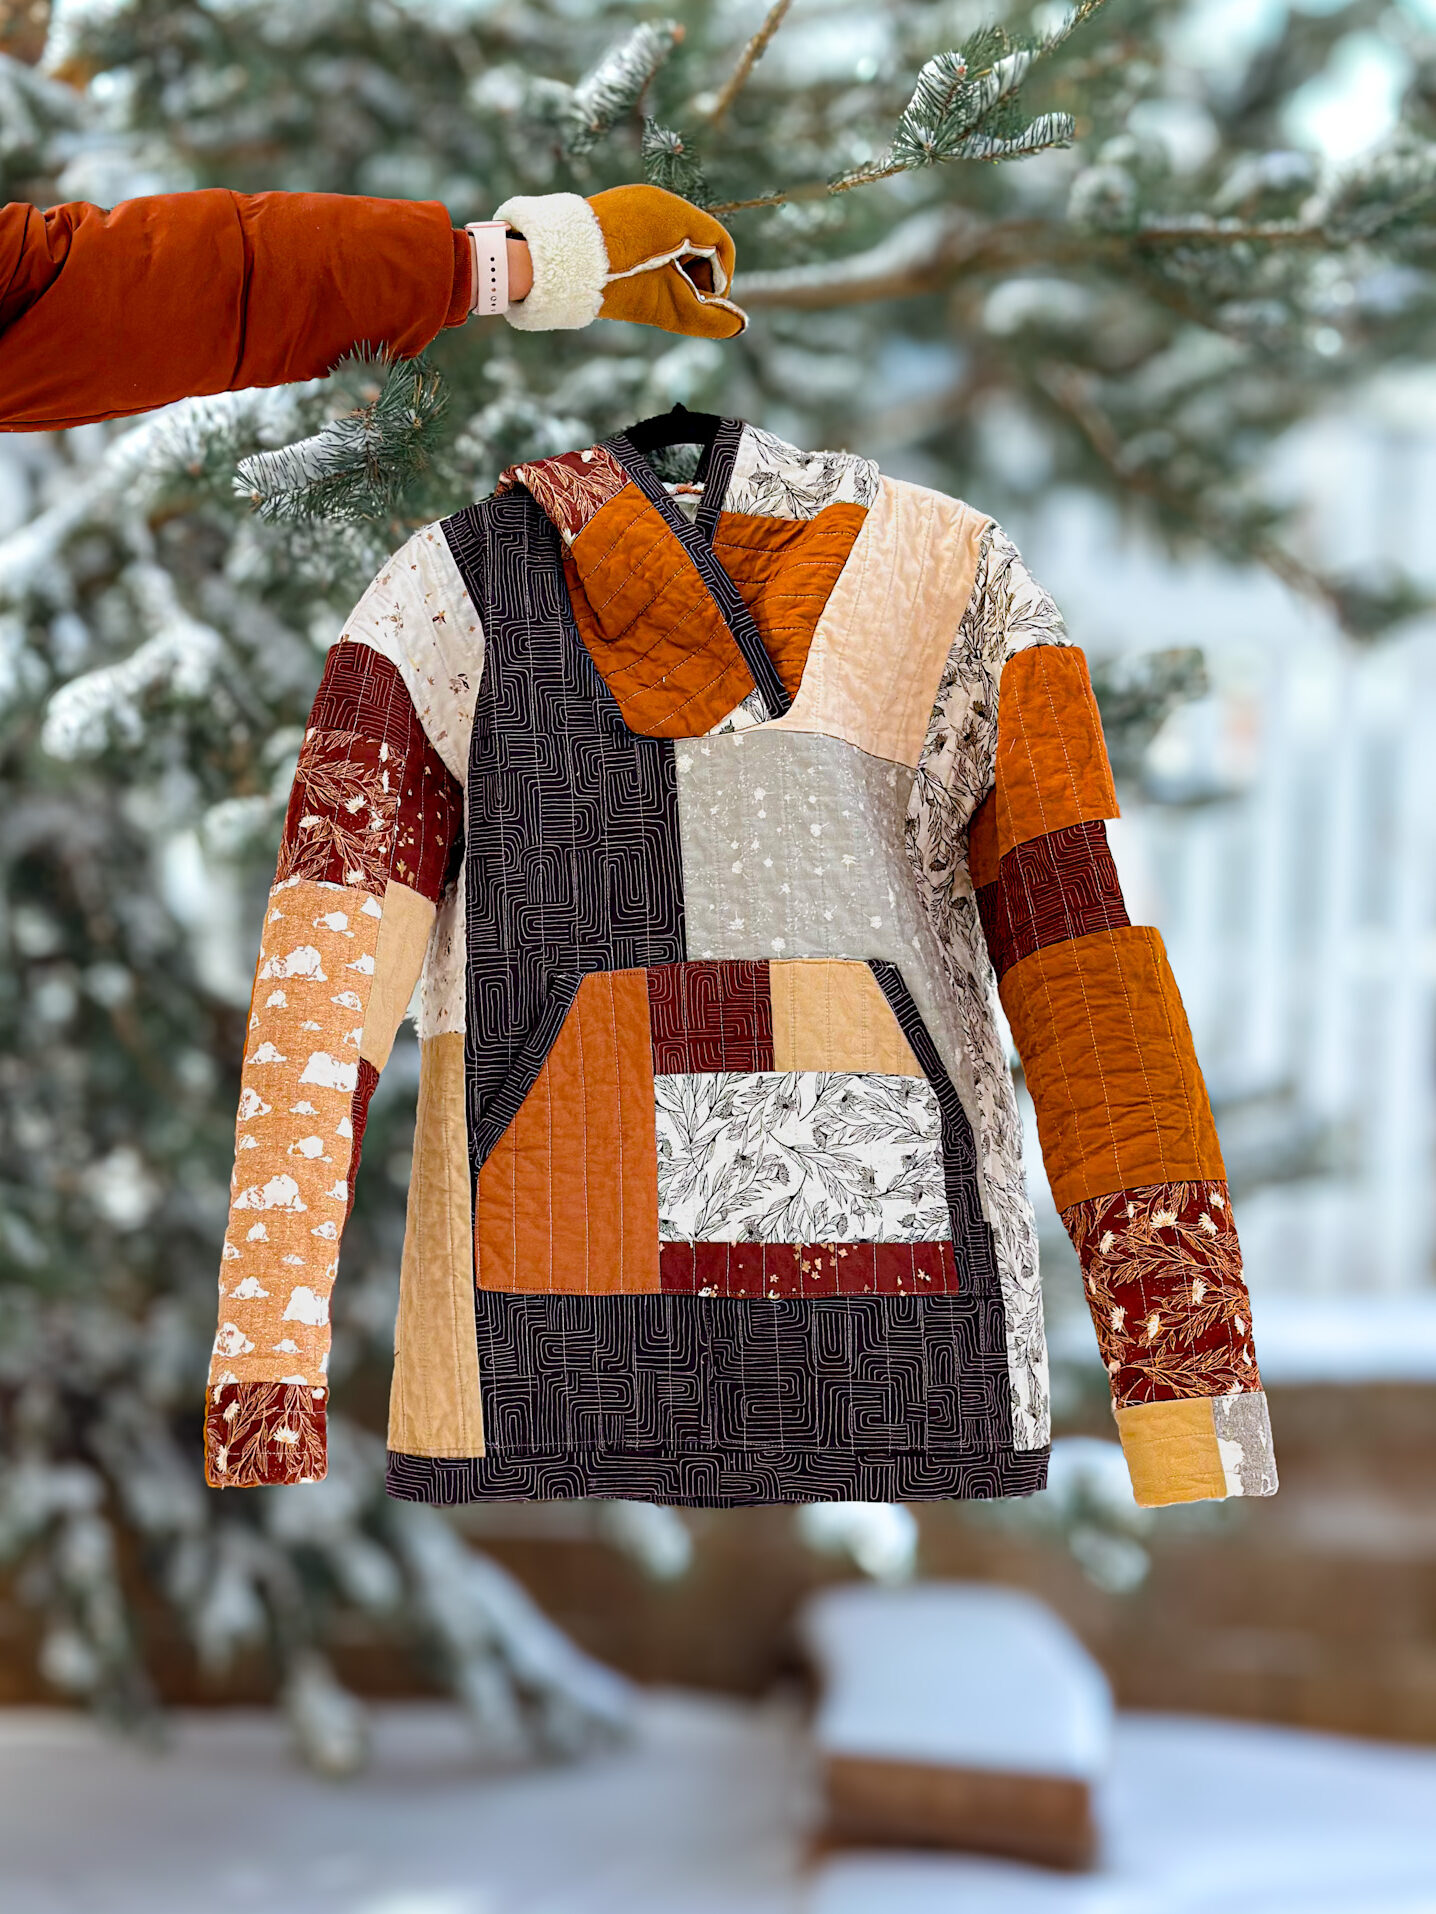
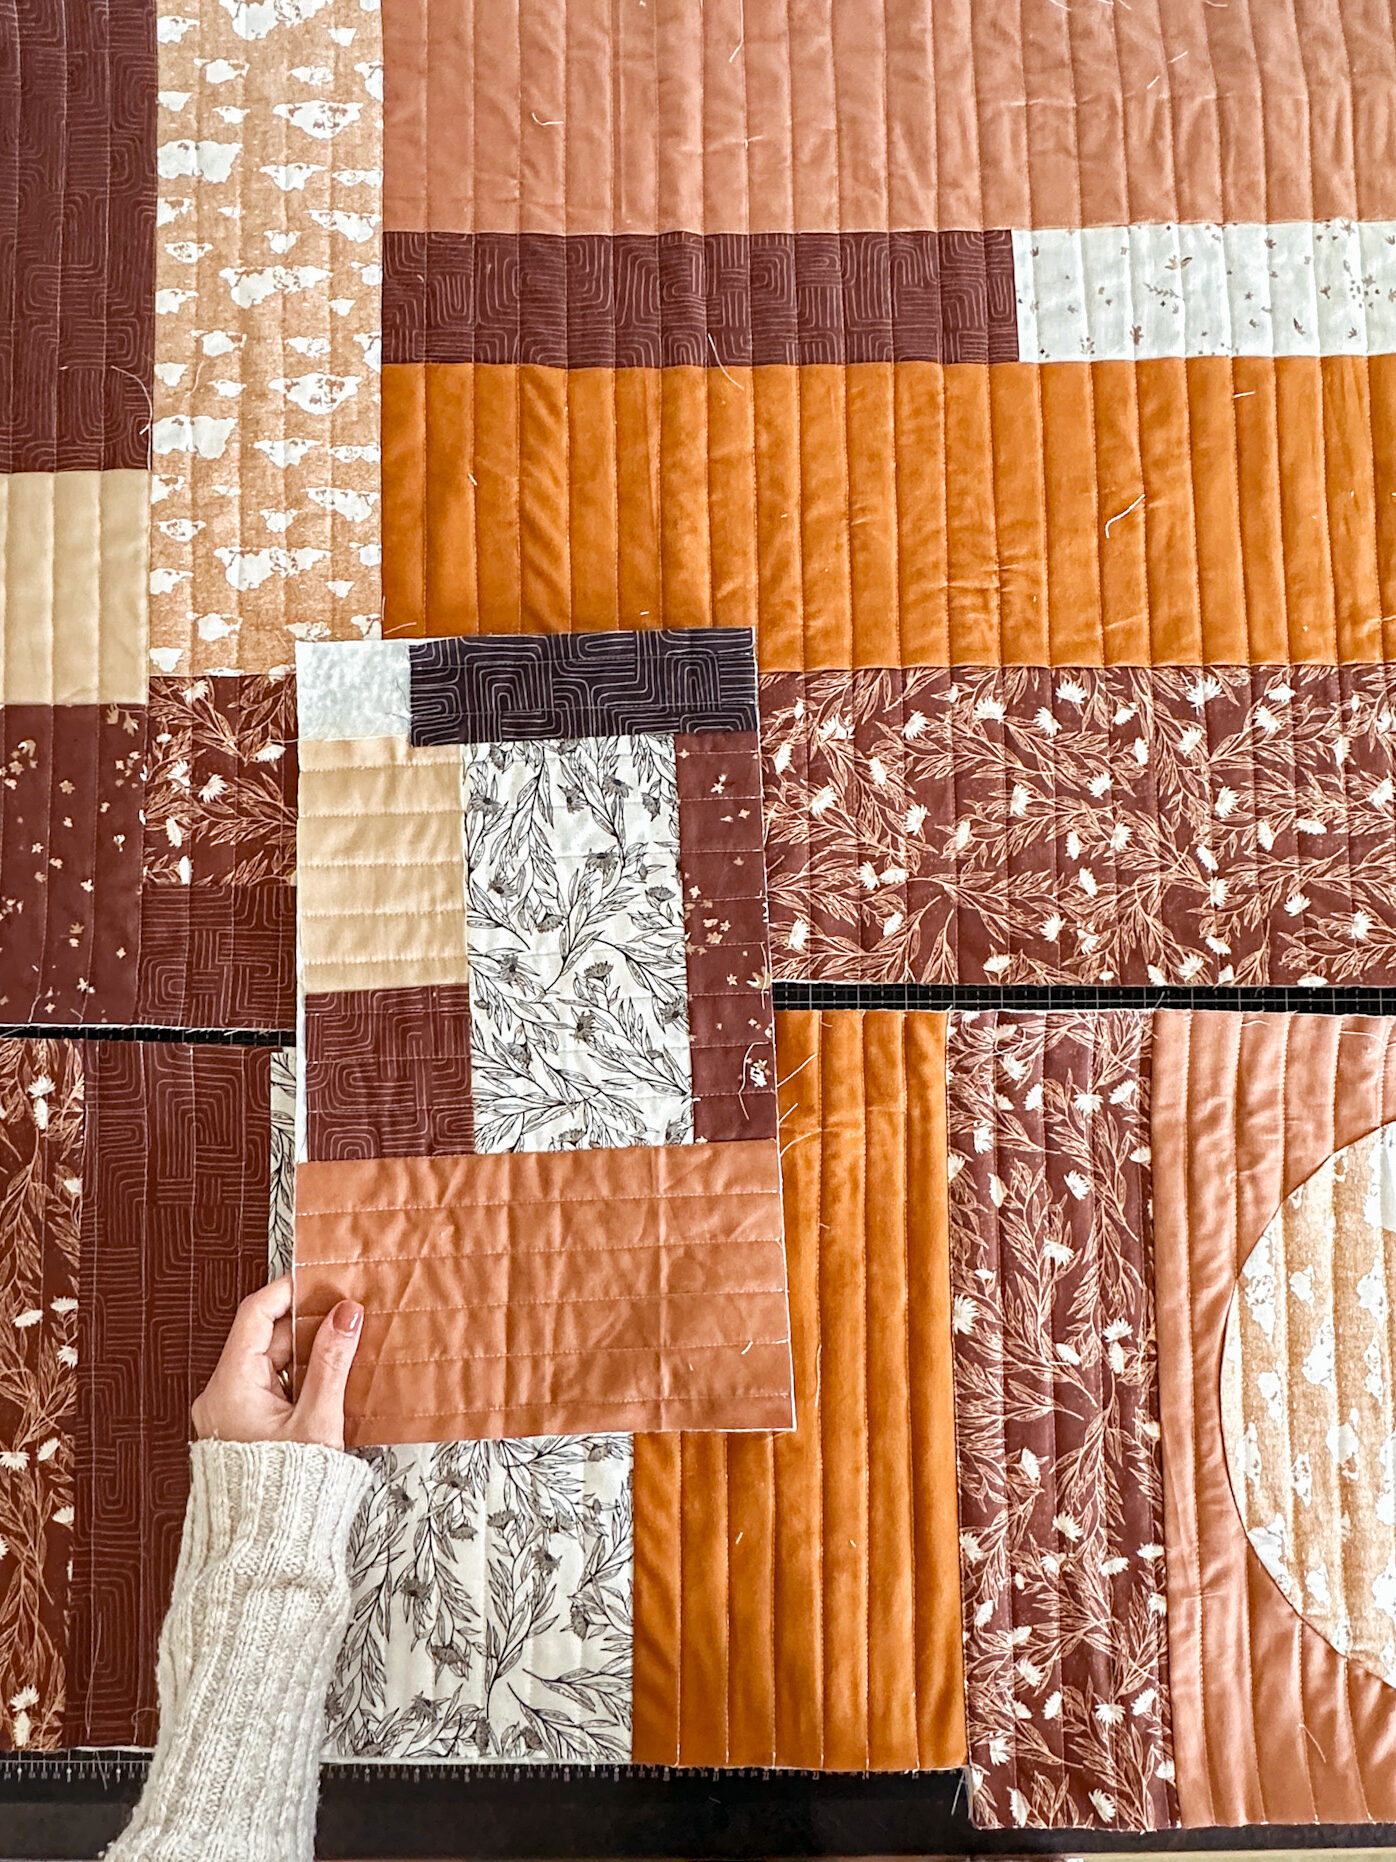
What happens when you turn the coziest quilt into the coziest quilted hoodie? MAGIC. Make your own DIY Quilted Hoodie using the Quilted Hoodie Pattern, available below! Then follow the blog post instructions to assemble your own version. The fabrics used in this version are from the Dancing Daisies Collection by Casey Cometti of Wellspring Designs. I’ll be hosting a casual 3 week Quilt-A-Long from March 24 – April 13, 2024 to make a DIY Quilted Hoodie with other quilters. Sign up here to join us!

GET THE PATTERN!
Use these templates to follow the blog post instructions and created your own DIY Quilted Hoodie! Templates include sizes XS – XXL.
Fabric Requirements:
- 1 large Throw size quilt.
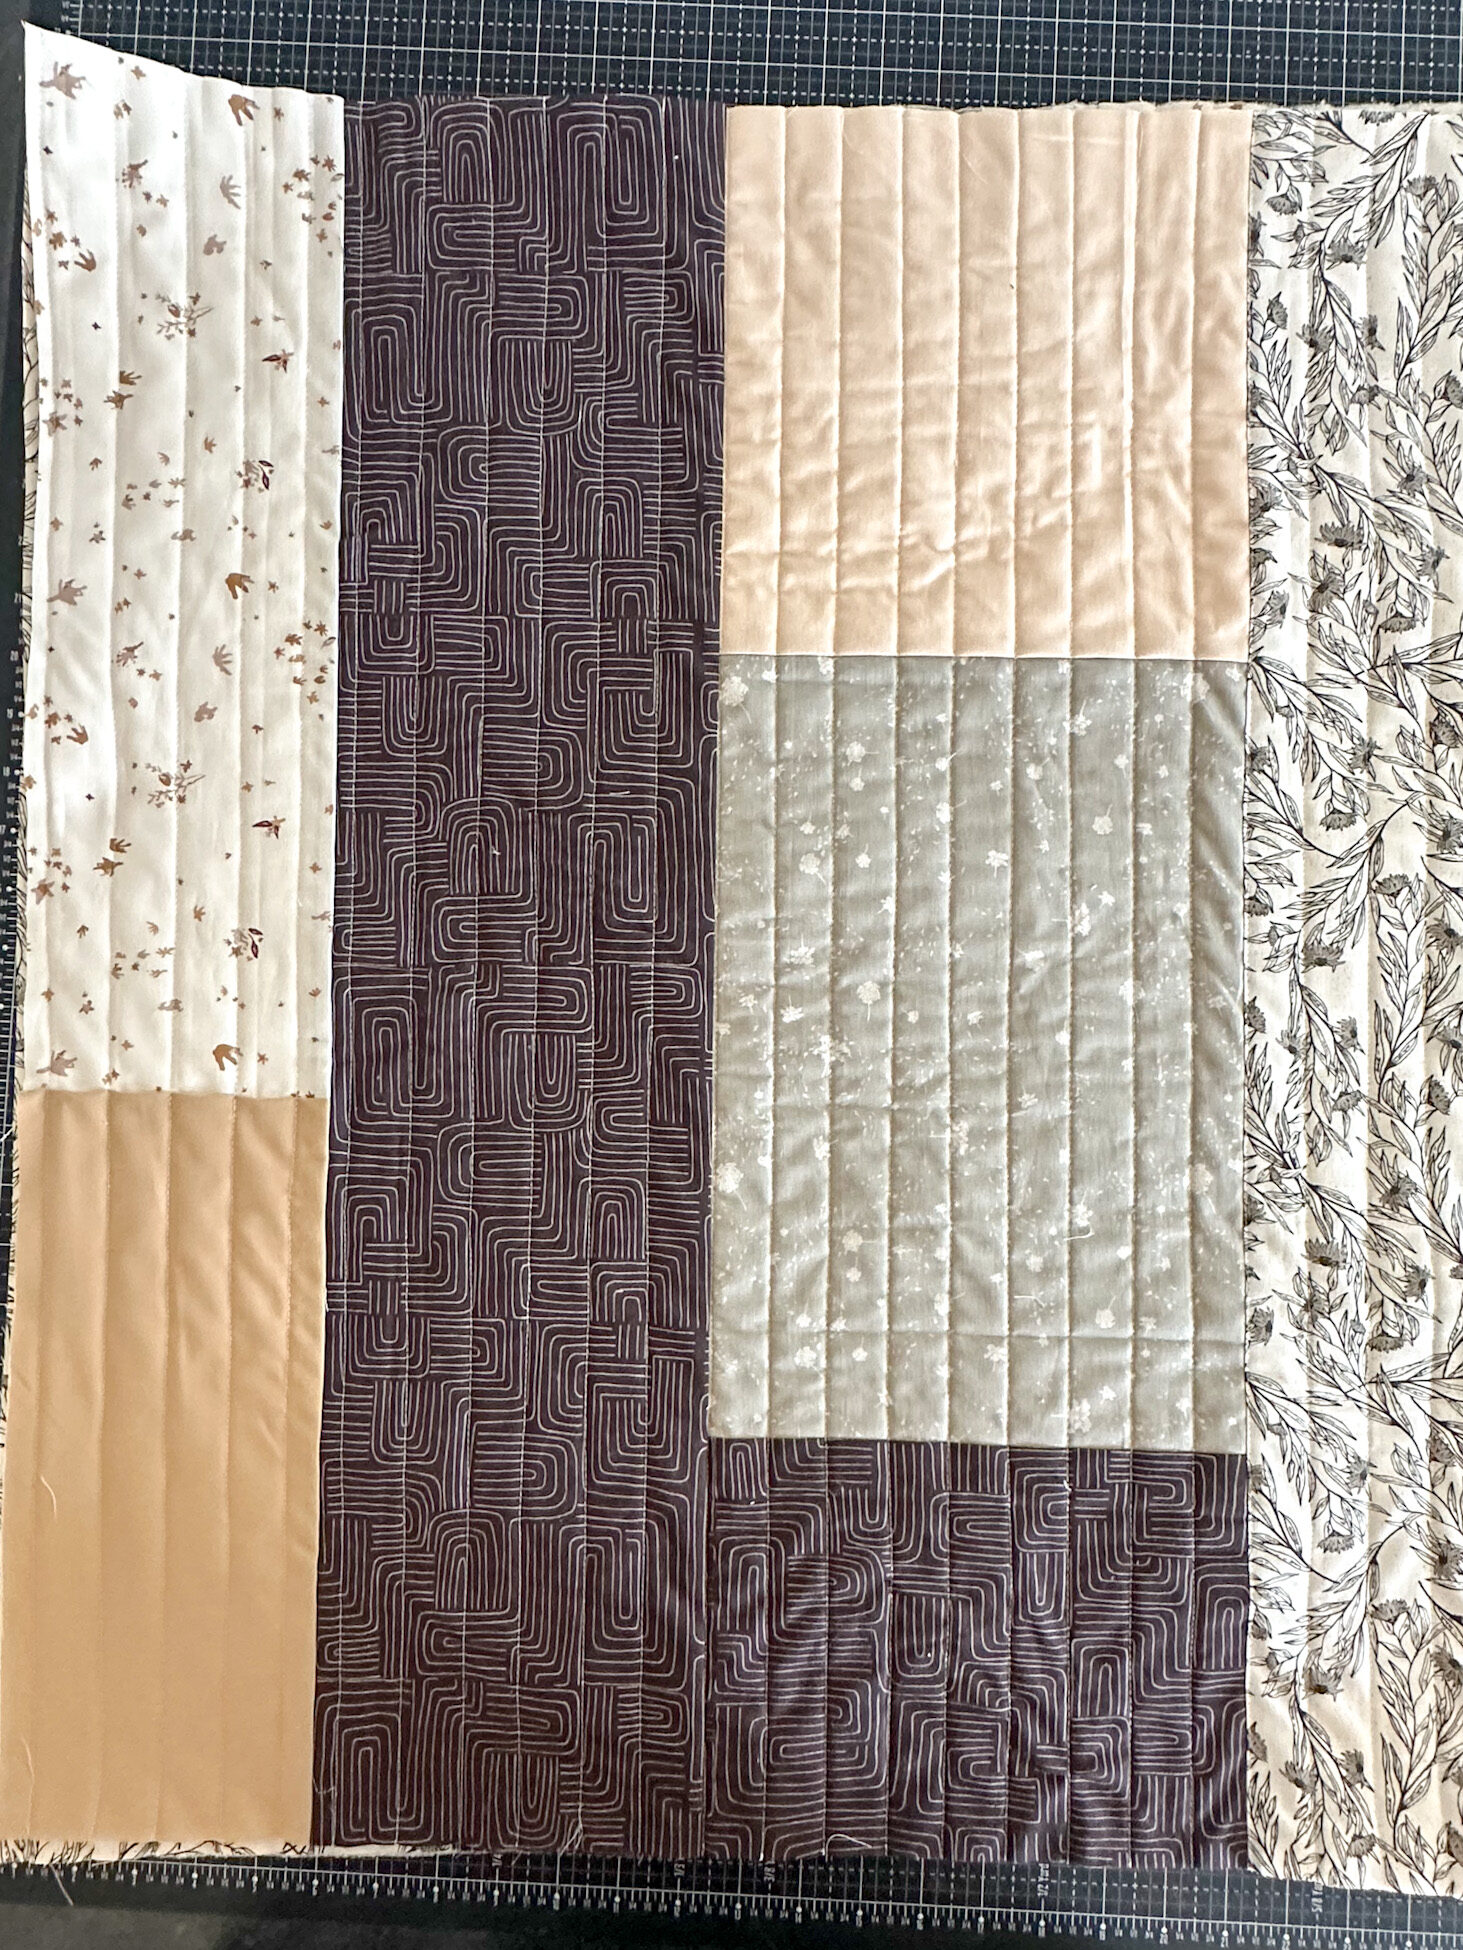
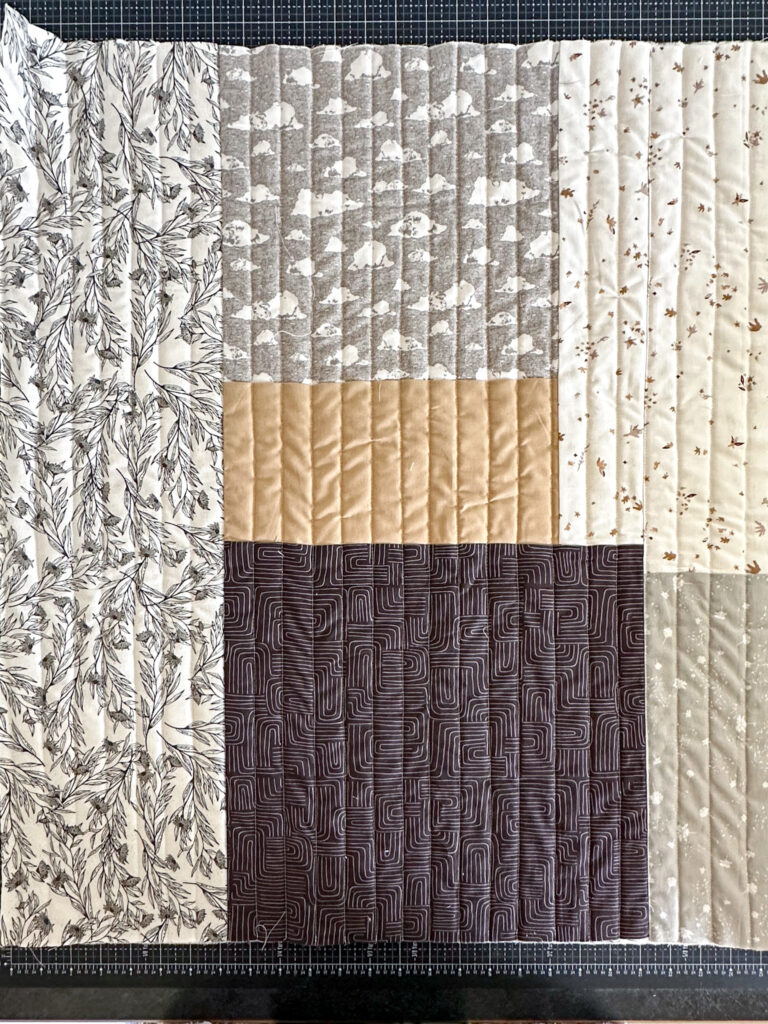
- I’ve made 2 versions of this pattern, for the first I used quilted sections that fit the templates (see below).
- For the second, I used 54″ x 64″ finished quilt to make a medium. Use those dimensions or larger for room to maneuver the templates.
- 1/4 yard to make 3.5″ binding
What you need:
- Fabric pencil or pen
- Rulers
- Cutting Mat
- Scissors or rotary cutter
- Adhesive spray — for stabilizing templates and appliqué
- Quilty clips — which are my newest notion obsession. They make garment sewing so much easier!
- Hera marker
- Sewing machine and thread
- Iron
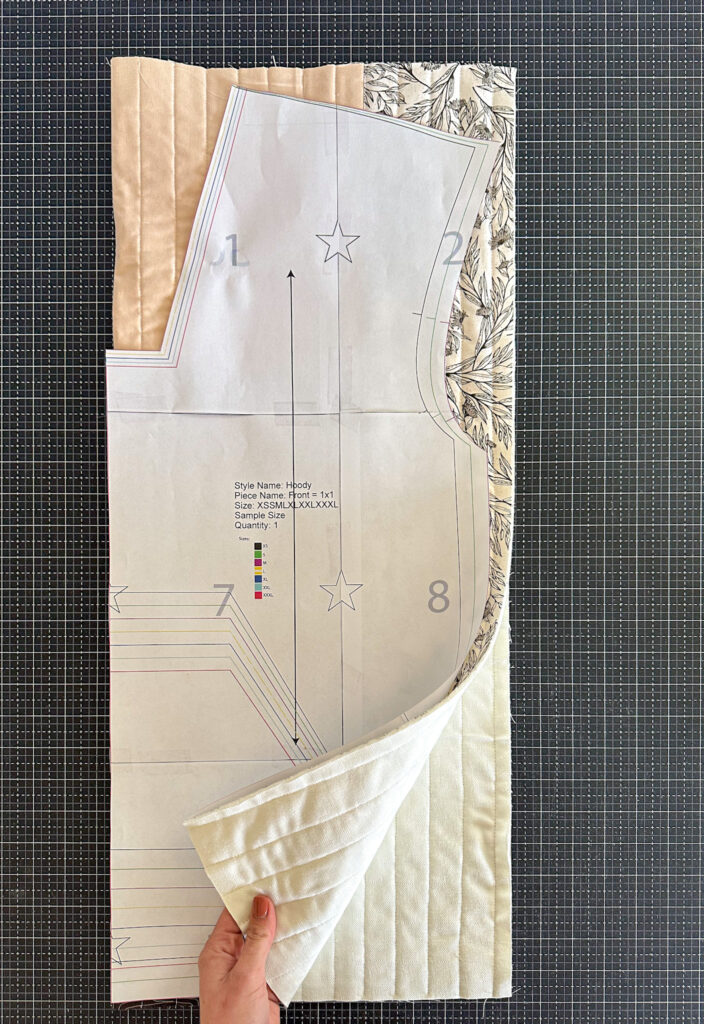
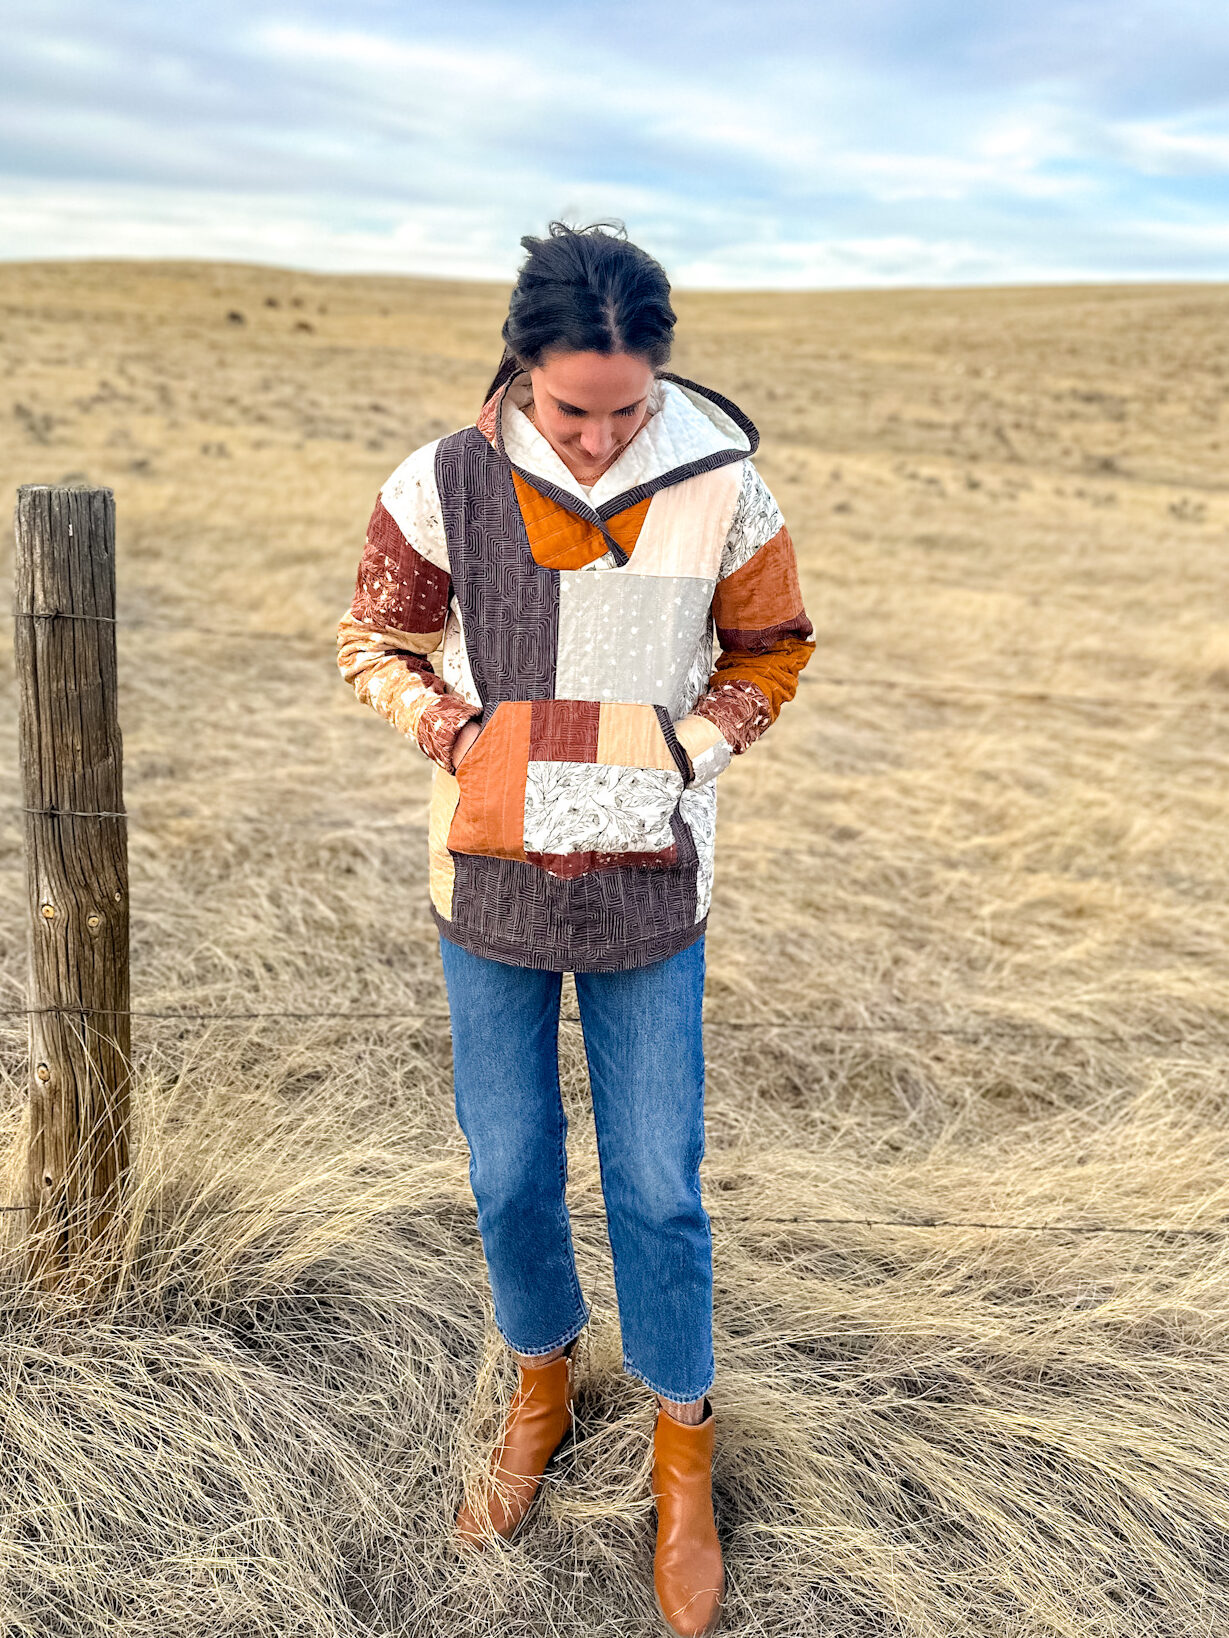
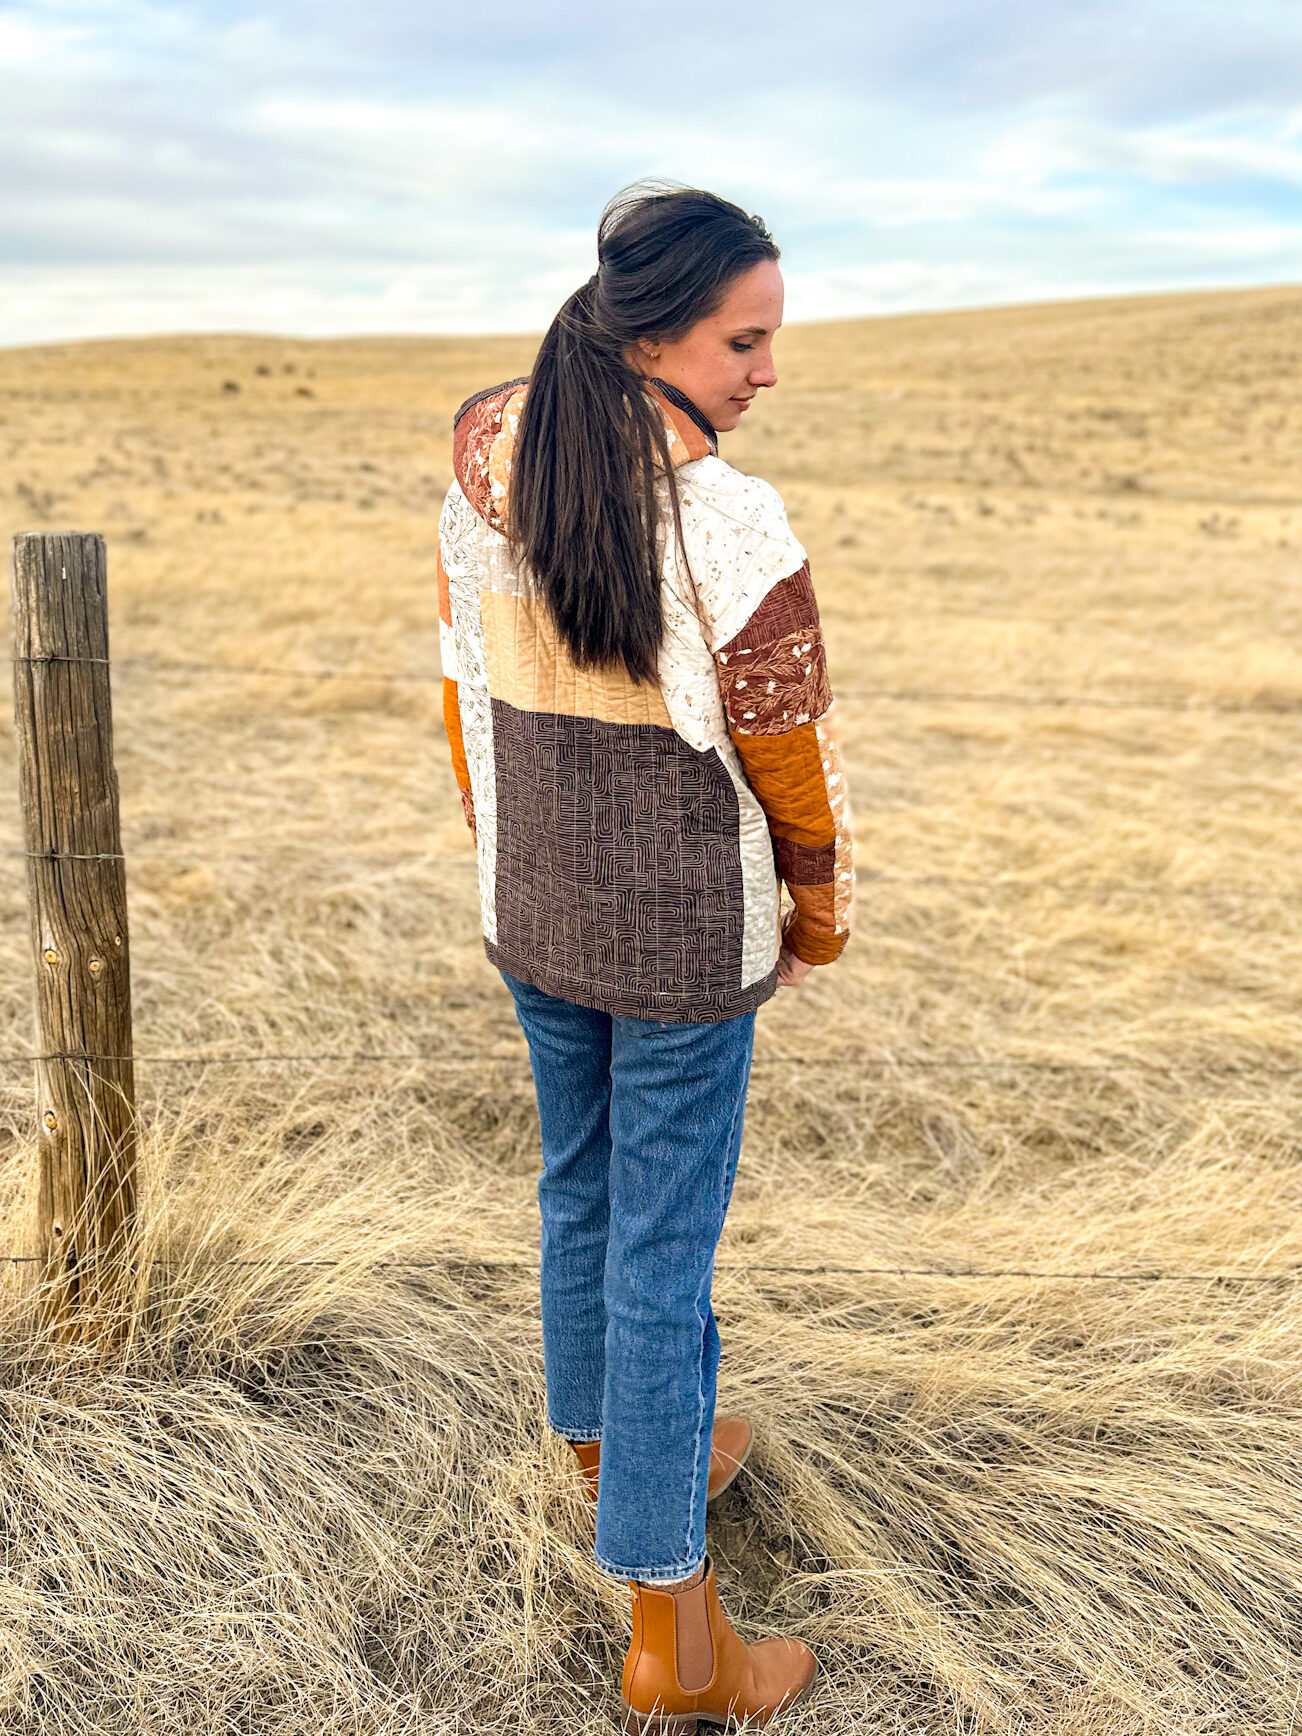
Once your throw size quilt or quilted sections are prepared, print and assemble the paper templates following the diagram at the end of the document. I recommend printing in color to differentiate the sizing options. I made the medium, which is true to size for me. For length reference, I am 5’10” and the finished hoodie hits at mid-hip level.
Everything you need to make your own version is in the Quilted Hoodie Pattern!
A new version of the pattern will be available with my next collection “Let’s Wander”, available for preorder March 2025 and hitting shops in October 2025! Keep an eye out to stock your local quilt shop with this pattern, it would be perfect for teaching a class!


61 Comments
Megan
Is it hard to put in and take off the coat as it is not made from knit fabric?
Casey Cometti
Hi Megan,
Yes, the quilted fabric does not stretch, so it requires a little more maneuvering to get on.
Anne
Is the template designed to be printed on A4 or on Letter size paper?
Mrs Julia Wigley
I downloaded this lovely pattern and made myself a fabulous hoodie. I used cotton sari hand quilted fabric. I love wearing it. Now going to make another in patchwork. Thankyou for giving this pattern.
Randi Ulmer
I would like to sign up for the quilt a long
Thank you
Valinda Proffitt
What time is the hoodie Quilt Along?
Casey Cometti
It starts March 24th, I hope you can join us!
Jayden Boyd
Is there a way I could buy a template and have it shipped?
Elly
Can you share rough dimensions of how many and how large you made the quilted sections please?
Thank you so much.
Lorna
Love this hoodie! I have already signed up to joint the Quilt-a-long.
I have also printed the pattern. I was just wondering how I determine what size I will need. I cannot find anything that refers to size measurements.
Caron
Is there a size chart available for this pattern?
Margaret
On the pocket you applied binding on the sides, did you turn under the top top and bottom before sewing it on, or is that raw edges?
Casey Cometti
Hi Margaret, thank you so much for your question! I’ll have a more in-depth description and alternative methods in the QAL, but yes. I turned under the seams of the pocket attach it.
Gwenna
Hello What are the setting for getting the pattern pieces to print out correctly?
I did at 100% but it doesn’ seem to match up correctly with the stars.
Thanks
Grace de los Ángeles Salazar Ulate
Muchas gracias me gustó mucho el tutorial
Beverly
Can you please provide a size chart so I can determine if it will fit before I order it?
Thanks.
Rosemary B
Dear Casey, thank you for sharing this. I am gonna try it. I like the idea of making the pieces to each part instead of cutting up a quilt, which just seems weird and sad bc you lose a lot of pretty fabrics. Anyway, Thank you so much for figuring this out.
I will try it and let you know at some point. This hoodie is great and you looks beautiful!!!
Kristen
Definitely joining you! I have several quilt tops that would be perfect for this. It looks so cozy🤩 Do you have any references to what the finished sizes equate to in inches, instead of just S,M,L,etc? Everyone is different on what they consider this to be.
Thanks for the SAL and pattern, Kristen
Jean Ruefer
Do you have the measurements listed somewhere for the different sizes? I don’t seem to be able to find them. Thank you.
Cynthia Kielpinski
Hi Peg! Did you ever figure out how to pick the sizing for this?
Peg
Thank you for this tutorial and the templates. I have thoufgt about a quilted hoodie for awhile. You did the hard stuff by making the templates, so I am so excited to start. Will sen pics. Thank you so Much
apron
Way cool! Some extremely valid points! I appreciate you penning this write-up and also the rest of the site is
really good.
Jill Scholtz
I signed up for the quilt-a-long, but I might not be able to wait, haha! I’ve done a lot of garment sewing and this pattern looks pretty good! I’ll let you know how it goes!
Cheri hillk
It hasn’t sent me a link
Deanna Crossgrove
If you measure the front pattern piece at the underarm and multiply by 2 , then do the same for the front, then add those 2 numbers together you get the circumference of the whole jacket minus seams.
FRONT. BACK. SIZE
21 21. XS
22. 22. S
23. 23. M
24. 24. L
25. 25. XL
26. 26. XXL
27. 27. XXL
Velda
Hey. I would love love love to make this hoodie. See you soon
stencil hoodie
I absolutely love your blog and find a lot of your
post’s to be just what I’m looking for. Would you offer guest
writers to write content in your case? I wouldn’t mind composing a post
or elaborating on most of the subjects you write related
to here. Again, awesome web site!
Martha H
I am excited to make this hoodie. I cannot seem to organize the templates in the right way to form the pattern pieces. Is there a diagram or chart to see which pieces join? I can see the diagram for the front with pieces 1,2,7,8,14,15 and my pieces, by those numbers, don’t look the same. Help? I did get the pocket and the sleeve to match for a proper shape. Please send a diagram or chart to show how the pieces are to join! Thank you
Renee
Hi, I signed up twice for the templates for this hoodie and have yet to receive and email with it. Not in my junk folder either.
Thanks.
yolo
Saved as a favorite, I like your site!
stencil hoodie
This is really interesting, You are a very skilled blogger.
I’ve joined your feed and look forward to seeking more of your wonderful post.
Also, I have shared your site in my social networks!
jacket
I got this website from my pal who shared with me about this web page and
now this time I am browsing this site and reading very informative posts here.
Erica
Hi. I am not seeing what the measurements are for the XXL size. Did I miss it?
Thank you!
Erica
Sorry I mean for how much fabric I need.
Maggi
Does your pattern provide body measurements so we can determine which size we need to make? S/M/L/XL/XXL vary a lot from pattern to pattern.
Tina Short
Hi, could you give actual measurements in inches please as sizes vary so much
Thanks
Susan Eiseman Levitin
For some reason, I am not getting the templates through flodesk. Is there another way to get them?
Suzanne Faris
I never got an email with a link to the templates.
Shelli
I have started already! Got the front and back done and sewn at the shoulders. I found a large square pattern (11.5″) I liked and fabric and made the “quilt” piece the size of the front and back and cuffs. Going to do the same for hood, pocket and sleeves. So far it’s been 6 or 7 fat quarters and close to two yrds of backing for the front and back.
Linda Warmath
Please help!!! I have printed out all the pattern pieces and I can’t find the directions for taping the pieces together. I have tried to figure it out to no avail. This has been quite an undertaking and lots of time spent. Please let me know where the directions are for taping these pieces together and thanks. I’ve been at this for over an hour and 1/2.
Nicole
Just love it. Don’t know if I can wait that long! So cute.
Shirley Ontiveros
Thank you for the pattern!
I have a ton of sturdy knit fabric left over from earlier projects. Therefore, I am going to try making one out of stretch first. The binding I will leave off since it will be a rag quilt style. I have some stretch denim that would be perfect.
Can’t wait to try this out!
Barb
I , like others, am wondering what size to make. do you have measurements listed for the sizes? thank you
Love your site.
Kristen
I am sure you will mention this later in the SAL, but for those of us who want to sew a few seams,could you please share what seam allowance you used? I have made some garments and know that it’s usually a bit bigger than our quilts! I could go on past experience, but you are the one who has been wearing/washing it, so I want to make sure it’s sturdy! Thanks, Kristen
Tami
Kristen – there is a little window on the top left of the pattern that designates a 1 cm seam allowance!
Rachel Moffett
Hi! I’ve tried multiple time with a couple different emails and I haven’t received the templates (yes I checked my spam!❤️) how can I get the templates so I can participate in the SAL? Thanks!!!!
Debra S BOHN
I just signed up for the QAL a little late. This hoody is so cool! What are the corresponding sizes to Med or Large? TY!
Nancy Burk
I am not receiving the email to download the templates. I have checked all files, spam, etc. HELP! Thanks.
Francine
Hi,
I signed up multiple times for the templates for this hoodie and have yet to receive an email with it. It is not in my junk folder either. I’ve also signed up for the QAL although I am late to the party, I only found this last night.
I’m really looking forward to making this hoodie.
Thanks.
Charlotte Christensen
This hoodie is so cute! I just couldn’t cut up one of my quilts that my grandmother made so I just quilted each piece. I did have a few issues….could NOT get the pattern to print for me so I found another free pattern. I thought I cut out a big enough pattern but decided I needed my arms to fit into the sleeve so I added an extension to each side. Then it seemed so short so I added an extension to the bottom ….I do love long coverage at an outdoor event!. Since I was using cotton there wasn’t enough stretch for the neckline to get over my head, so I added a placket which turned out perfectly!!! Thanks for the inspiration!!!
Neth
Is there a size chart for the hoodie? Would like to know what M, L, Xl are equal to in US sizes. Bust measurements, etc.
Thank you.
Pam Jaspers
Why can’t i get a link to the pattern? I have tried multiple times but never receive the link or pattern.
Marianne (Marcy) Griffes
Just a thought, but I think I would put a zipper in one of the side seams. Wouldn’t really be visible and would sure make it easier to put on and take off.
Carmie
Hi, how can I get this pattern? Is the link broken?
Glenda Cox
Great pattern which I plan on making soon. I would also like to know if the seam allowance is included in the templates and what it is meant to be.
CArol Fuoss
I’d love to try this only adding a zipper.
Another Kristen
I’m just finding this and I would have love to join the SAL, but I missed it…by months. Is it possible you will be doing another one of the fall/winter? I would love to make several of these for Christmas gifts.
Kay McDonald
Hi, I saw this last spring, it wasn’t a good time for me to sew along, but I’m ready now. What kind of batting is recommended?
Colleen Gabriel
I cant get the pattern. I put in my info 2 times and still no emailed pattern. Is it because the sew along has already happened? I would love to make one of these.
Ruth A Boden
Is the free pattern still available? Love the style.
Shelley Gaalaas
I am trying to download the pattern but am unable to do so. I missed the tutorial and wonder if it was only available during the course. If so, will there be a repeat course to sign up for?
Thanks.