
Trick-or-treat in style with Beggar’s Night tote bags
Hello Makers – it’s Sara from Rose Hill Quilts, and I’m feeling prepared for Halloween. It’s never too early to get ready for trick or treating! In this blog, I’m going to show you some fun tote bags which have lots of space for candy.

How to cut up your panels to find more creative possibilities!
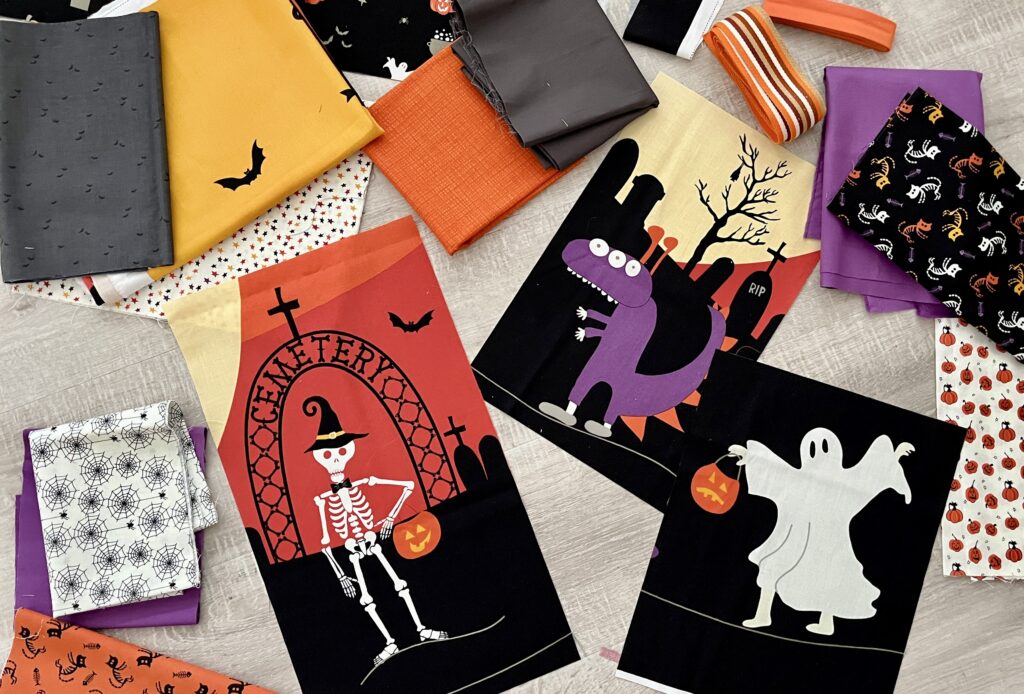
In order to make these bags, I used the Trick-or-Treat panel from this collection as a starting point. I love cutting up panels because they create so many options that you wouldn’t consider if you were using it as a whole piece for a quilt or a cushion.
I spend a lot of time staring at panels before I cut them up, so that I have considered all the options before I get my rotary cutter out! You can also do this online with a basic design software, and crop the picture in different ways to see how it looks. For the more intuitive quilters, you can also just fold the fabric in different ways to see what pieces you may want to cut up.
Coordinating your panel pieces with other prints
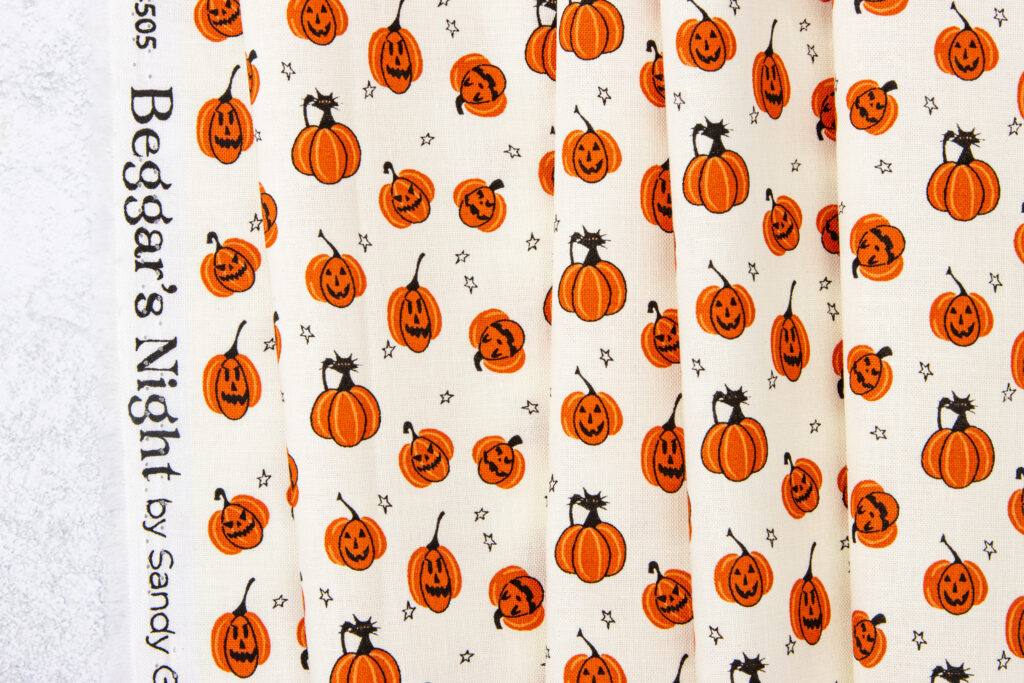
Alongside the main panel, I used some prints from the Beggar’s Night collection, which made the bags extra spooky with additional spiders, ghosts and cat skeletons.
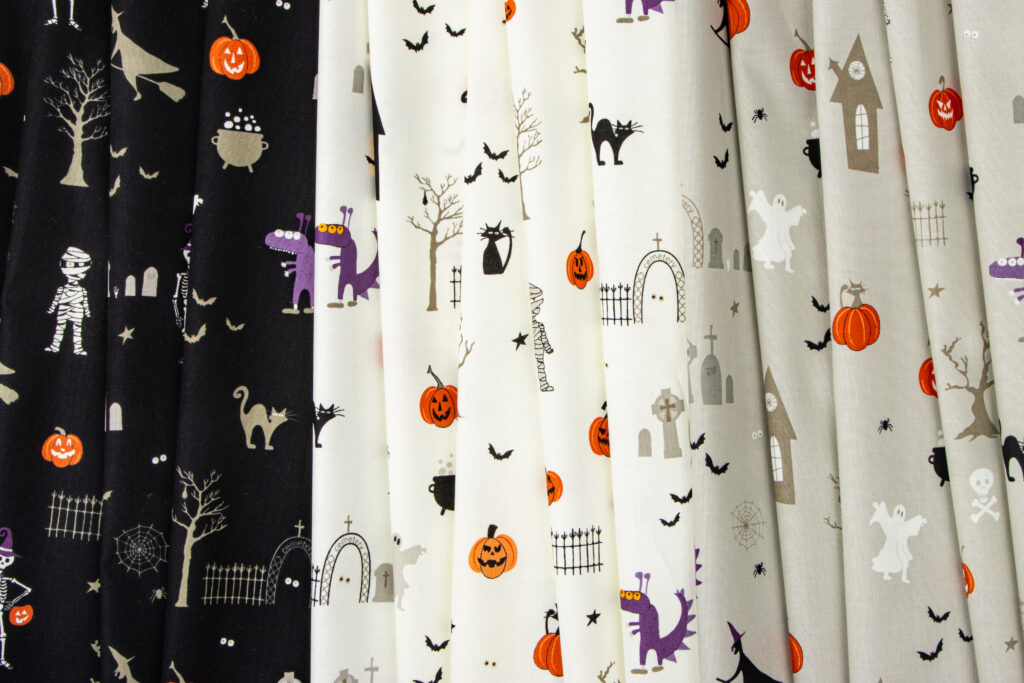
I also used some Riley Blake Basics which matched nicely. Did you know there are lots of Riley Blake Halloween seasonal basics available? I picked some Black Bats, alongside Confetti Cottons in Purple and Pumpkin Texture basics.
Constructing the tote bags
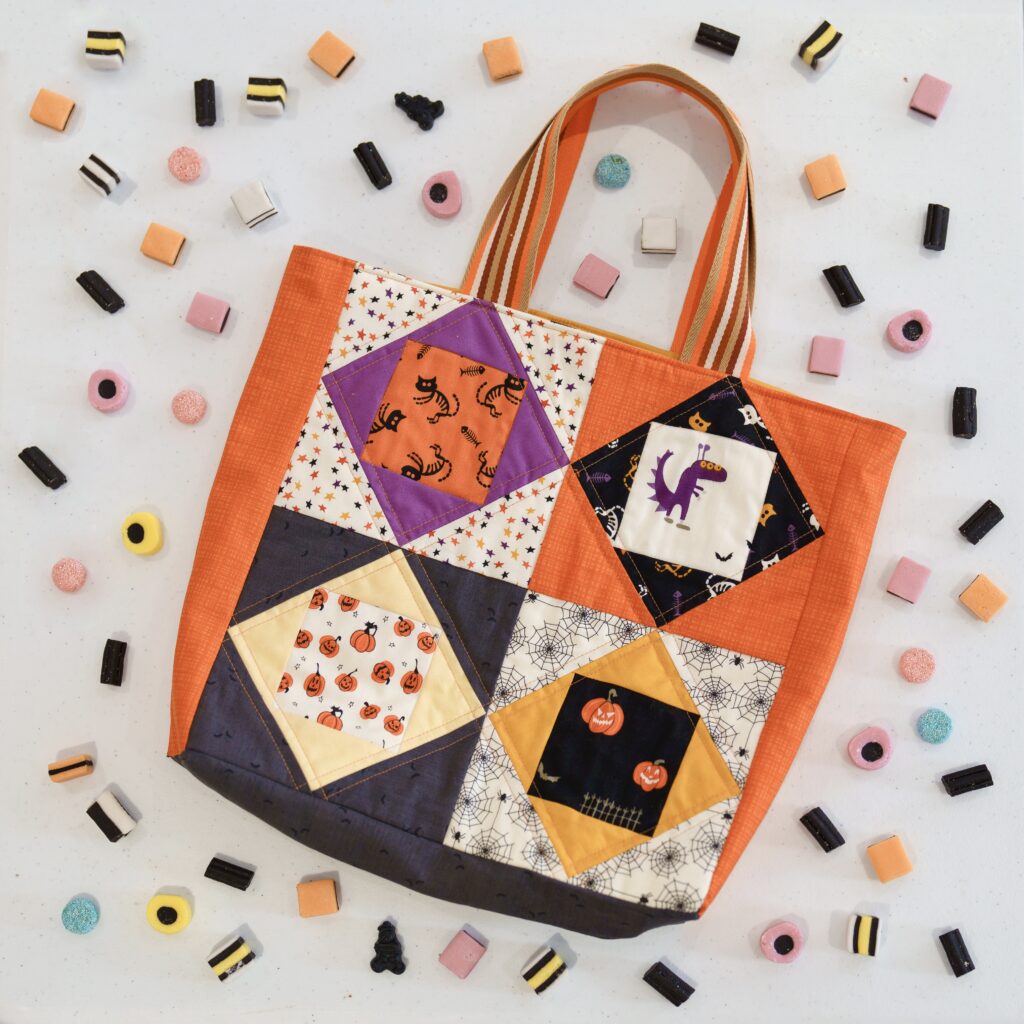
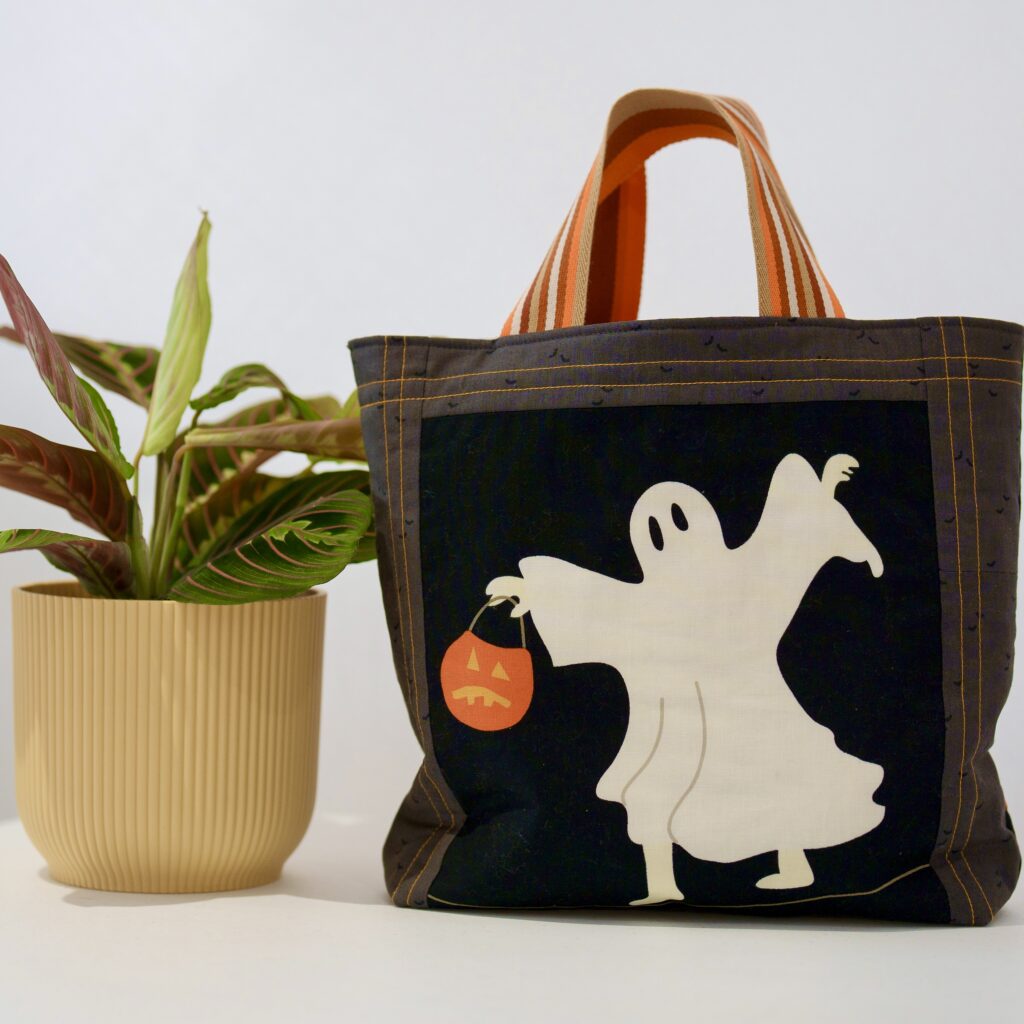
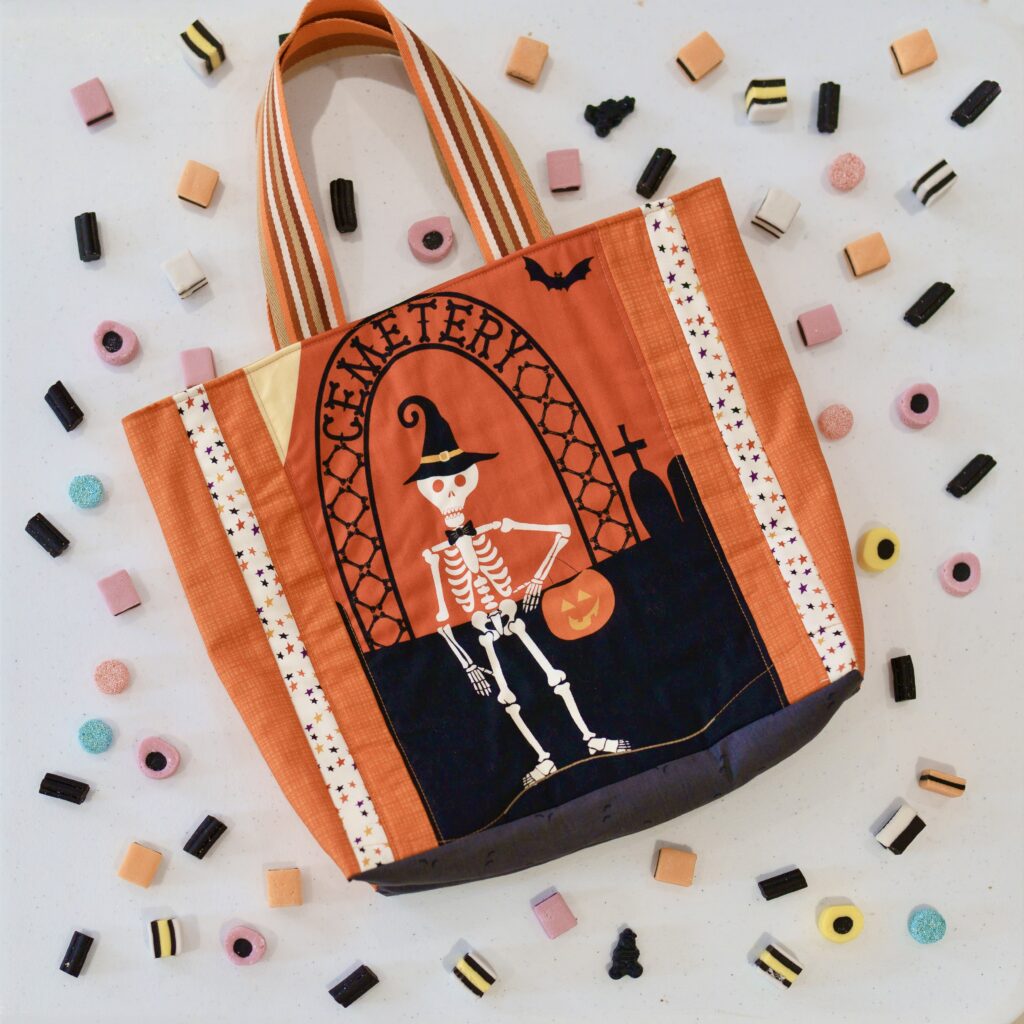
I made a tote bag with boxed corners, to make sure there was lots of space for candy! The bags have a basic boxed corner construction, and striped webbing for the handles. I applied Vilene G700 by Vlieseline to both the outside panels, and the lining. This helped give the bag some structure, but also kept it soft.
There are so many free tutorials available for different tote bags available. If you have never made a tote bag before, check out the Riley Blake Youtube tutorial to make an easy trick-or-treat bag.
I made four different designs for the sides of the bags, in order to make the most of the Trick-or-Treat panel and different prints from this collection:
- A purple applique big monster tail to go with the purple monster from the panel
- Four economy blocks with fussy cuts and some of the coordinating basics
- A ghost from the panel framed by bats from the Seasonal Basic collection
- The skeleton from the panel framed by the cream stars from the Beggar’s Night collection

You can also keep it simple, and choose a couple of the prints from the Beggar’s Night collection instead. There are some creepy cat skeletons, spiderwebs, and even glow-in-the-dark eyeballs! You will need half a yard for the lining, and half a yard for the outside panels.
Using up all the panel off cuts
I really enjoy the challenge of minimising how many offcuts I have left from the panels I cut up. In this case, I used the leftover sections of the panel for one of the bag’s lining, so if you peek inside there is a witchy surprise!
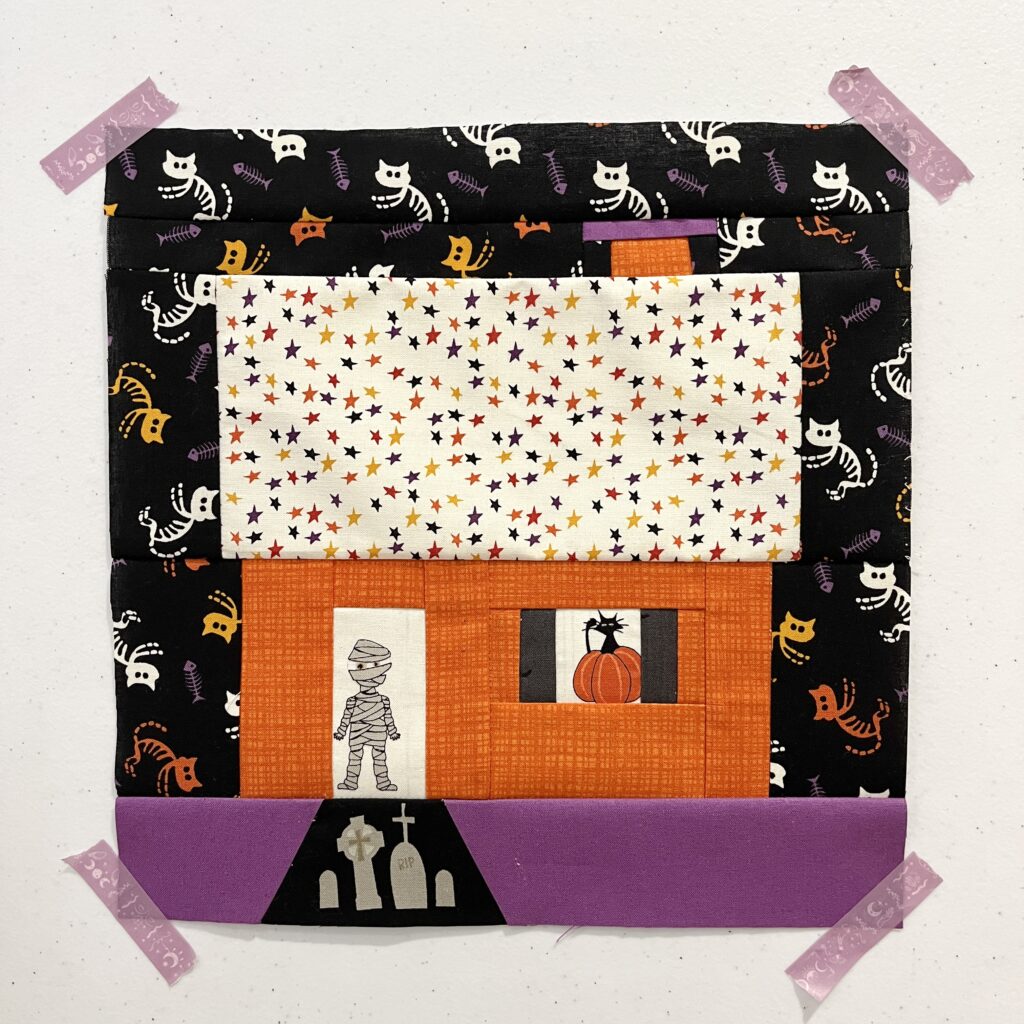
A little extra bonus project
The collection has lots of fun fussy cuts, and I couldn’t resist using a few of them to make a spooky house! The pattern is by Kate Basti, it’s called Home for the Holidays and it has lots of fun ways you can customise your houses.
I’d love to see what you make with this collection – tag me on instagram @rosehillquilts to share your makes.


4 Comments
Kat
These are absolutely adorable. I need that panal ASAP.
Sara Fernandez
I can’t wait to see what you make! 🙂
Pingback:
Pingback: