Your First Quilt Coat with Dancing Daisies
It’s Sara from Rose Hill Quilts bringing you some top tips to make your first quilt coat! When I received the Dancing Daisies fabric by Casey Cometti, I knew I had to make something I could wear – I just love the boho vibes and soft tones of this collection.
This was my first ever quilt coat jacket, and I definitely think if you’re a confident quilter you can make one of these too. Read on to find some top tips to make your first quilt coat.
Choose your pattern carefully
I used to do lots of garment making, but it’s been a long time since I did any and I feel a bit rusty! Because of this, I knew there were certain jacket features that I wanted to avoid. I chose the Hovea pattern by Megan Nielsen, which has dropped sleeve shoulders, no collar and no buttons. You can also find a Hovea sewalong on their website with lots of detailed information and step-by-step pictures, which can be helpful if you get stuck.
Read the instructions fully before you start
I know this sounds obvious but I definitely need the reminder to do this! I got excited about the jacket construction and missed some details that would have helped me make it fully reversible with neater inside seams.
When you do the first read, make a note of any steps which seem unclear in the pattern. You will likely figure it out as you construct the jacket, but you can also check the Hovea sewalong or search for other makers on YouTube to get a better idea of how each step works.
Make a plan for your panels
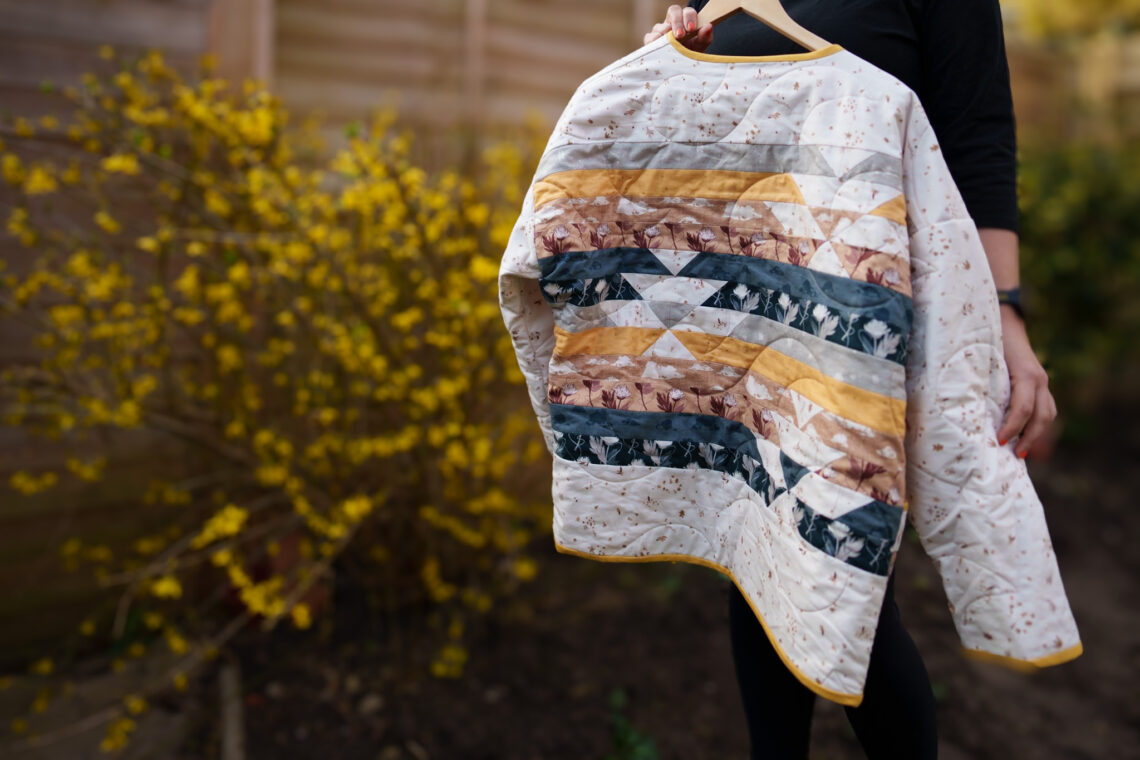
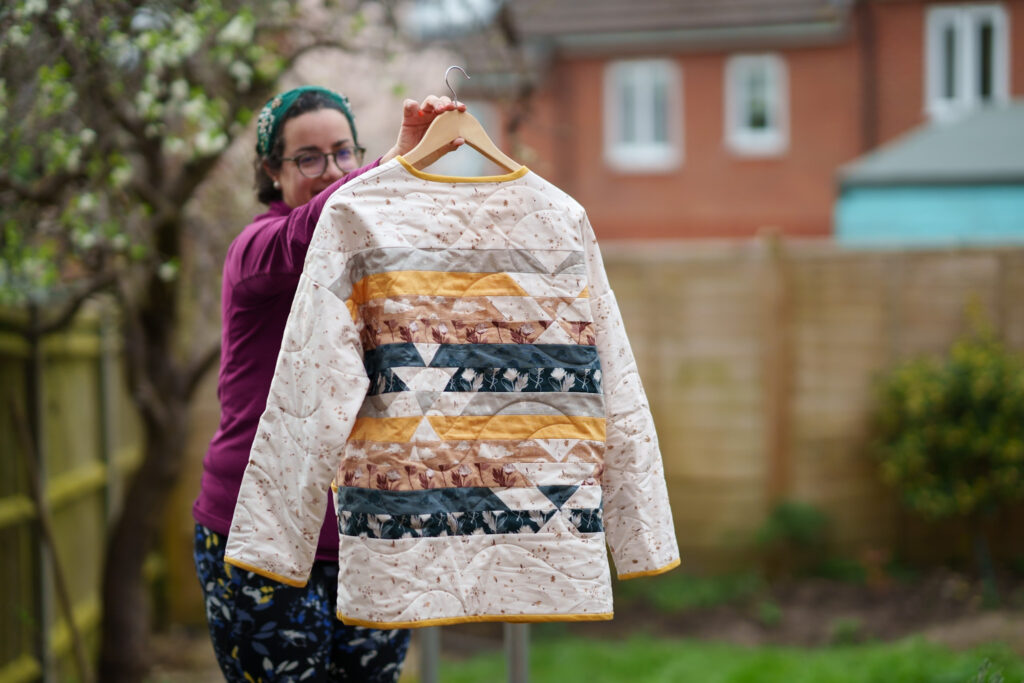
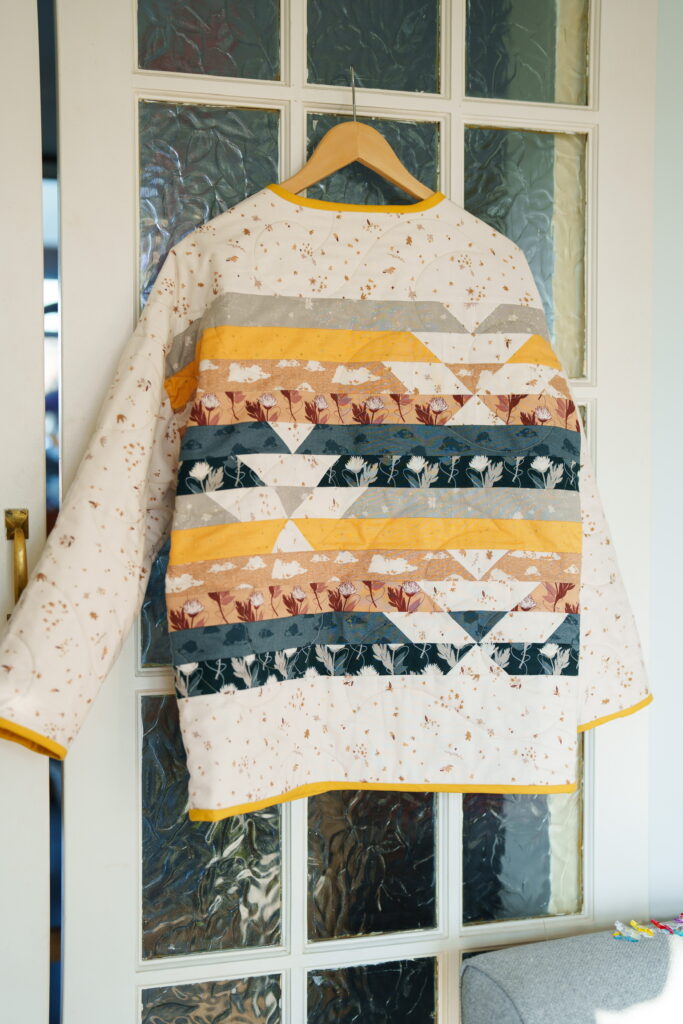
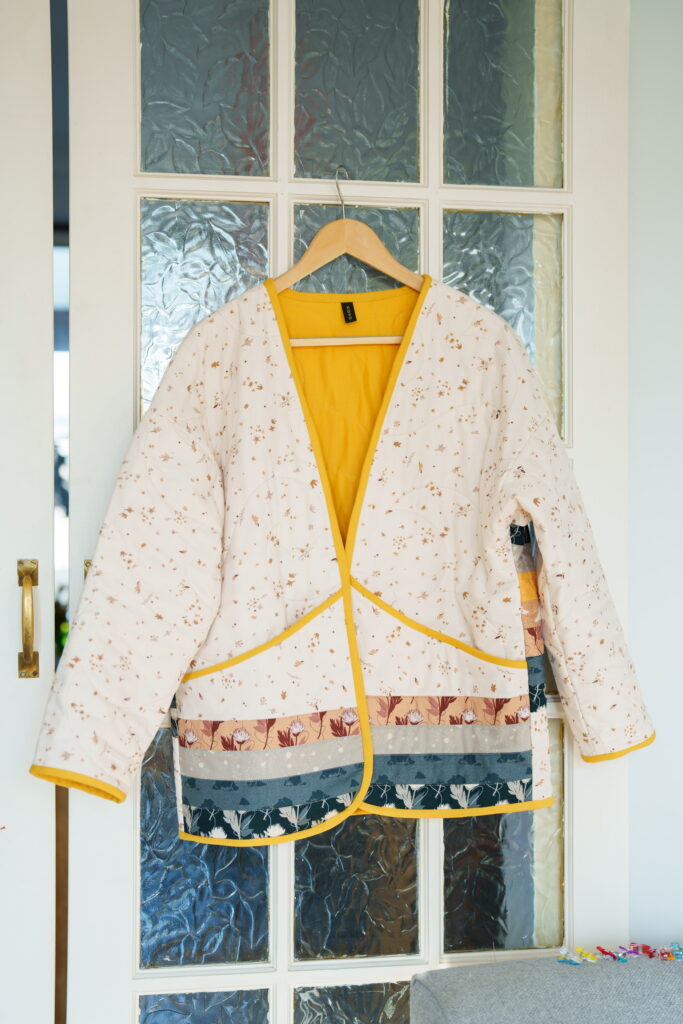
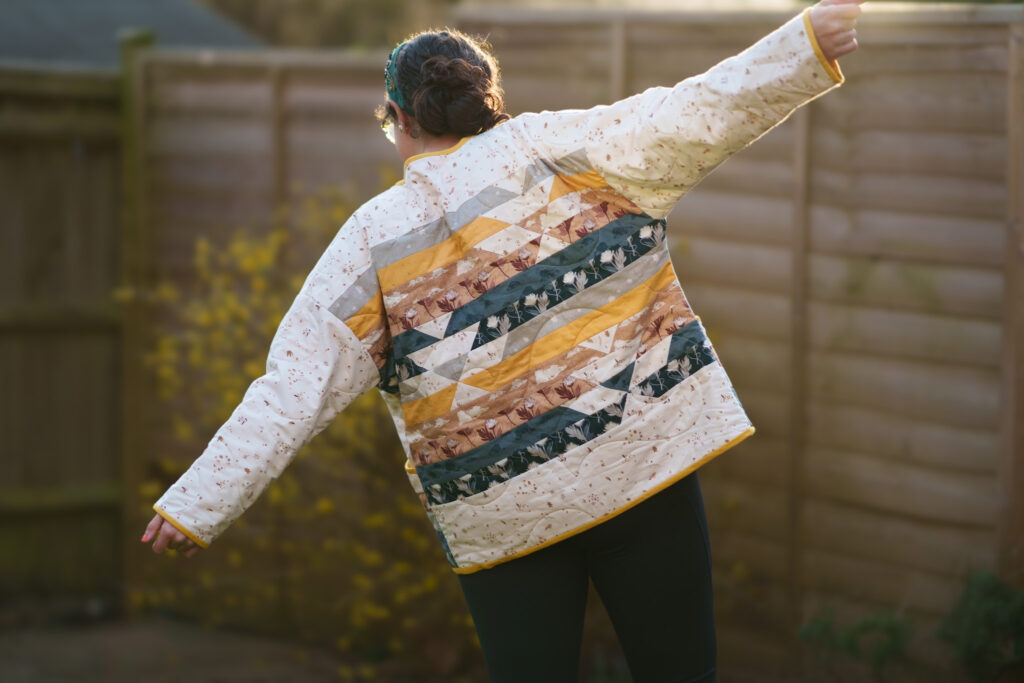
Typically, a jacket has five pattern pieces: a back panel, two front pieces and two sleeves. The Hovea pattern also has optional coat pockets, so that’s an additional two pieces. I absolutely love pockets so I made sure to include them in my plans.
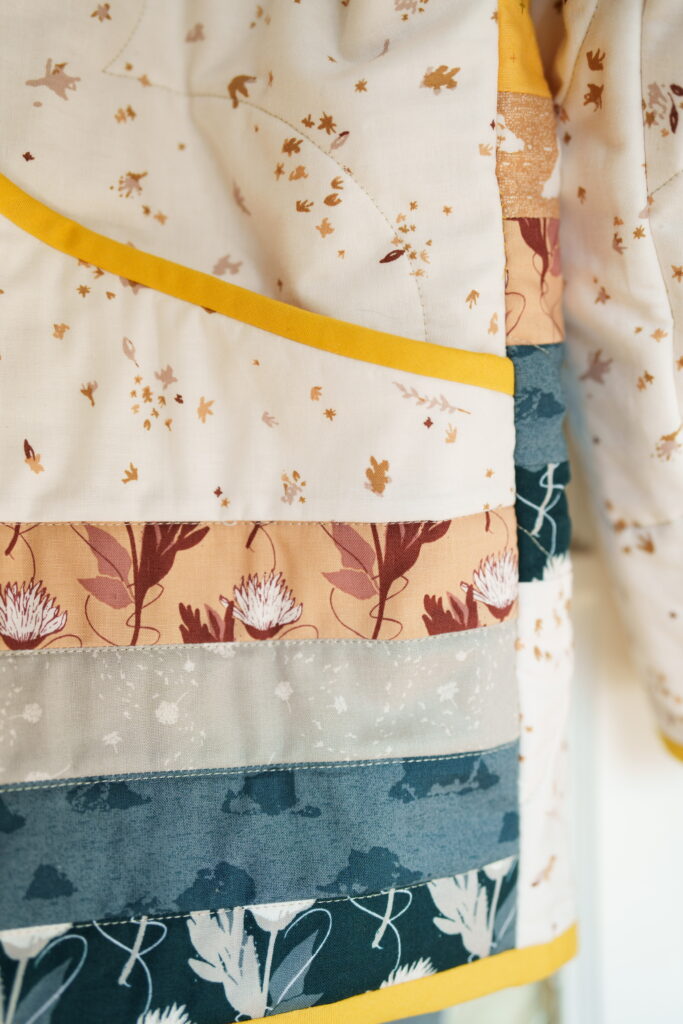
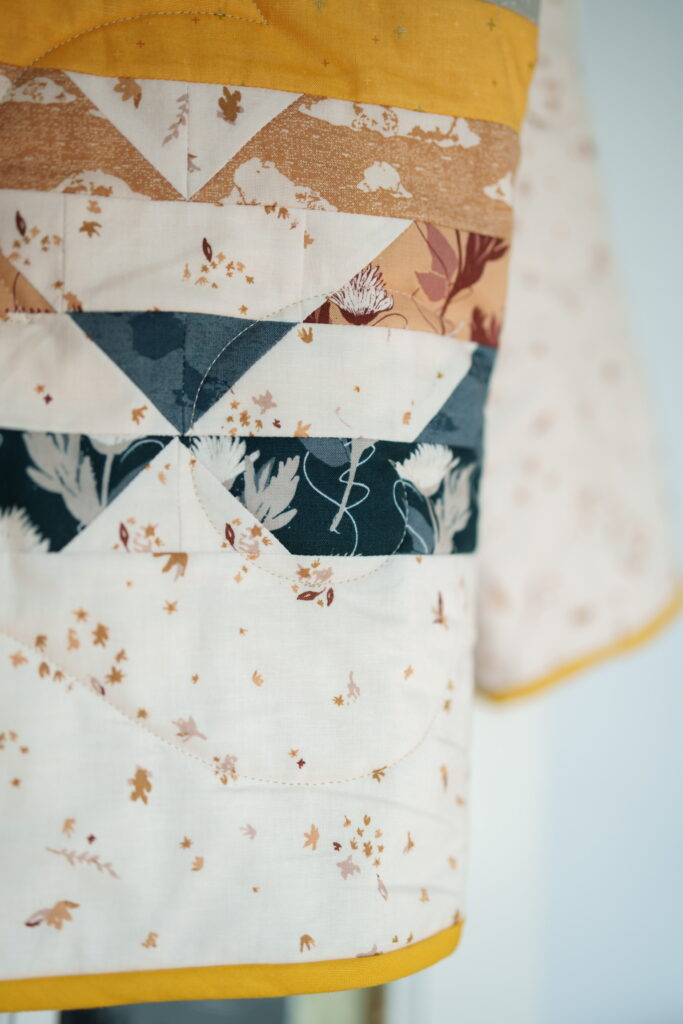
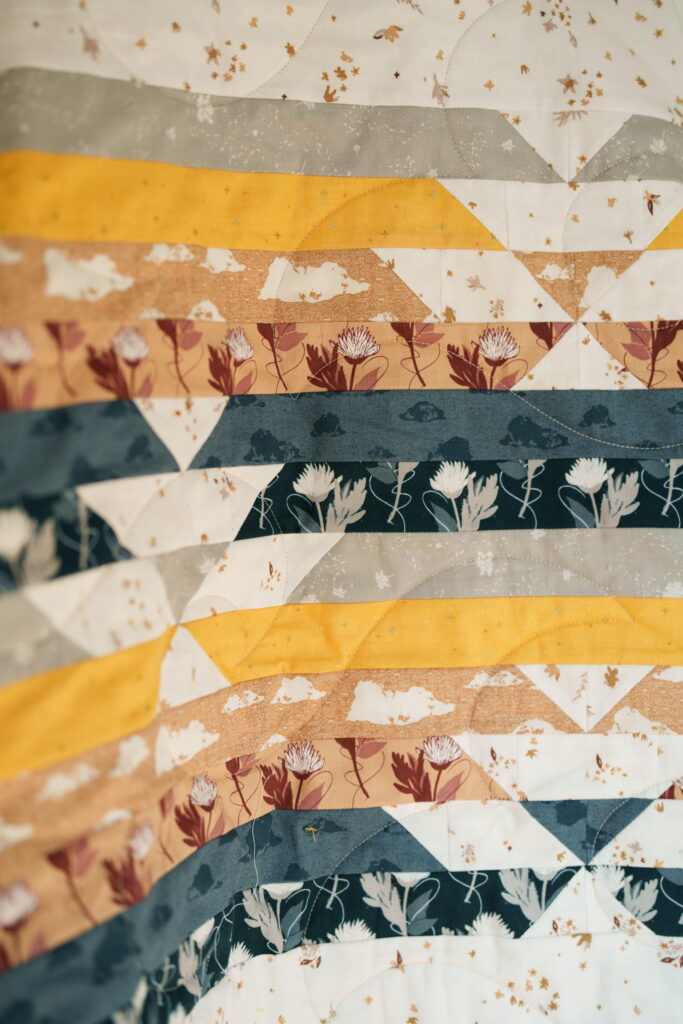
With a quilted jacket you have two options: you can either use yardage for all your panels, or you can piece some (or all!) of them. In this case I decided to piece the back panel and the pockets, and just use yardage to feature the collection prints on the rest.
Beware of adding bulk with seams
In a quilt coat, seams quickly add up, which brings bulk and weight to your jacket. You can piece anything you want in as many of the panels as you’d like, but remember that it will add bulk to your project.
I picked the Westhawk pattern by The Blanket Statement because it coordinated well with the prints of this collection and added to the boho prairie vibes. It also does not have lots of pieces and seams, which I wanted to avoid.
If you use a quilt pattern, will need to make sure the size is big enough for the coat panel(s). Start by cutting the coat pattern pieces, then measure them and adjust the quilt pattern dimensions as necessary.
You can also do simple piecing e.g. using charm squares or half square triangles. In this case, you need to also make sure the final pieced panel is a little bigger. This is important as the panel will shrink a bit when you quilt it.
For the lining, I used yardage of a coordinating Confetti Cotton in Golden, and avoided piecing the lining panels.

Make a simple plan for quilting
The reason quilt coats are easier than regular coats is that you don’t have to worry about lining. However, you still need to quilt the panels and sandwich them as you would do with a regular quilt! When you are planning the quilting lines, you have different options. For example, you can do some simple vertical lines along the grain of the fabric, or a diagonal crosshatch. In this case, I got the panels all quilted on my longarm. I didn’t want it to be too stiff, so I kept the design quite open. If you want to quilt the panels more densely, bear in mind that this will make your coat stiffer.
Just do it!
I spent a few months thinking about doing a quilt coat instead of actually doing it. There are so many useful resources online, that there is no reason to be intimidated by this project. I’d love to know if you decide to make a quilt coat, tag me on instagram to share your creations @rosehillquilts
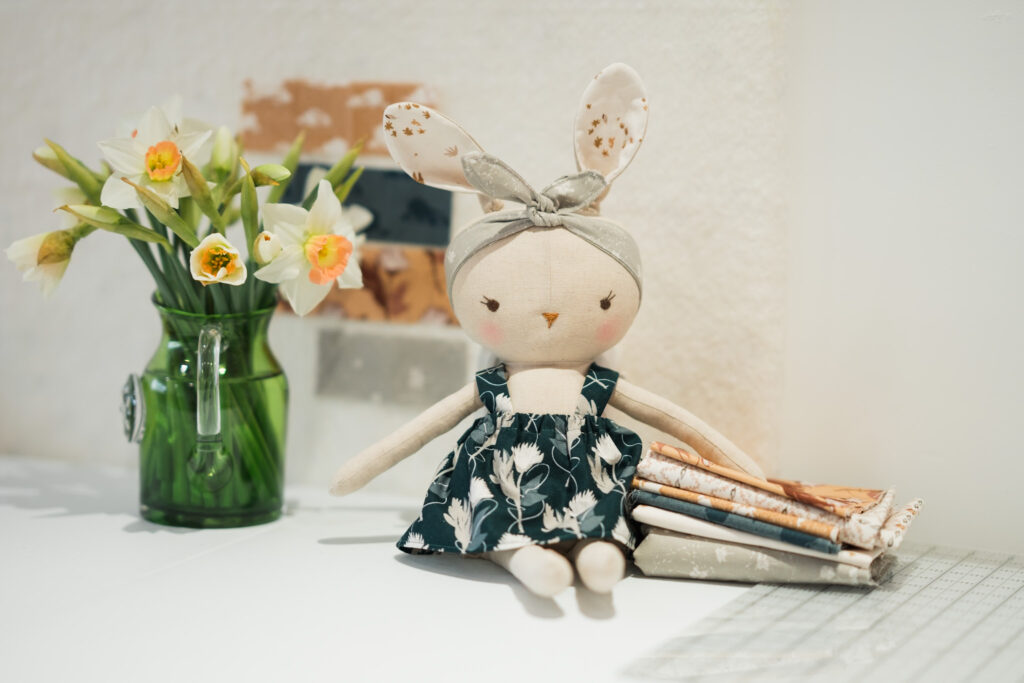
Dancing Daisies bunny bonus project
I’ve been wearing my new quilt coat everywhere, including to a bunny-making workshop to learn how to make the patterns of Studio Seren. Of course, my bunny had to have a matching outfit and I used the leftover fabric from my coat to make its ears, dress and bandana.


You May Also Like
Punch Up Your Sales with Punch Needle
Old School Quilts