Designing the Elton Quilt: A Love Letter to Jane Austen
Hi all, Mary Burroughs-Mayer from Ember Craft Company here, sharing my latest quilt pattern, the Elton Quilt! You can find it in my Etsy shop HERE!
I designed this pattern exclusively for the Emma fabric collection, the most recent licensed fabric line from Riley Blake Designs featuring the works of Jane Austen.
Now, I have been reading and enjoying Jane Austen since I was a teenager (a longer time than I’d like to admit!). My daughter’s name is Emma and I have loved the name since first reading the iconic novel of the same name. When I saw the latest license Jane Austen fabric collection was also named Emma, I couldn’t wait to get my hands on it! You can take a look at the full collection HERE.
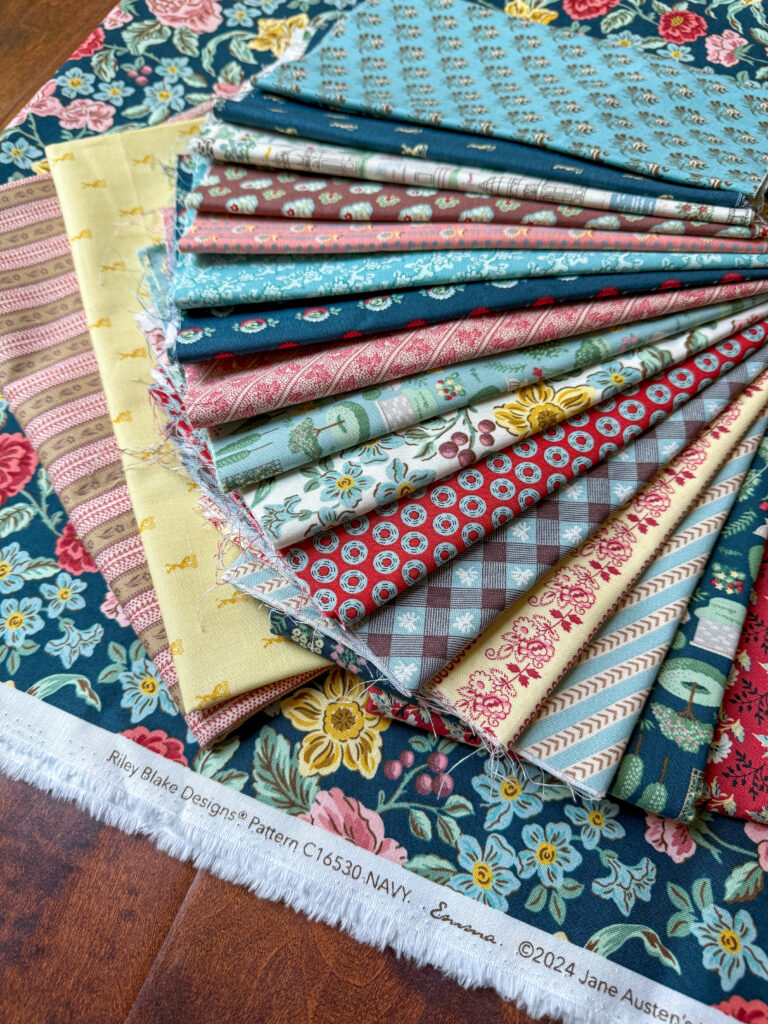
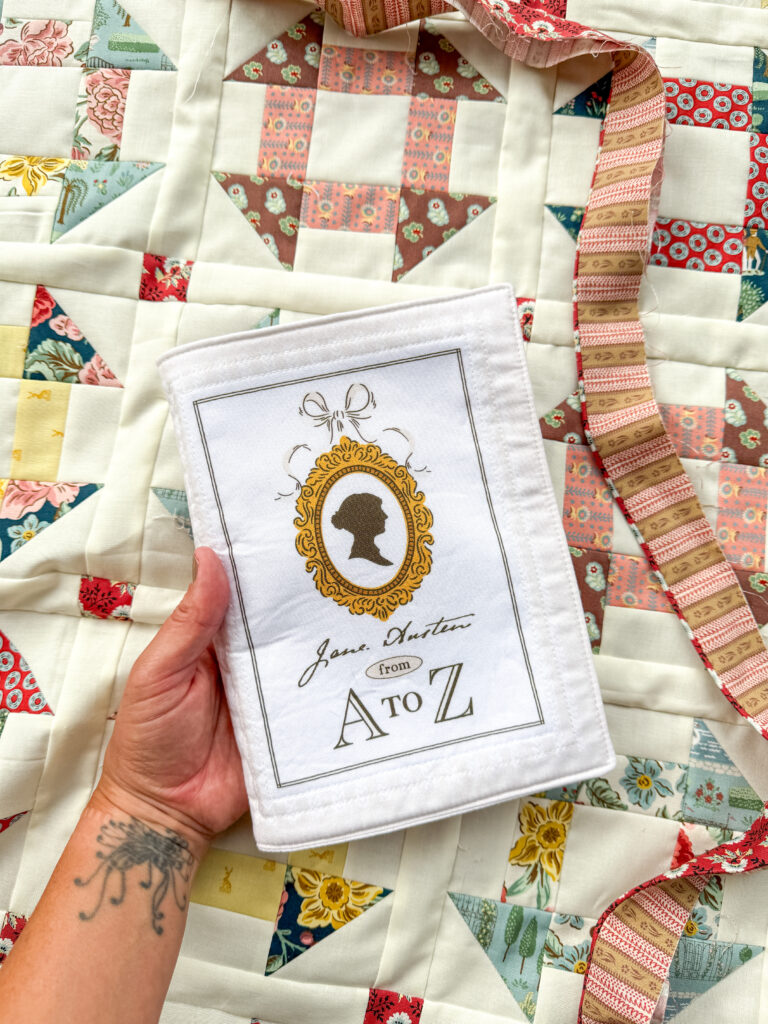
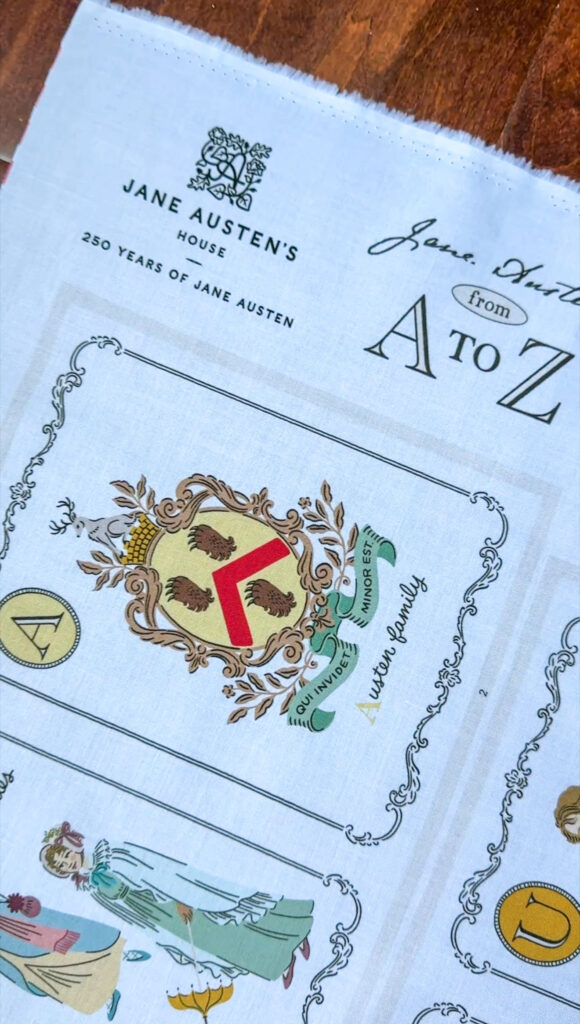
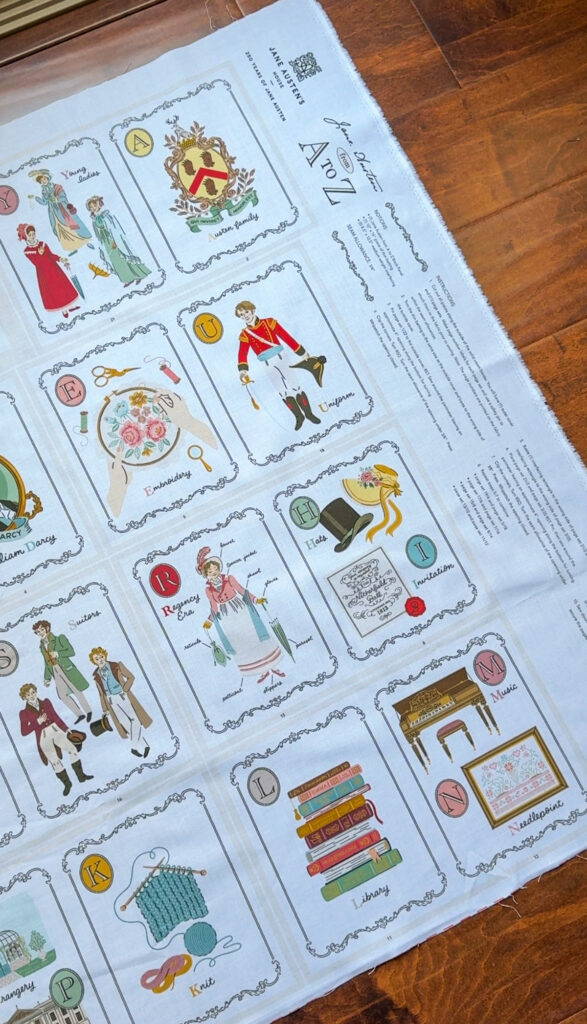
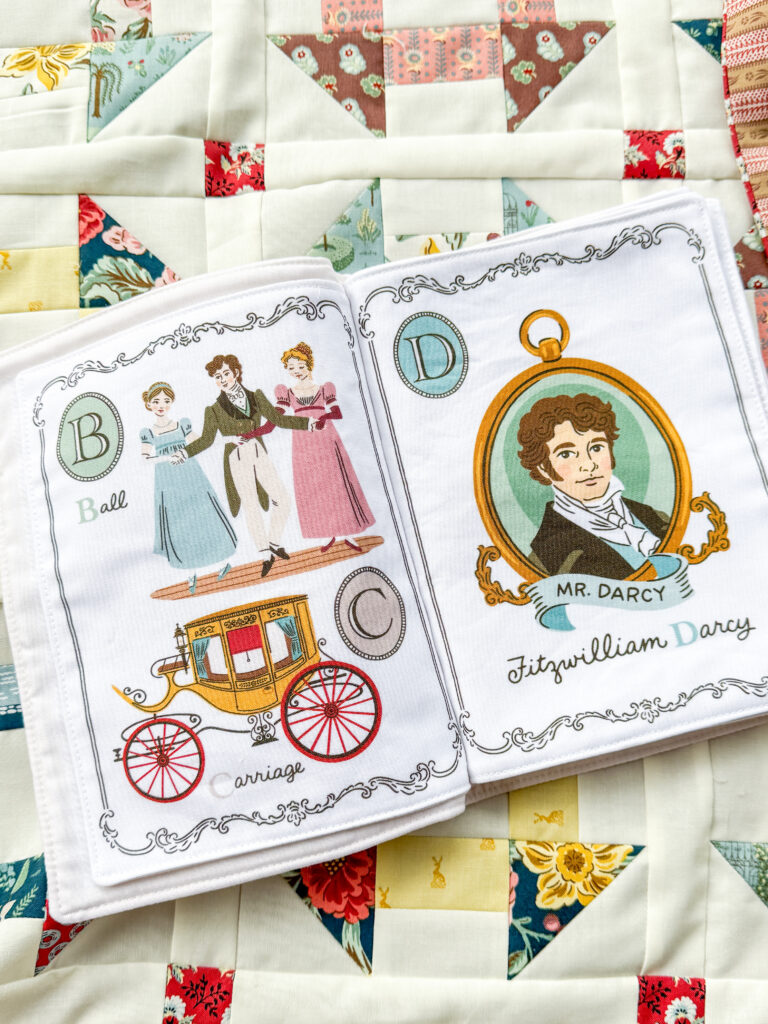
These fabrics are a fun mix of classic prints pulled from the priceless coverlet made by Jane and her mother and sister that is housed at the Jane Austen’s House Museum in Hampshire in the UK, as well as modern prints featuring vignettes and scenes imagined from the Emma novel. There is also an incredible soft book panel in the collection (find it HERE) that creates a Austen-themed alphabet book (O is for Orangery – didn’t you know?) – more on this later!
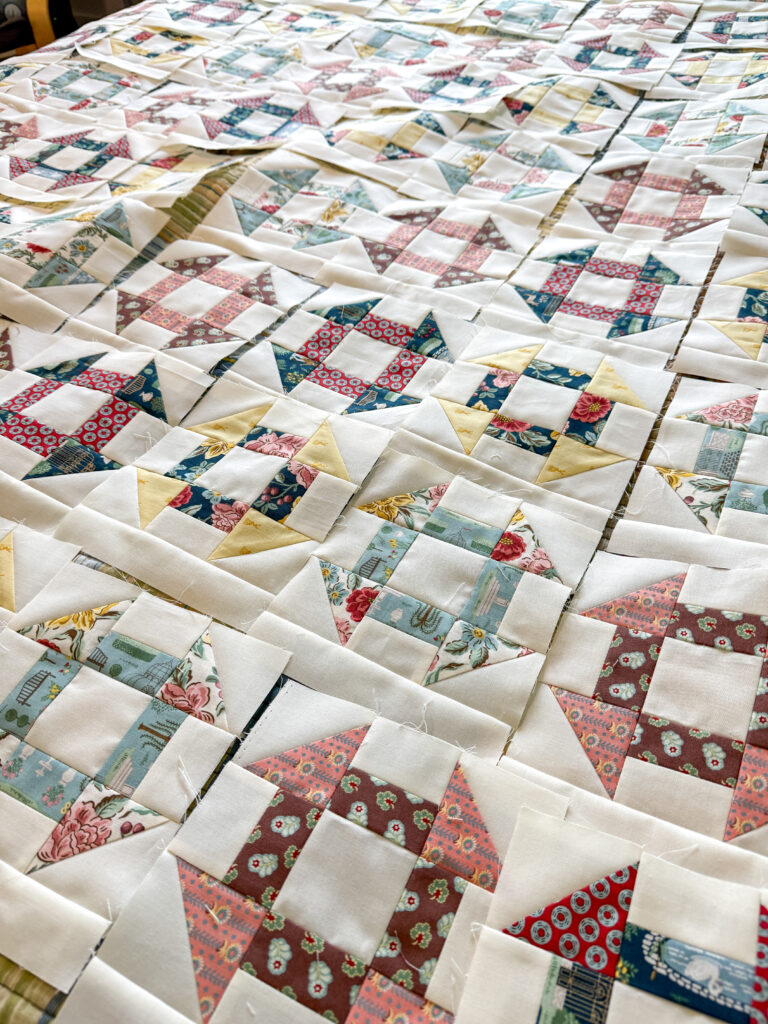
I set out to design a quilt pattern that would mix and mash these modern and traditional fabrics together in a way that is still cohesive.
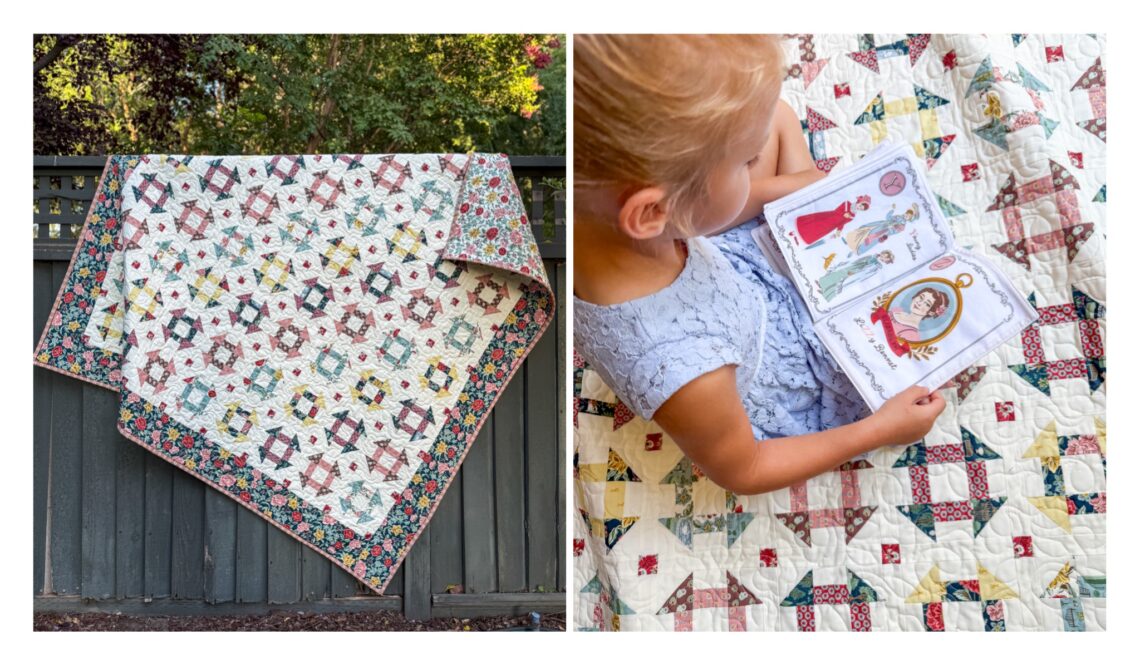
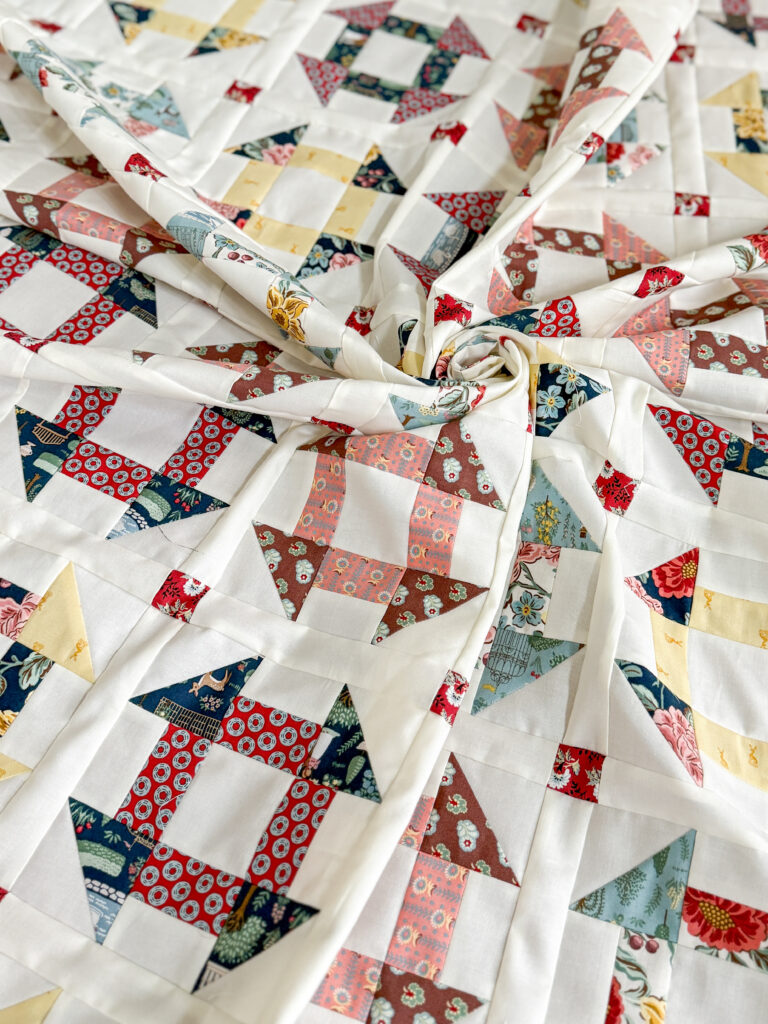
Enter the Elton Quilt
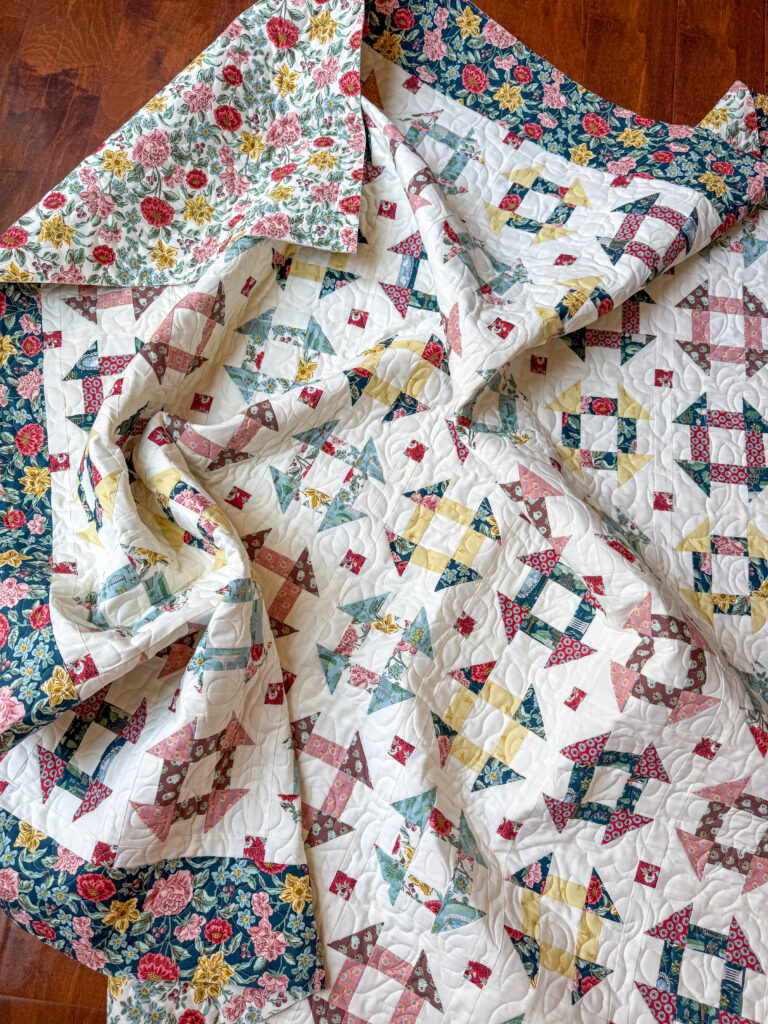
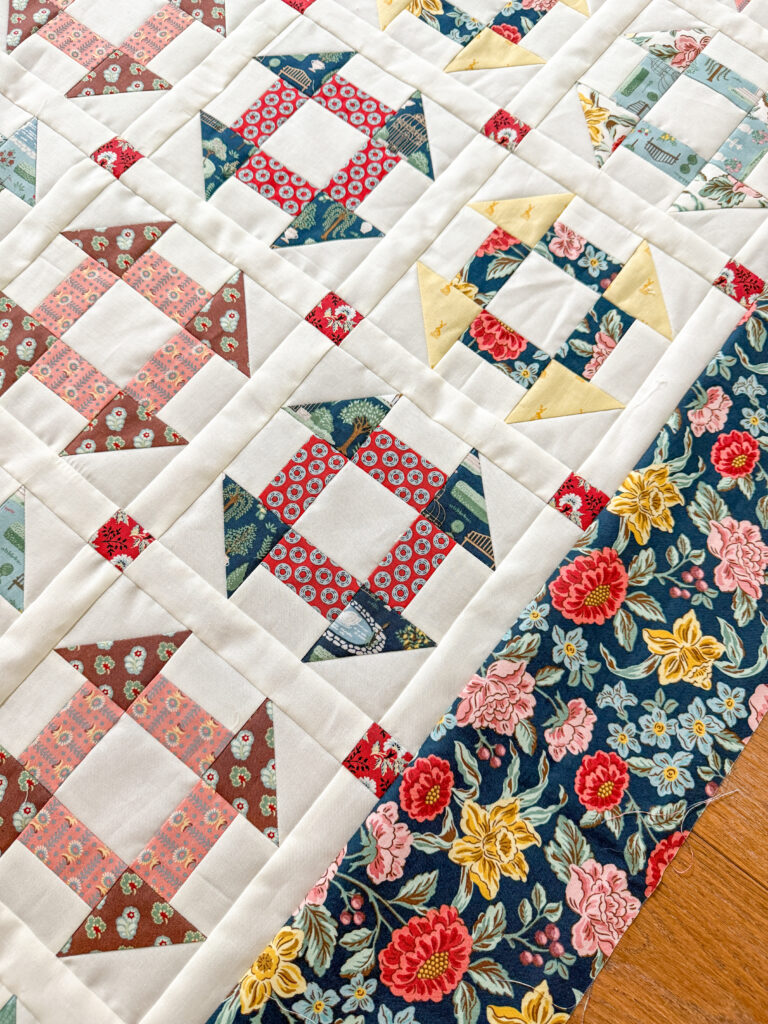
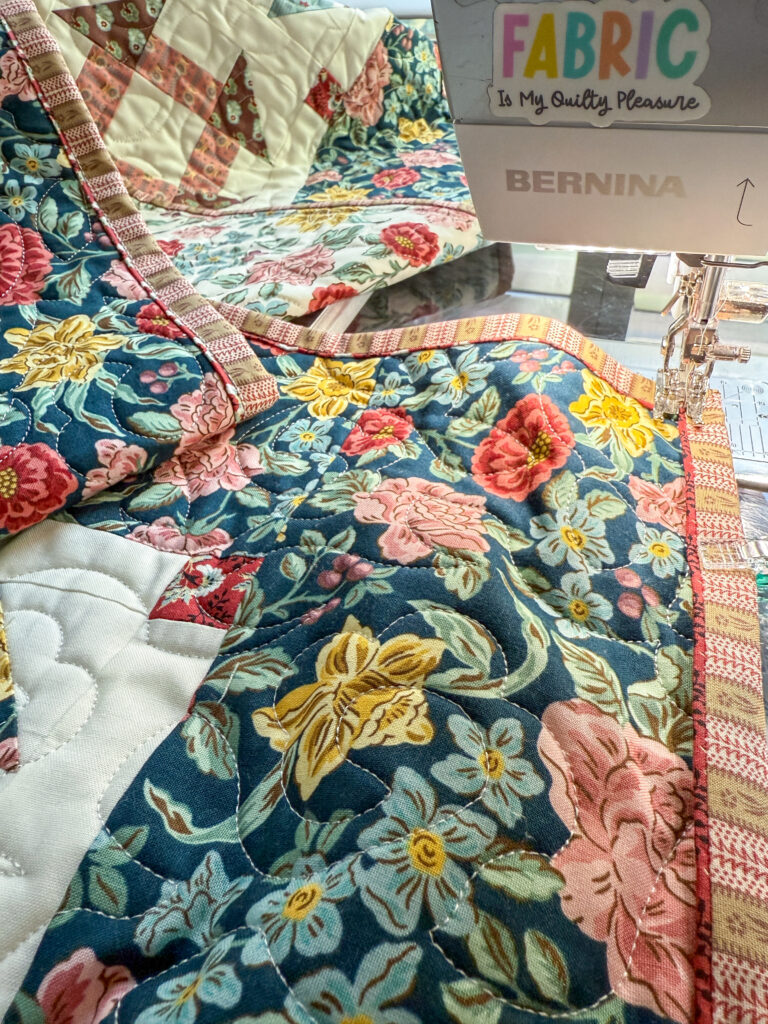
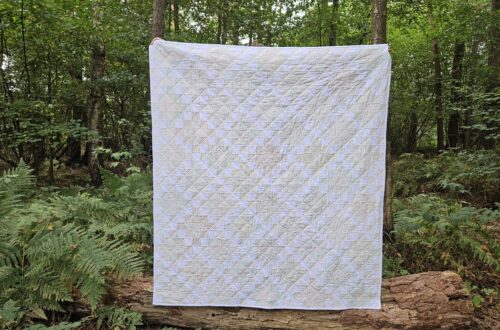
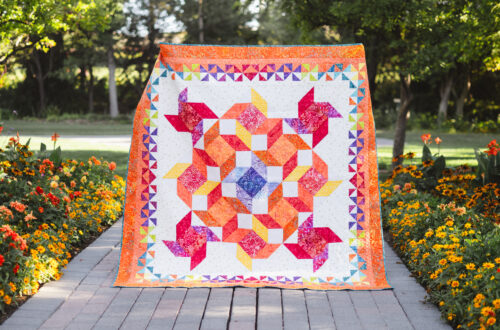
The Elton Quilt pattern is fat quarter and quarter yard-friendly, and has a wide outer border that is perfect for showcasing a favorite, bold print. I’ve mixed and matched print sets and alternated them to create a series of classic churn dash blocks. These are set off with sashing and cornerstones to bring out an instant vintage charm.

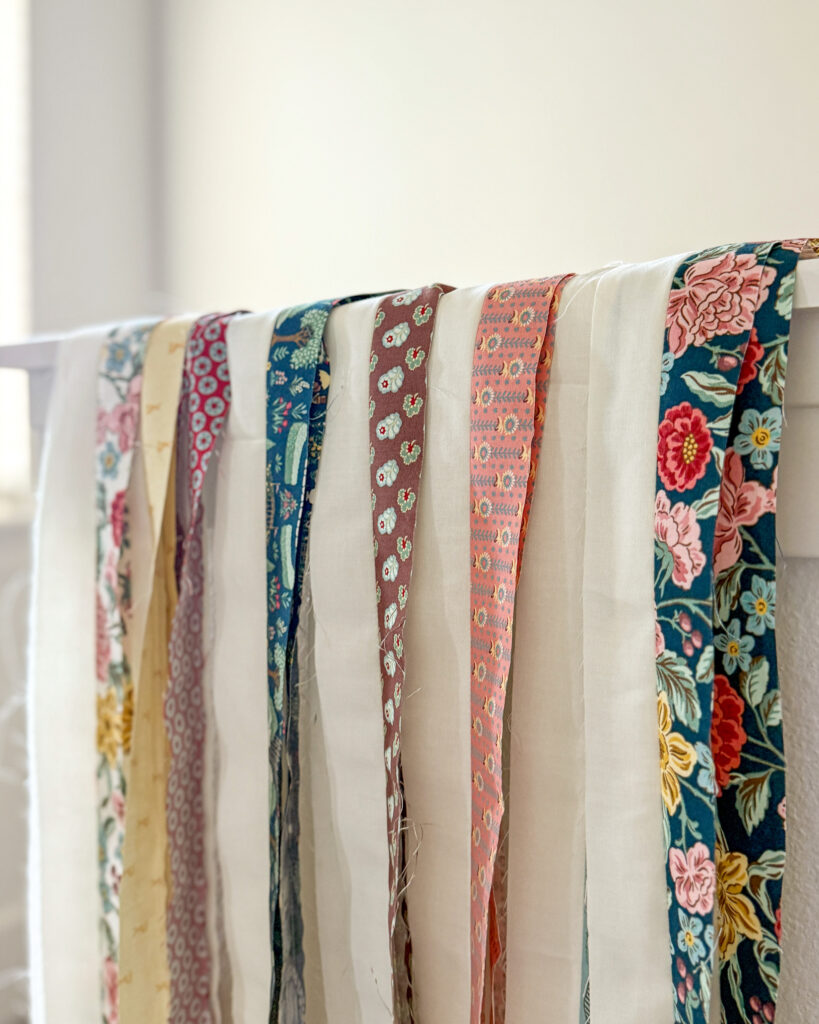
Strip Piecing
These blocks are made using strip-piecing to help speed up the process. Strip piecing is a great way to speed up the process, but it does take a few considerations:
- Lower your stitch length. I like 1.8 or so, some people go shorter. These strips will be sliced up with no opportunity to backstitch to secure the stitching. A smaller stitch will help keep the ends from unraveling as much and you from re-stitching.
- Decide how you are going to press – I know this can be controversial so take this as you will: I like to press open UNLESS I’ll be able to nest the units at a later step. I always nest seams when I can.
- Make sure to set the seam by pressing the stitching across then unit before pressing open or to the side.
- IF I am pressing to the side, I will sew the strip unit with a scant 1/4” seam. I know the “scant” word is scary, but it really just means about 1 thread width smaller seam. On my Bernina, it means clicking my needle over 1 click and sewing as usual.
- The slightly smaller seam allowance helps account for the thread and the layer of fabric folded over and was a game-changer for me to get accurate strips once I figured this out.
- IF I am pressing open, I use a regular 1/4” seam allowance and its generally fine.
- IF I am pressing to the side, I will sew the strip unit with a scant 1/4” seam. I know the “scant” word is scary, but it really just means about 1 thread width smaller seam. On my Bernina, it means clicking my needle over 1 click and sewing as usual.
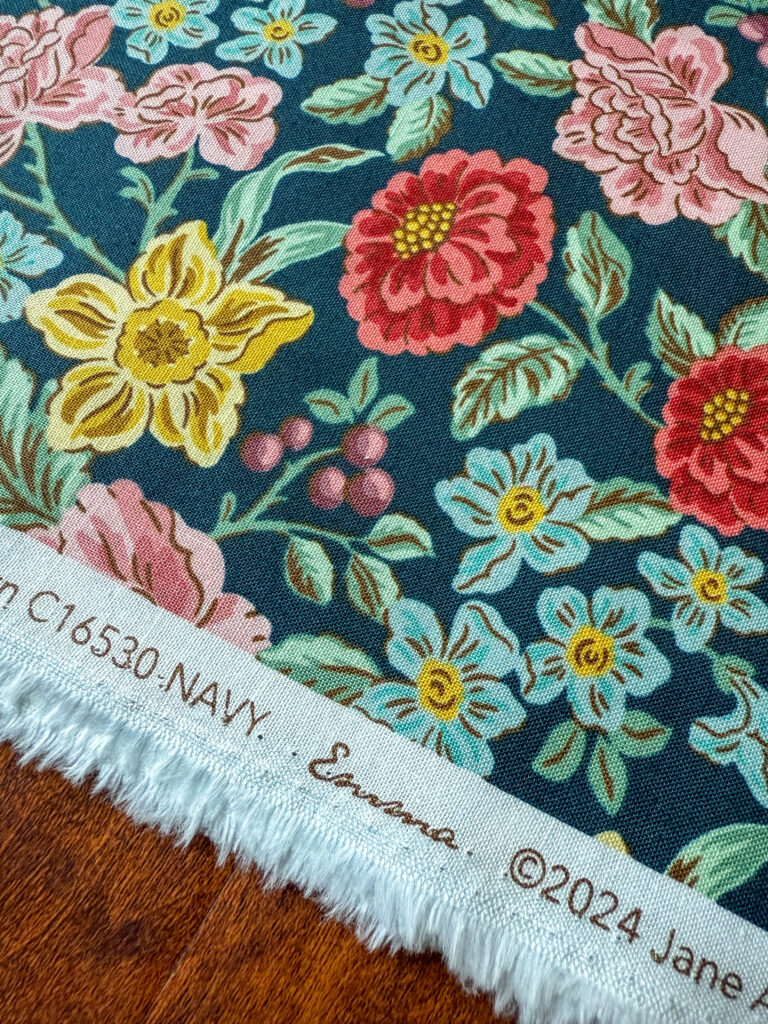
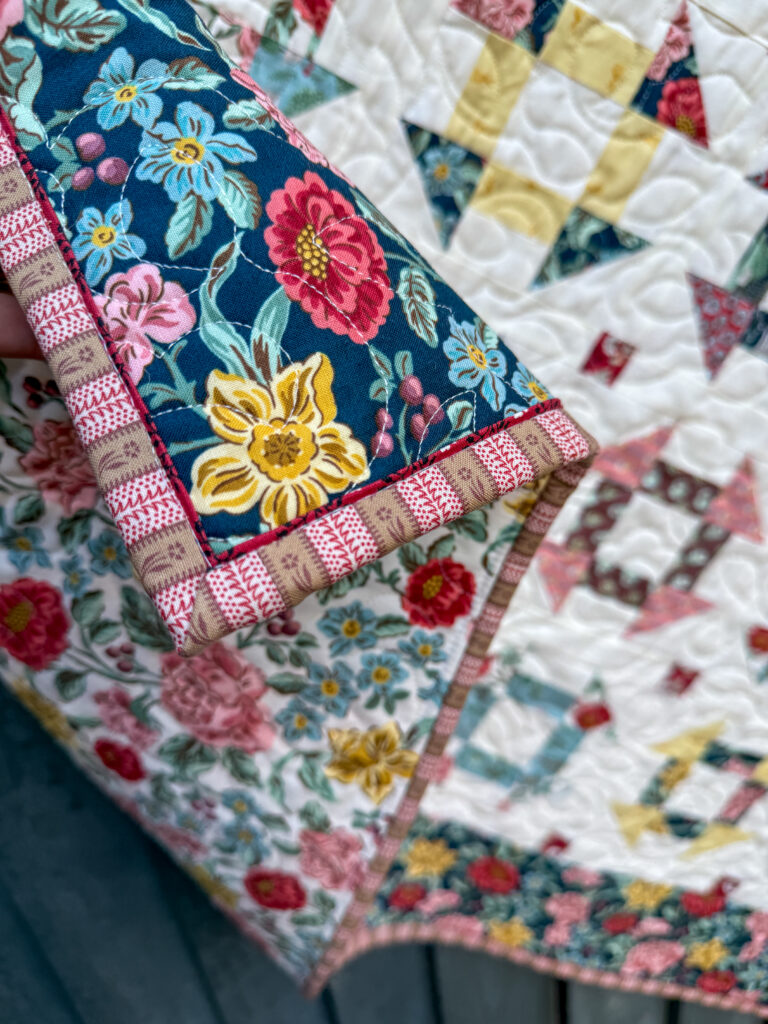
One of my favorite prints from this collection is the Hartfield Navy floral – you can find it HERE! I added the wide border to the perimeter of the quilt just to show it off. It provides such a gorgeous frame to the checkerboard of blocks.
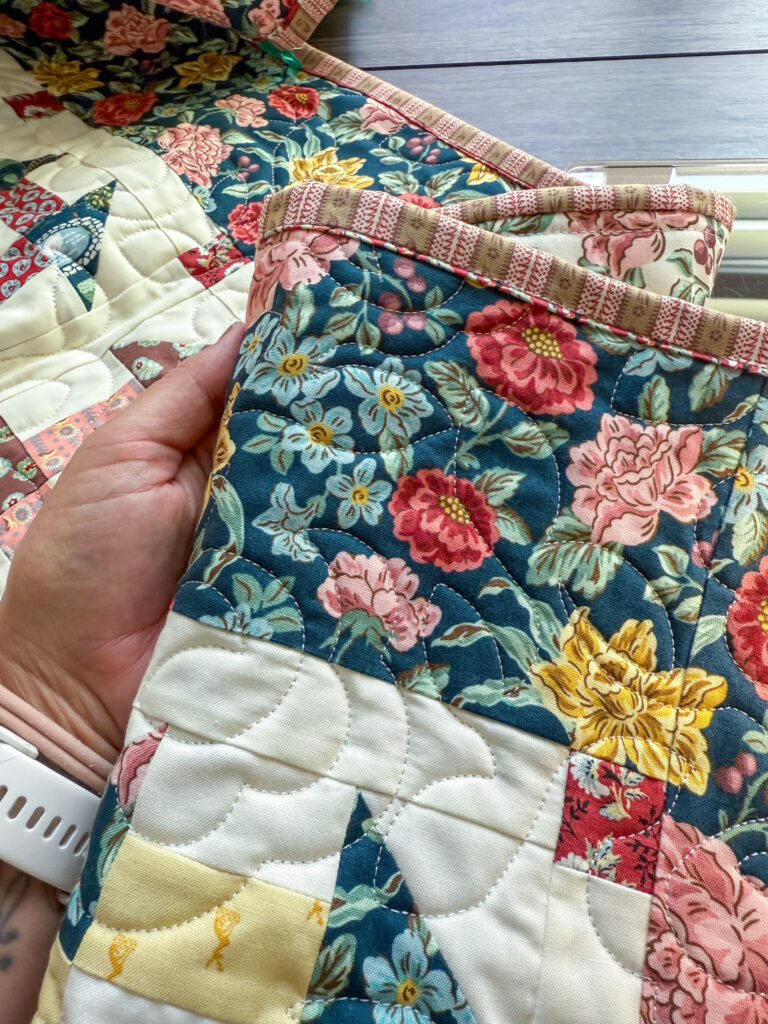
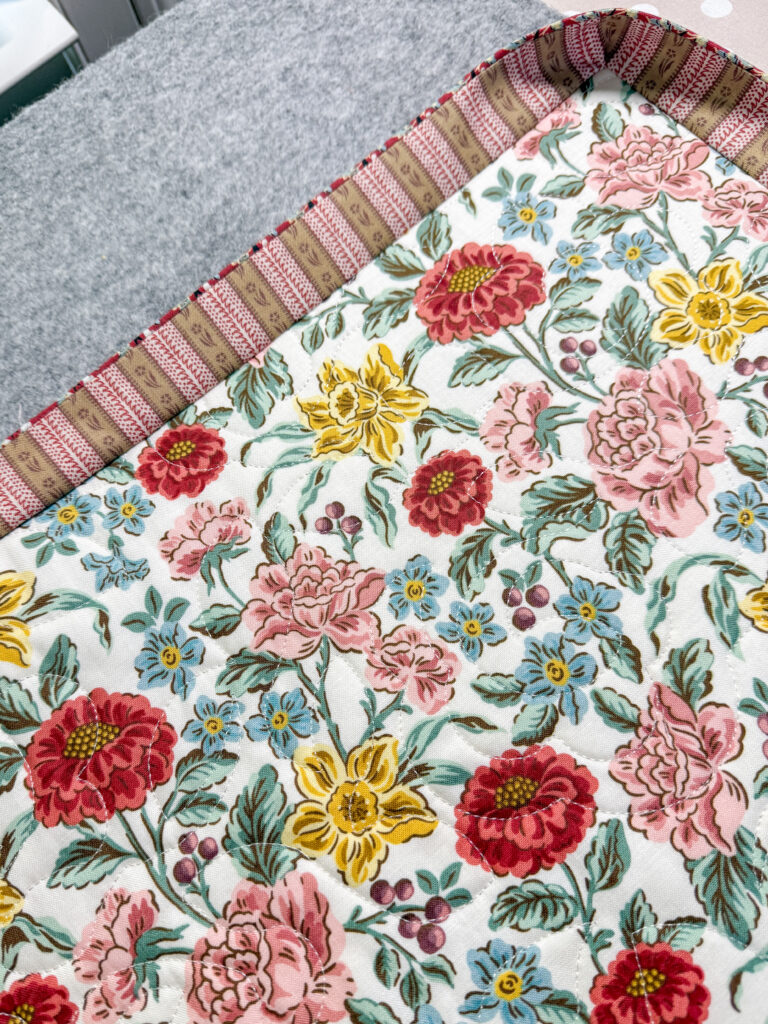
The Quilting
Donna Larson from Featherbed Quilting worked her magic for me once again (find her work HERE). She used a panto called “Field of Flowers” and it gives just an amazing all over texture.
Finishing Touch!
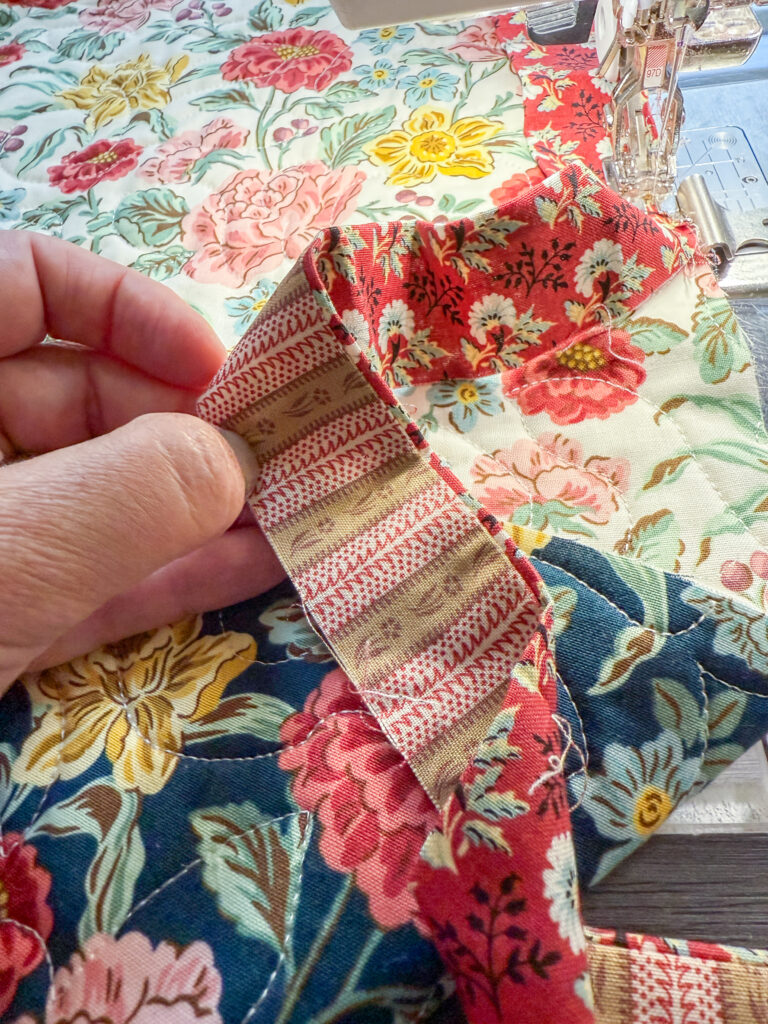
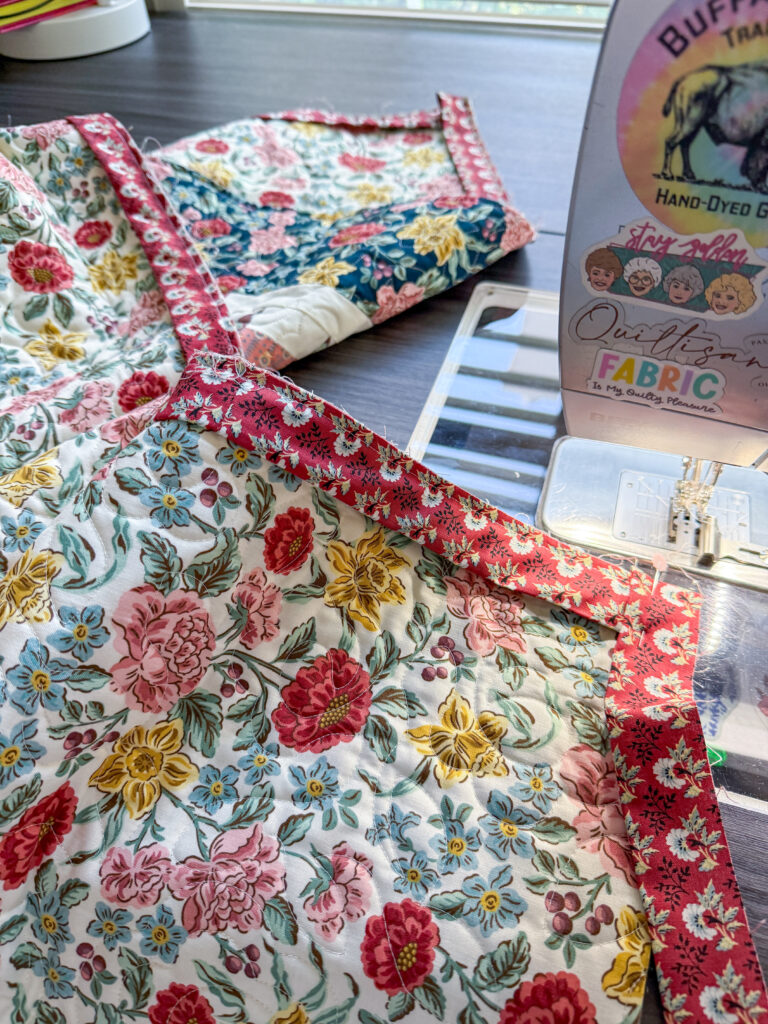
The finishing touch on my Elton Quilt is the flange binding. A flange binding involves piecing two more narrow strips together for the binding strips so that one peeks through about 1/8″ when folded over. It is stitched to the back of the quilt, and then folded over and machine-stitched down to the front of the quilt. While making the binding itself can be a little more time-consuming, stitching it down by machine to the front can be a huge time saver. The opportunity for an extra sweet detail is always fun too. I used the same print for the flange as the cornerstones in the quilt. I love how it pulls in that bright red and helps the stripe in the binding pop *just* a little bit more. Check out my reel HERE for all the details on how to make your own flange binding!
Now, as a note, this binding will extend a bit more than just the typical 1/4″ when it’s stitched down to the front of the quilt, so it’s not great for every project. I like to use a flange binding when there is a big border like in the Elton Quilt, or at least no pointy points that may be cut off along the edge.
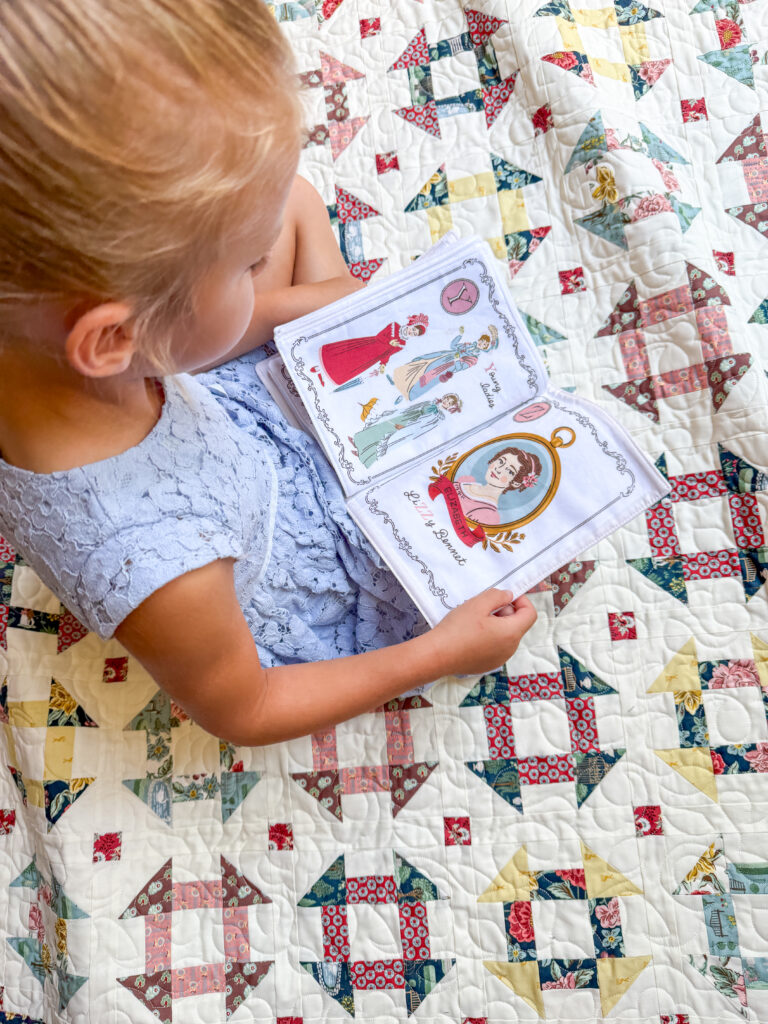
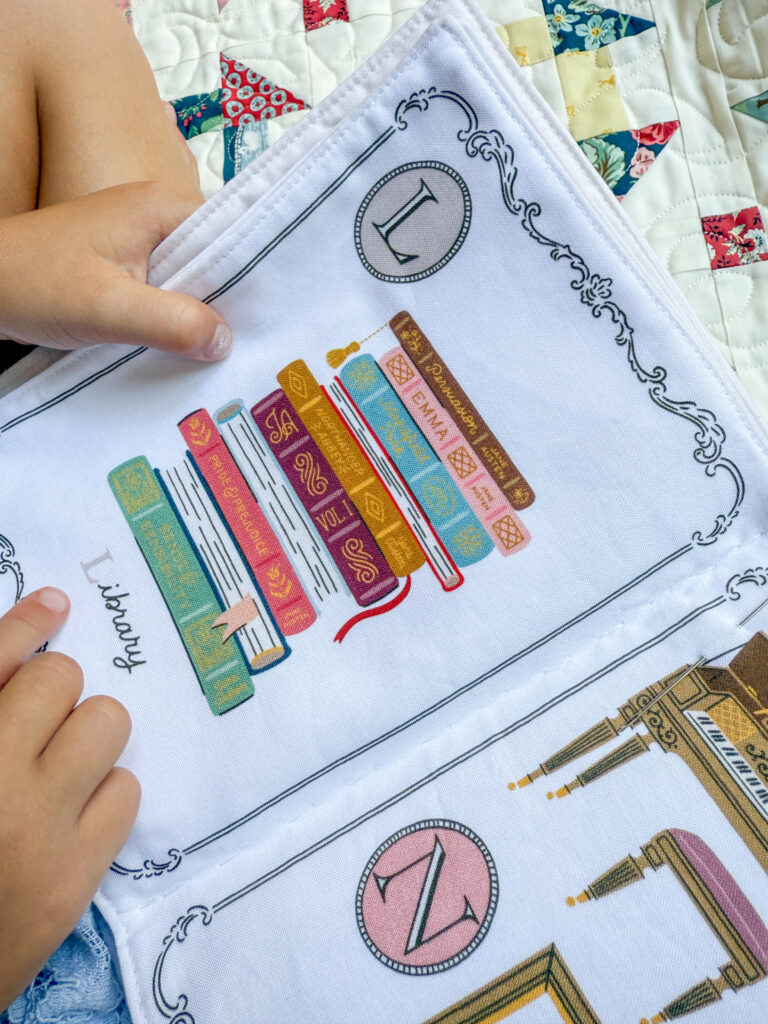
Jane Austen A to Z Panel Project
Now, I mentioned the soft book panel earlier. I am coming to love panel projects, and this one was a little unexpected to find in the collection. When I think of soft books, I think of baby gifts, but this is one soft book I am going to be keeping for myself. This project takes you through the world of Jane Austen from A to Z and really makes the cutest project! I may have to wrestle it out of my Emma’s hands though!
I set out to create a quilt that brings a touch of Regency romance to modern quilting with my design for the Elton Quilt. With the soft florals, vintage-inspired colors, and classic design, every block is like a little love letter to one of my favorite authors.
Whether you’re a fan of traditional quilting, literary inspiration, or simply gorgeous fabric, this pattern is my heartfelt nod to both craft and story.
Ready to sew your own Elton Quilt?
You can find the Elton Quilt pattern in my Etsy shop HERE – use code ELTON for 20% off my pattern shop through 7/20/2025 to celebrate!
I had such a blast designing this pattern, and the soft book project was an extra bonus. I can’t wait to see what others make with this design!
Make sure to give me a follow on all the socials and see what I’m up to next!
Happy Sewing!
Mary Burroughs-Mayer – Ember Craft Co


2 Comments
Debbi Patten
Would love to make this.
Were can I buy the fabric?
Mary Burroughs-Mayer
Hi Debbi, Fat Quarter Shop is carrying this entire line! Check out the Store Locator at rileyblakedesigns.com to find a store near you!