
Santa’s Tree Farm- Appliqué Pillow
Hi Makers! It is Sara from @SaraBQuilts here. We are just now getting a taste of summer heat here in Michigan but it is never too early to work on a Christmas project! I had the pleasure of working with Lisa Audit’s and Riley Blake Design’s Santa’s Tree Farm collection and it already has me counting down the days to December!

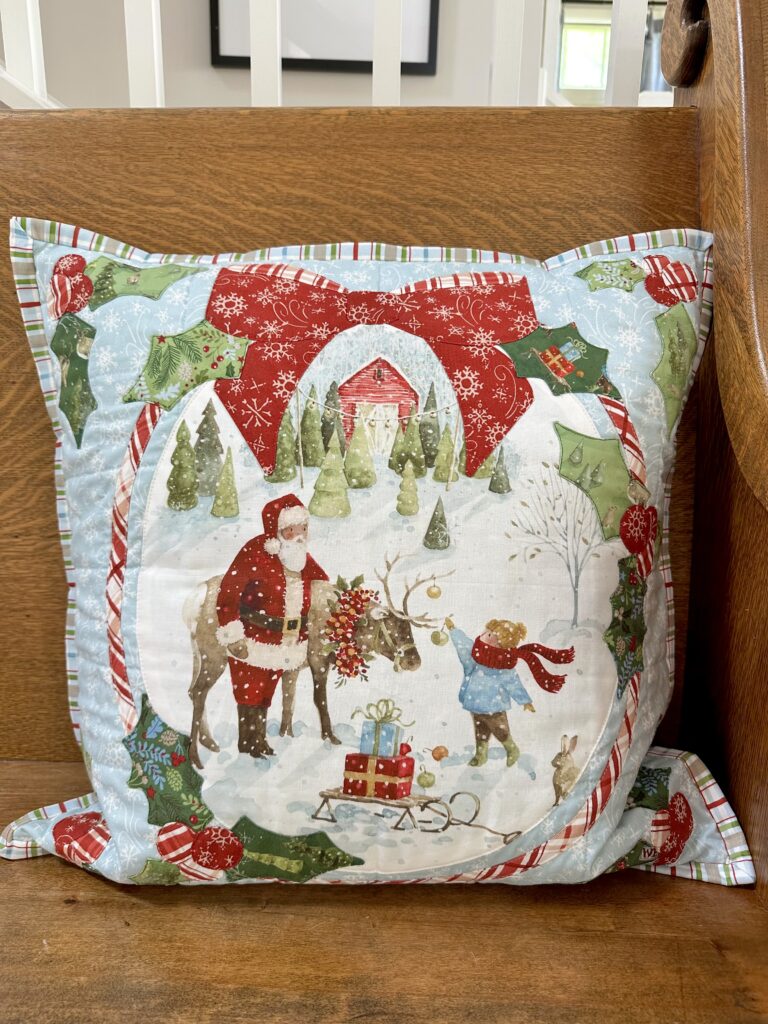
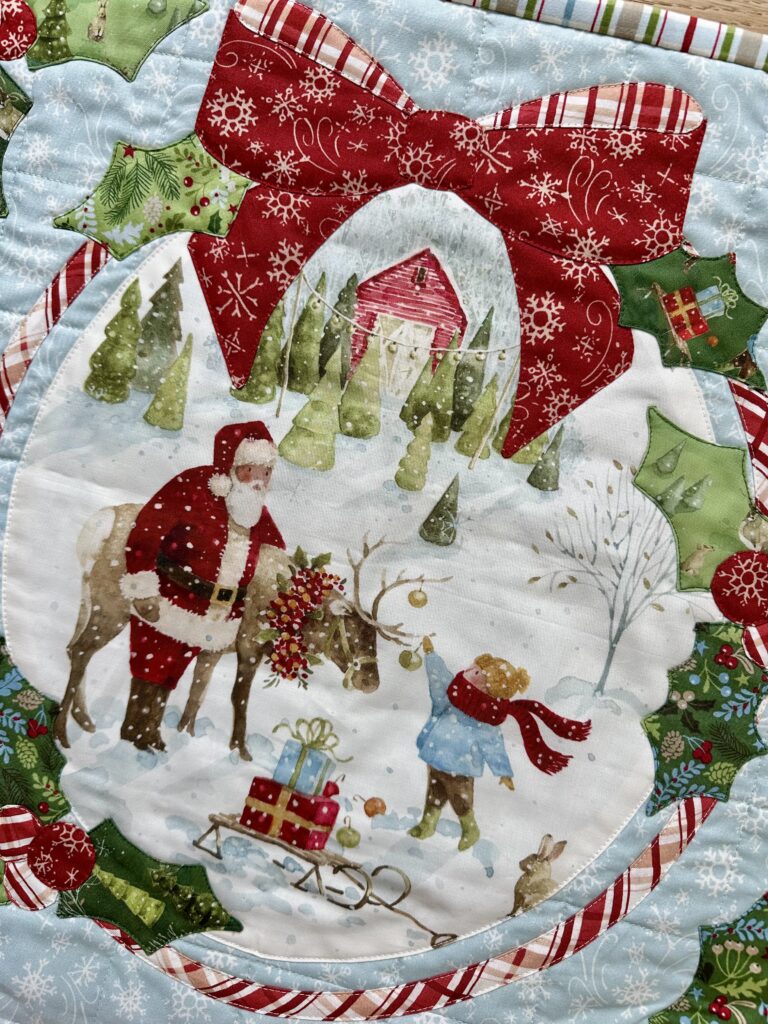
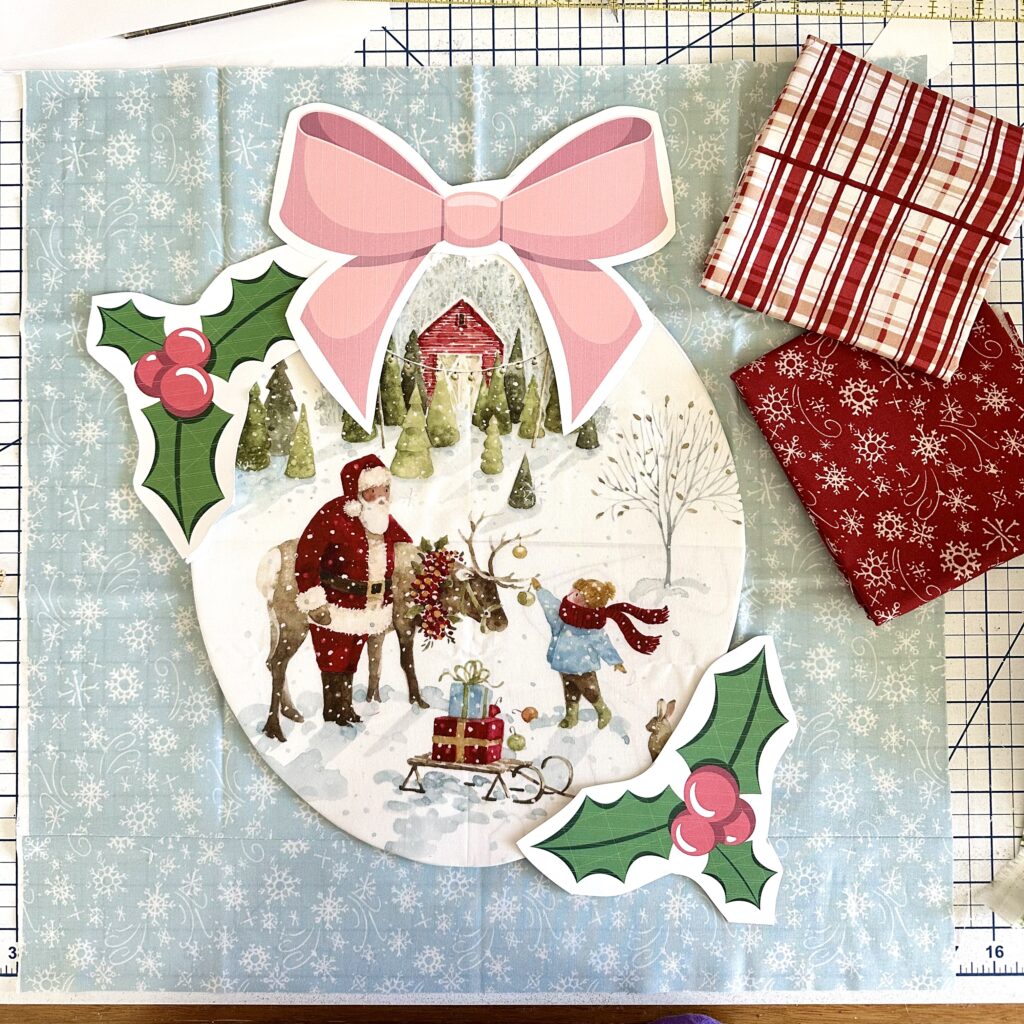
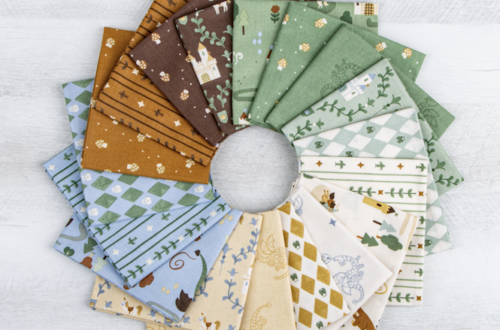
This collection is focused on Christmas trees, winter forests, and that traditional Christmas feel that makes everything feel more festive! While I love every single print, the Santa’s Tree Farm Panel is the star of the show! I knew the moment I saw it that it would be the focus of my Santa’s Tree Farm project. The Santa’s Tree Farm Panel has 4 pictures (approximately 17” square) depicting gorgeous winter scenes at Santa’s Tree Farm, reindeer tours included!
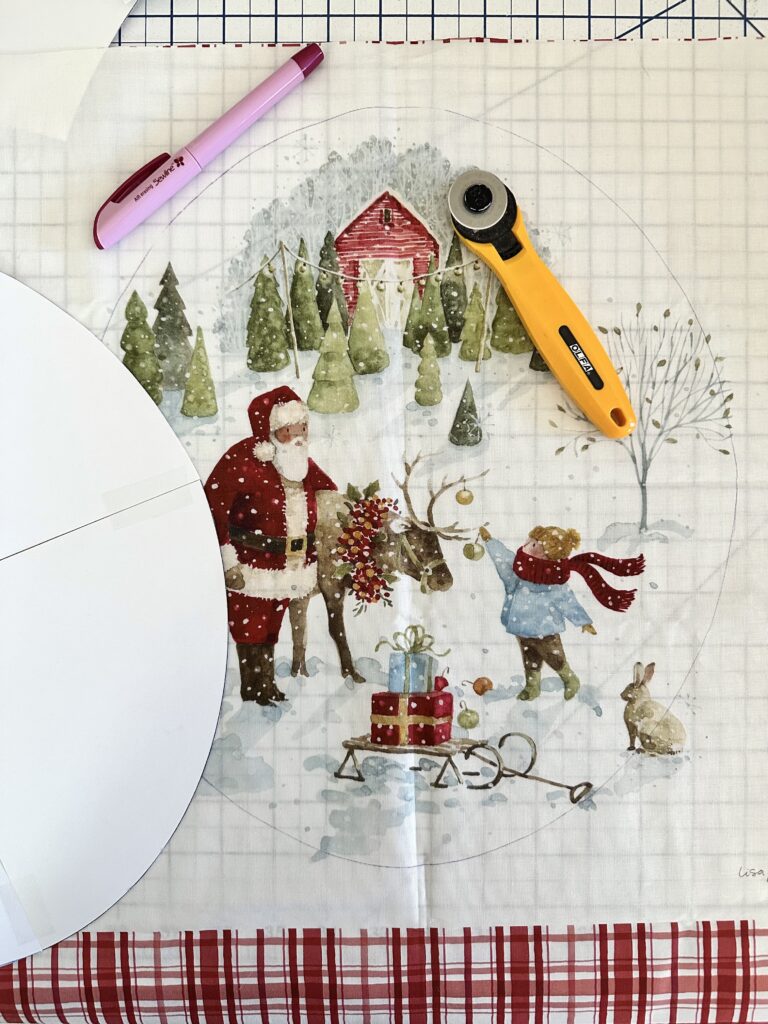
My in-laws actually have a Christmas tree farm on their property in Pennsylvania, so I thought a decorative pillow for their home would be the perfect idea! I decided to make up the pillow as I went along and I really love how it turned out. To start, I decided on what shape to make the picture from the Santa’s Tree Farm panel. While a circle would look great, I liked how the oval looked best with the image. I used Adobe Illustrator to create my 13” wide by 15” tall oval, but a serving platter would be great to trace around the panel image too!
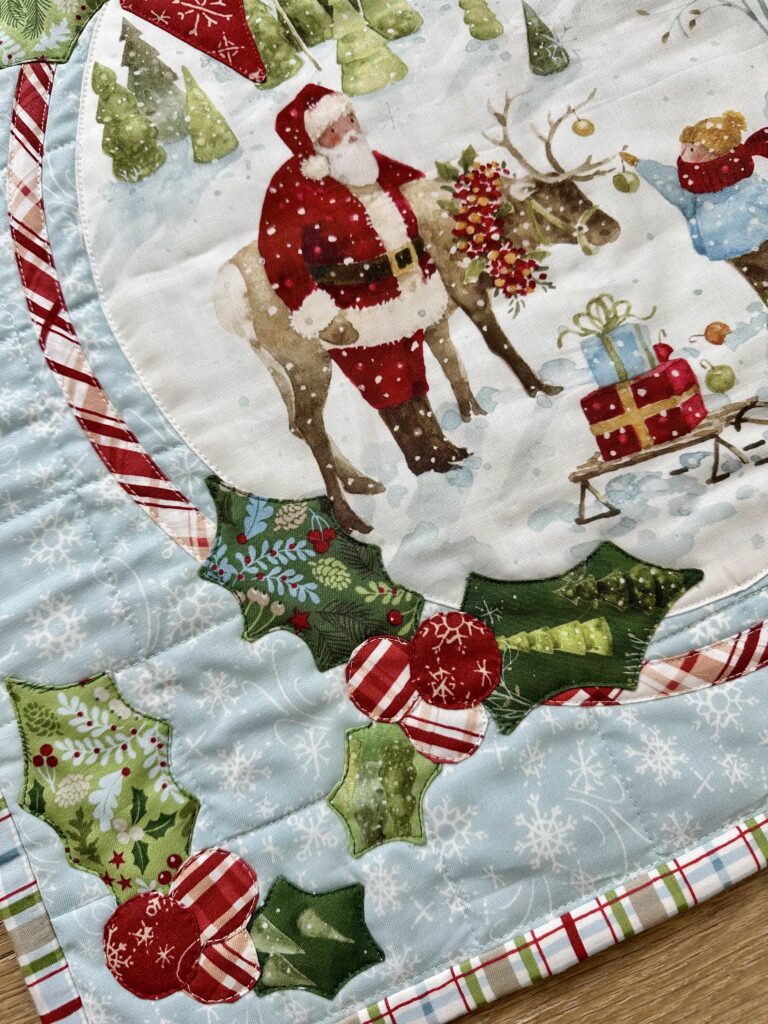
Once I had that center shape figured out, I had to find things to decorate my pillow with. I searched for bow and holly clipart images on the internet until I found the ones I liked. I just printed these images out on card stock and those became my appliqué templates. I really loved using Plaid and Snowflakes in Rudolph for the bow and the berries. They turned out so festive and pretty. For the holly, I enjoyed fussy cutting the Woodland print in Forest and Green. I also used Berries and Boughs in Green and Forest for the holly leaves.

Before prepping the pillow for appliqué, I quilted the background fabric, Snowflakes in Sky, with a simple 2.5” grid. By quilting it first, I was able to avoid any thread burying that would need to be done later on. I liked the scale of the grid and the soft feeling of it as well!
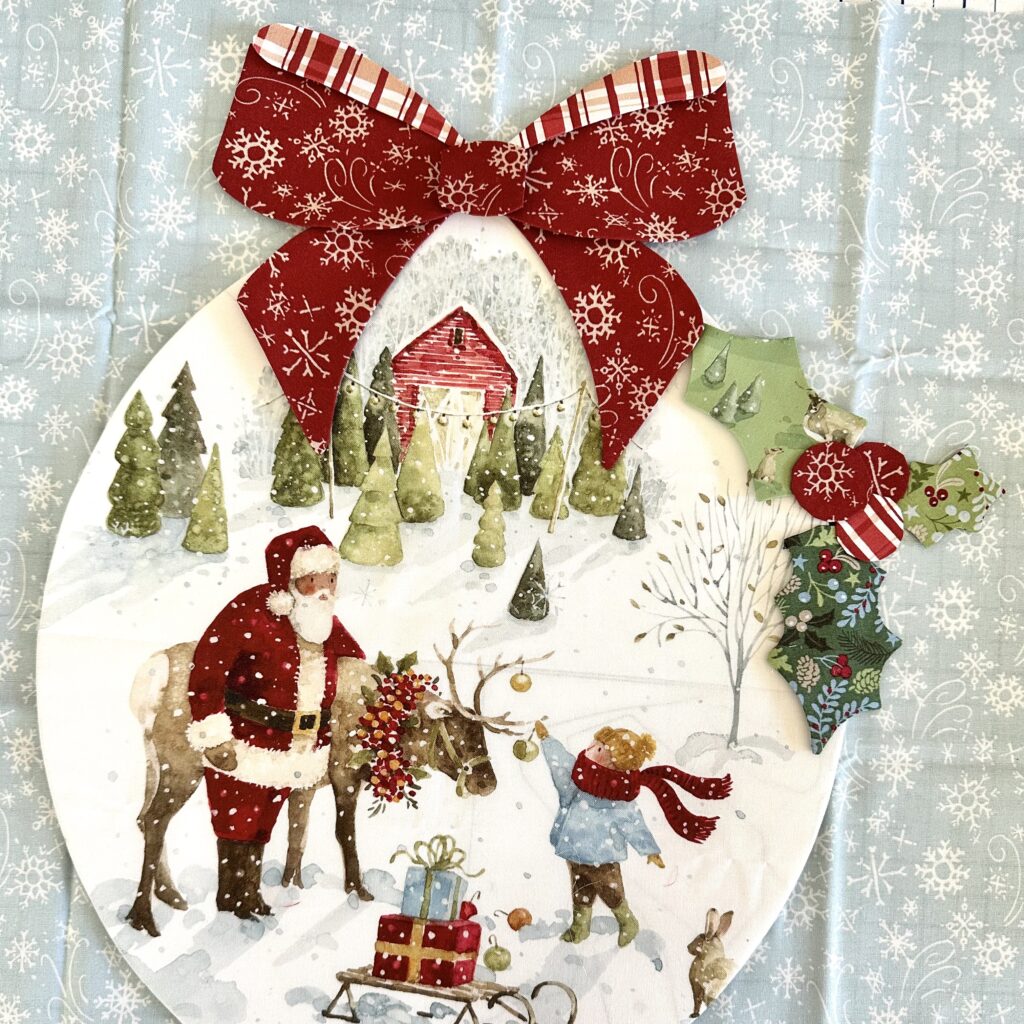
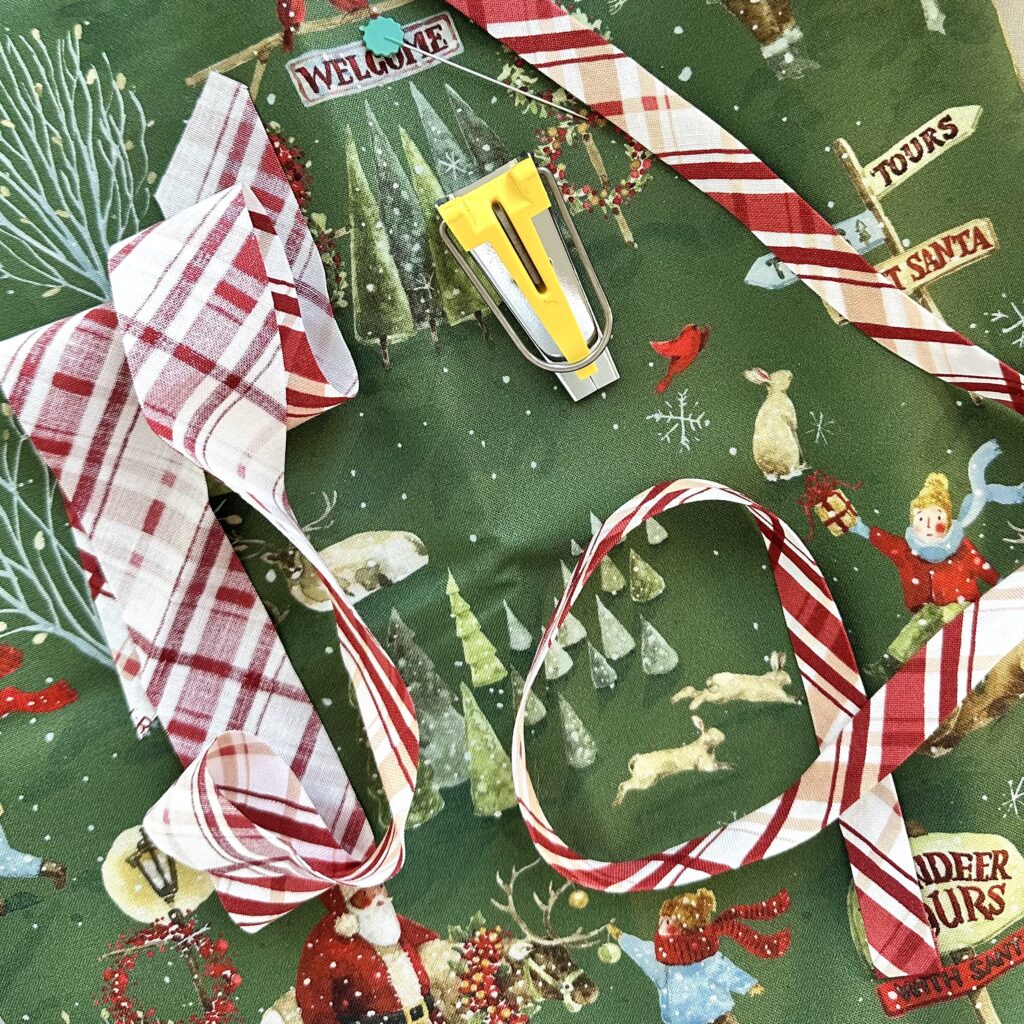

After I placed all of the shapes out, I decided that the pillow was missing something and the panel image needed a border or outline to really set it off. To do this I made 1/2” bias tape using the Plaid in Rudolph. I measured a 1/2” around the oval and glued the bias tape down around it before sewing it down.
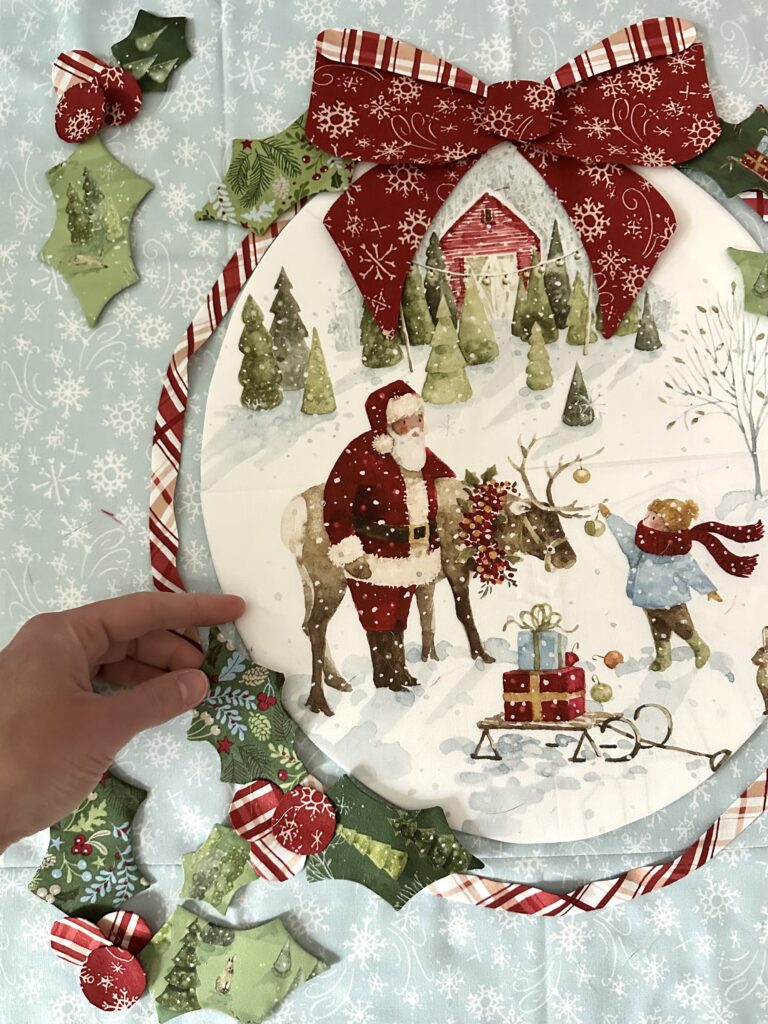

Once I had all of the berries and holly in the right locations, I was ready to appliqué them all down. I chose to turn the seam allowance under and then machine sew the appliqué shapes down with a very scant 1/8” edge. While I like the look of hand appliqué, the durability of machine appliqué for something that will be used a lot is hard to pass up!
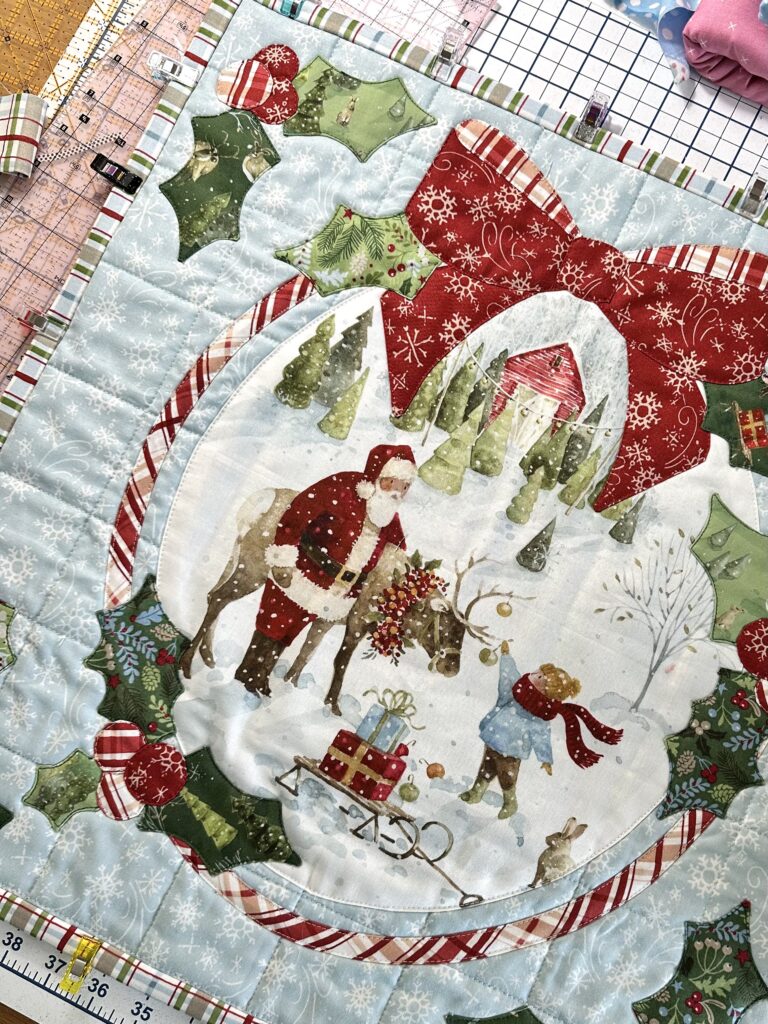
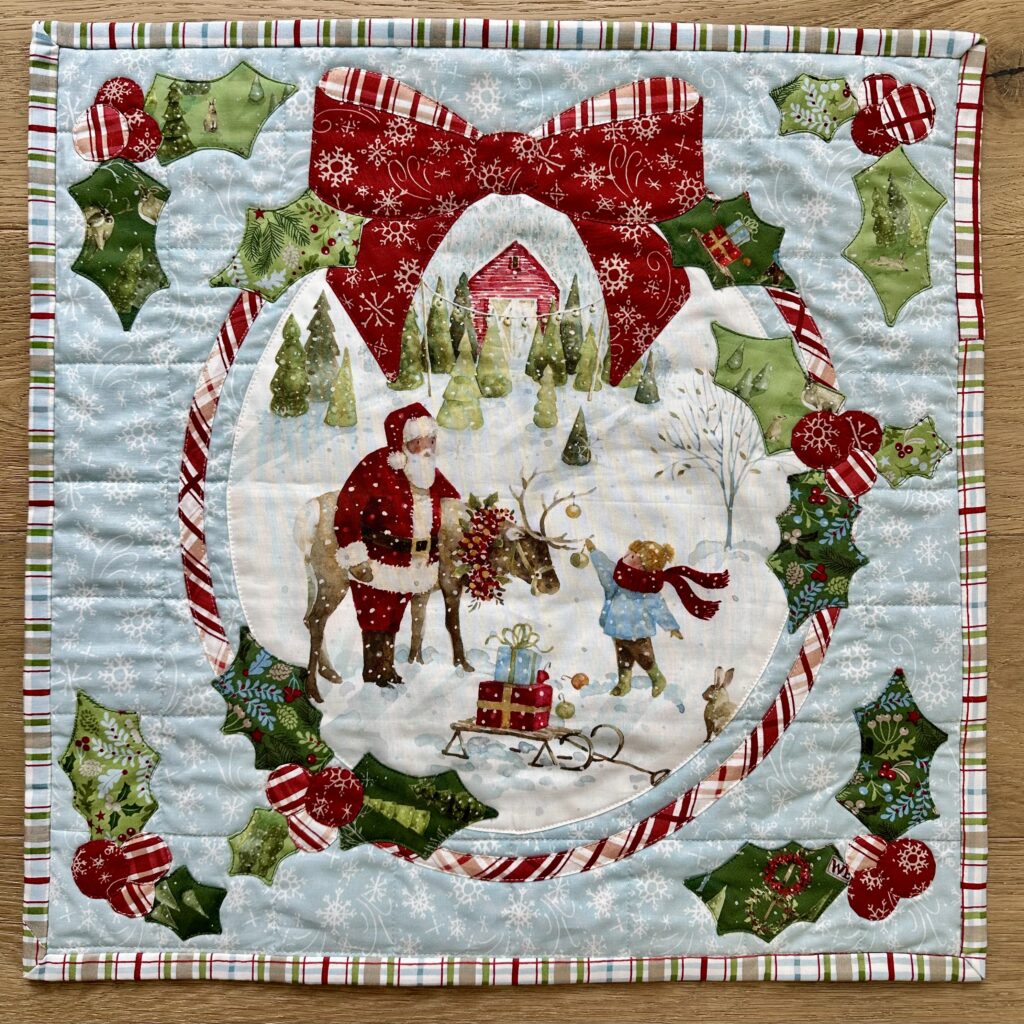

Now, if you follow me on Instagram you know that I love a ruffle on anything. I think a ruffle made with Plaid in Snowy would have been darling on this pillow, but my in-laws do not like ruffles as much as I do! I still wanted to frame the pillow with the plaid, so I decided to make a binding. A 1/4” binding would have been too narrow, so I cut 3.75” strips to make a 1/2” binding. I love how it turned out!


This pillow is so fun and I love that the panel image stays the focal point with a festive twist! With a few simple images from the internet and a bias tape maker, you could make this Santa’s Tree Farm pillow too!

I hope you love Riley Blake Designs’s Santa’s Tree Farm collection as much as I do and I cannot wait to see what you make with it!
Happy making!
Sara (@SaraBQuilts)


8 Comments
Cindy Smith
So stinking cute! Love, love it.
Sara Brown
Thank you so much Cindy!
April C Marietta
How do I get Santa’s tree farm pillow pattern?
Kristi Dillard
I would love to have the pattern. It would be great if you would sell this as a kit.
Janine Medlin
I would love to buy this pillow as a kit.
Absolutely beautiful
Kathy Rankin
What size did you cut the light blue piece used for the pillow background?
Gail Mason
I also would like to order the Santa panel where can we do this please
santa pannel how can we get ir
Bunny Rule
Love this! Would love to have the panel