Gentler Times: A Free Quilt Tutorial and Overalls to Match!
Hi all, Mary Burroughs-Mayer of Ember Craft Company back again to share my latest makes with Riley Blake Designs! This month, I had the absolute pleasure of working with quite a few prints from the Gentler Times collection by Lori Holt, and my goodness, what a gorgeous rainbow!
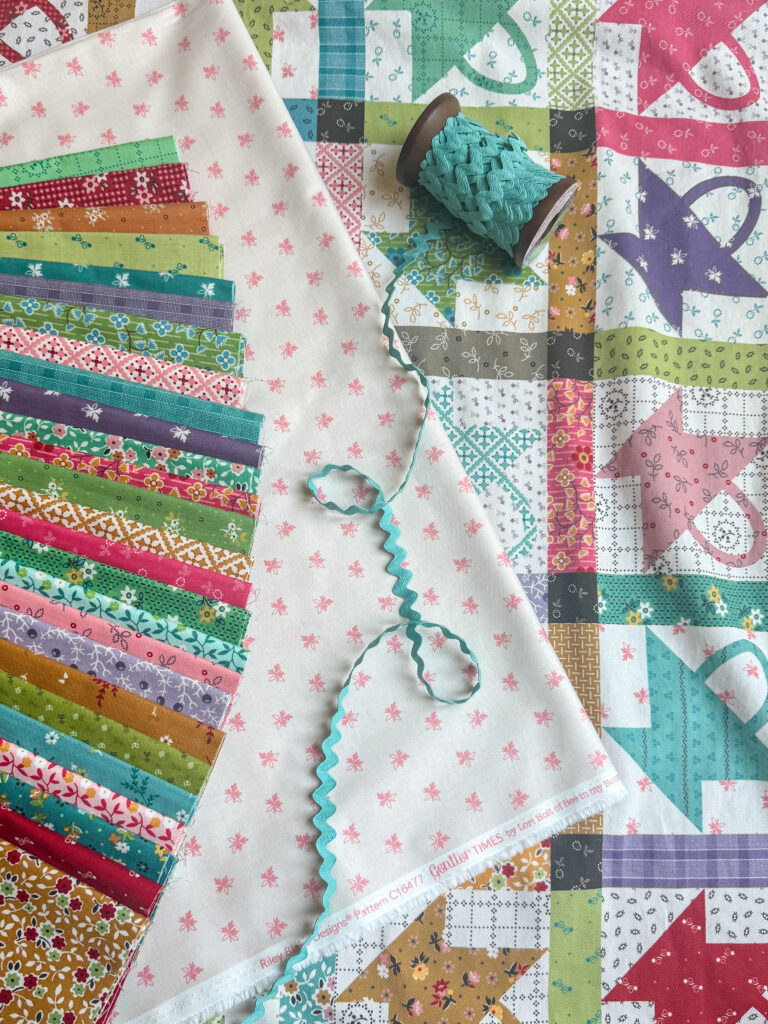
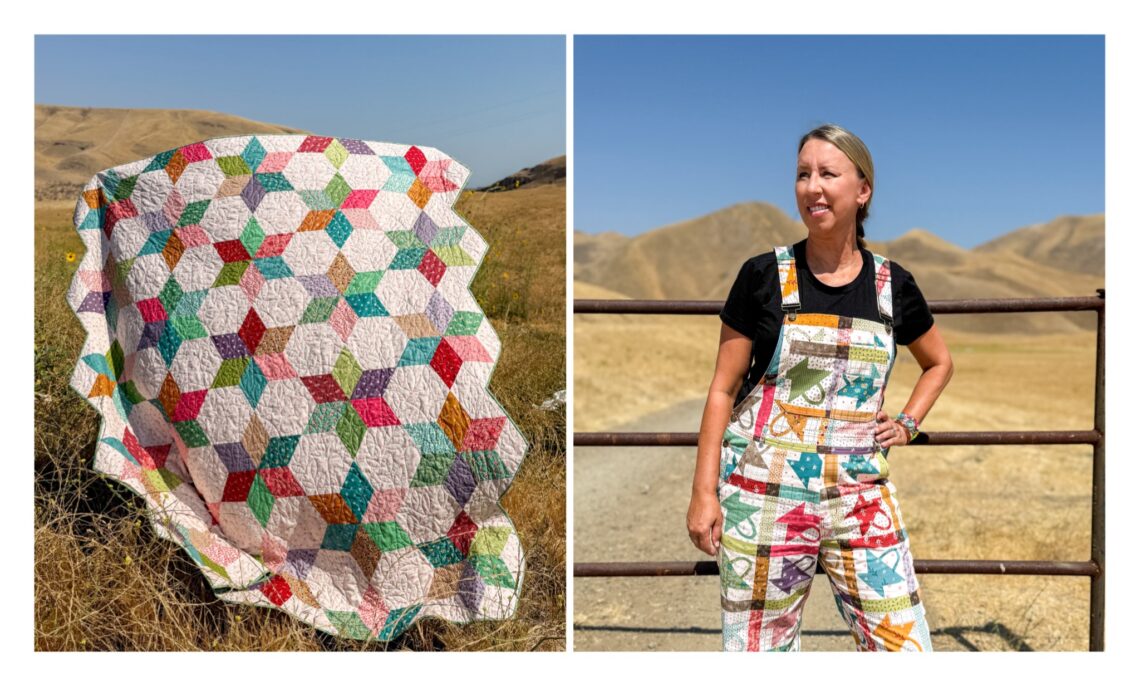
Now, when fabric this sweet comes along, why stop at just one project? These fun, nostalgic prints practically begged to be stitched into something soft to cuddle under and something fun to wear! In this post, you’ll get a free tutorial for my Hexie Diamonds Quilt and a first look at the matching Riley Overalls I made with the home decor fabric from this same collection!
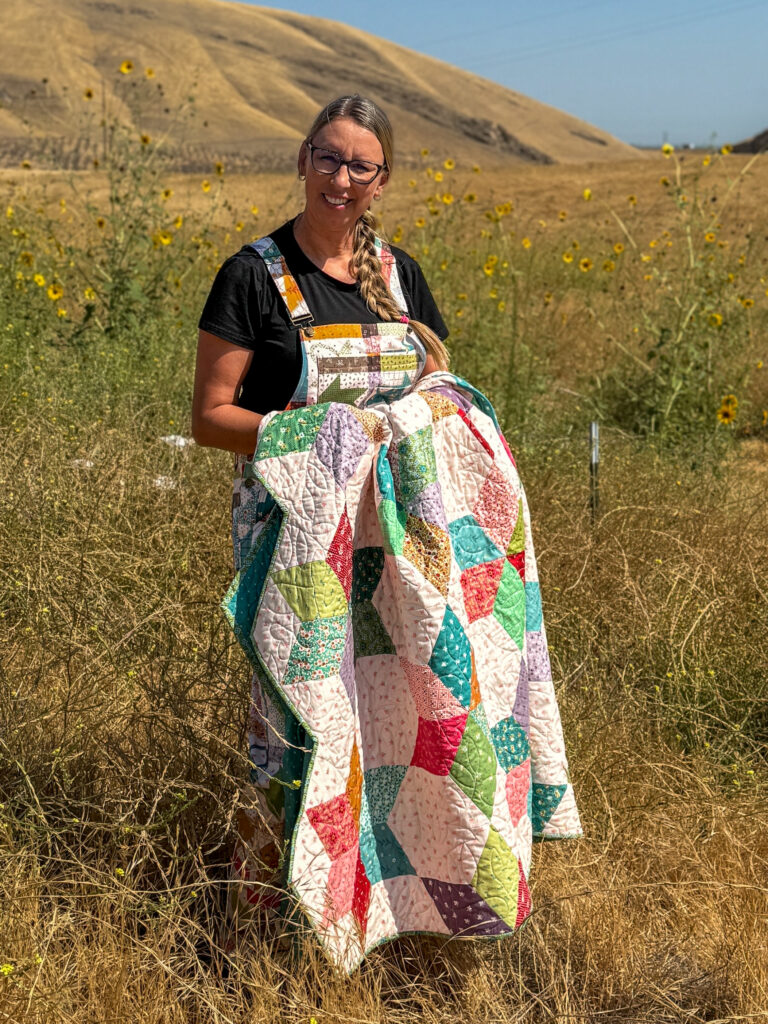
Riley Overalls
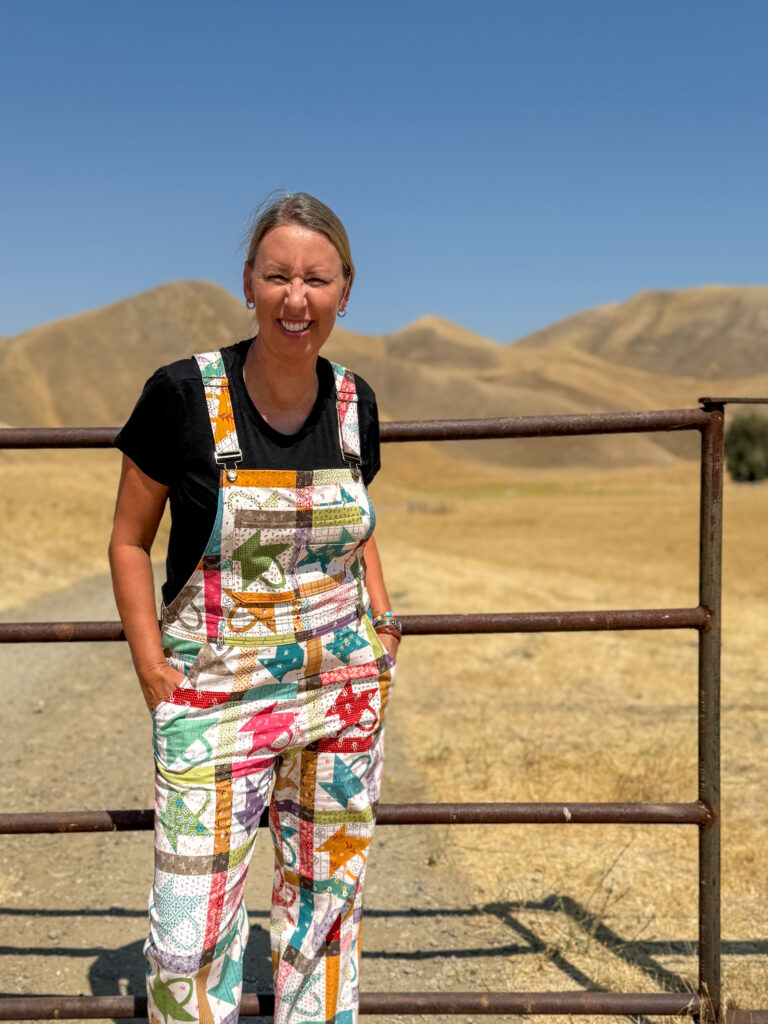
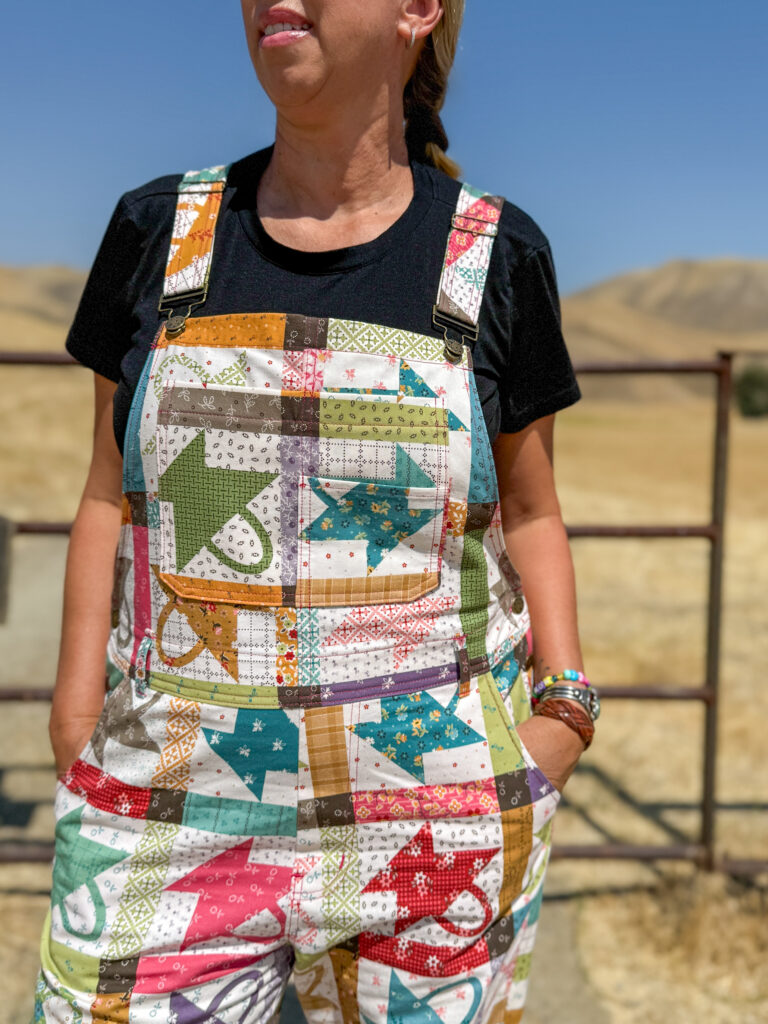
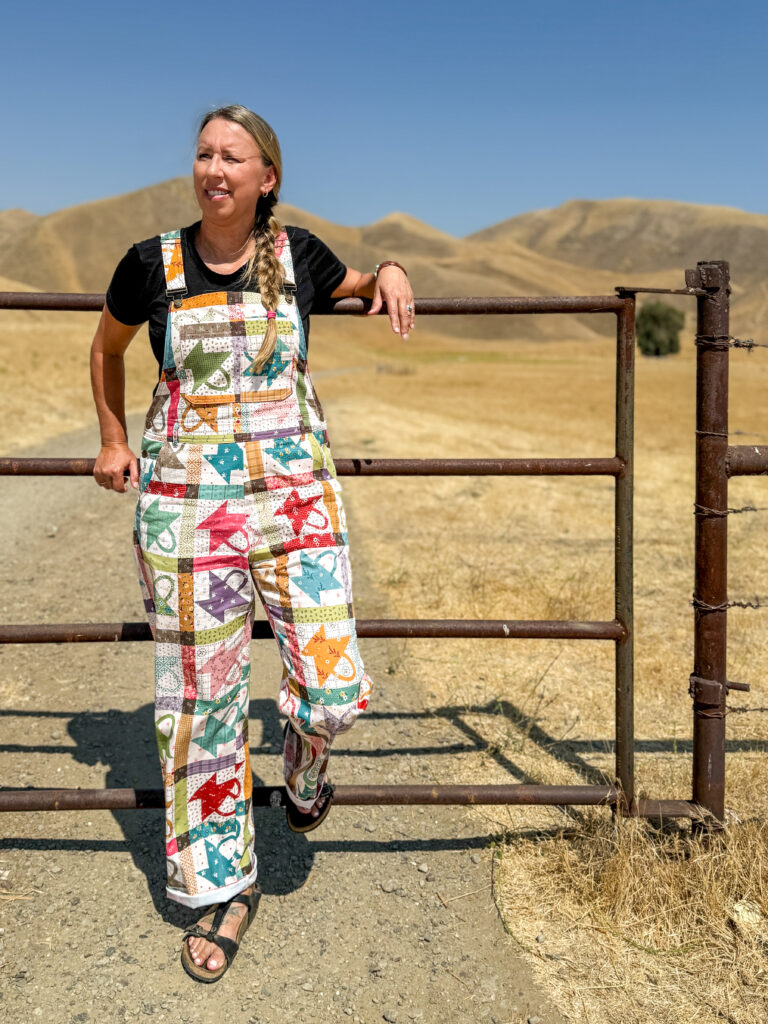
Now, let’s start with the overalls. I have been moderately obsessed with the home decor fabrics I’ve seen in Lori Holt’s collections since making the Pixie Peacoat with her Americana collection earlier this year (click HERE to check it out!). This fabric is heavier than quilting cotton, but also a bit lighter than a jeans denim though with a similar weave. This Gather basket print from the Gentler Times collection made me think of going to the garden to, well, gather vegetables and flowers grown in the yard. And what better to wear when gardening than an adorable set of overalls?!
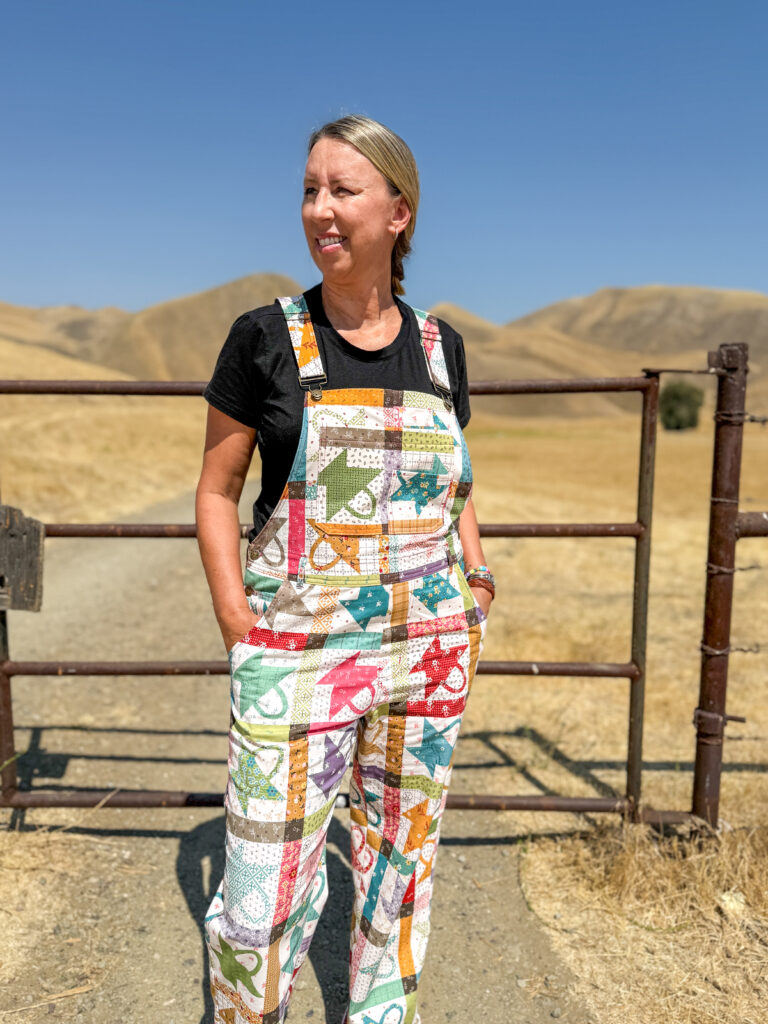

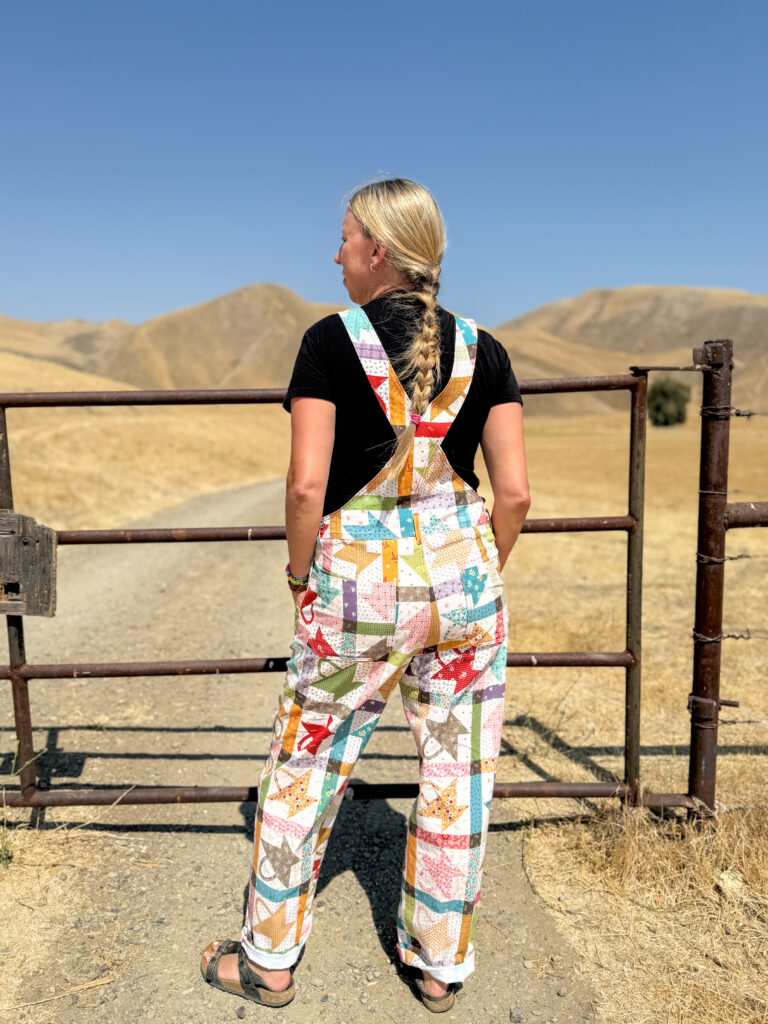
The pattern I went with for these is the Riley Overalls pattern by True Bias (you can find the pattern HERE). I want to give a quick shout out to their customer service who helped me get the correct pattern file after I thought I ordered the wrong size. NOTE: they offer two size files for purchase – one is for sizes 0-18, and one is for sizes 14-32. After reading through the pattern and going by my full hip measurement, I ended up making a size 14, and ultimately would have been fine with either file, but here we are. Still, thank you Natalie of True Bias for helping a girl out. I did lengthen the legs by 2″ – I’m 5’10” but most of that is in my inseam, and this was easy to do with the markings on the pattern.
The BEST part of using this pattern though? They did a sew-along for these back in 2022 and the 7-day blog posts are STILL available to follow along with! Get started on your own pair with the sew-along HERE! The pattern and its diagrams are great, but it is so helpful to see pictures of the actual fabric in the pattern being made. It probably wouldn’t take you 7 days to make these, but it’s nice to have it broken up into nice, manageable chunks.
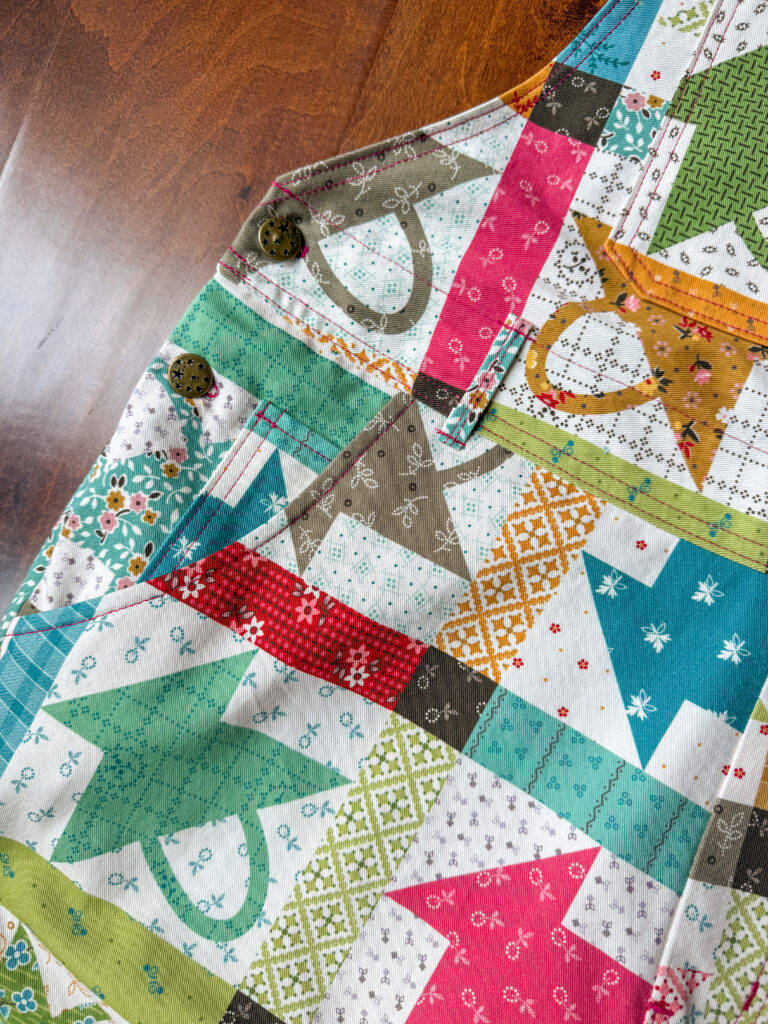
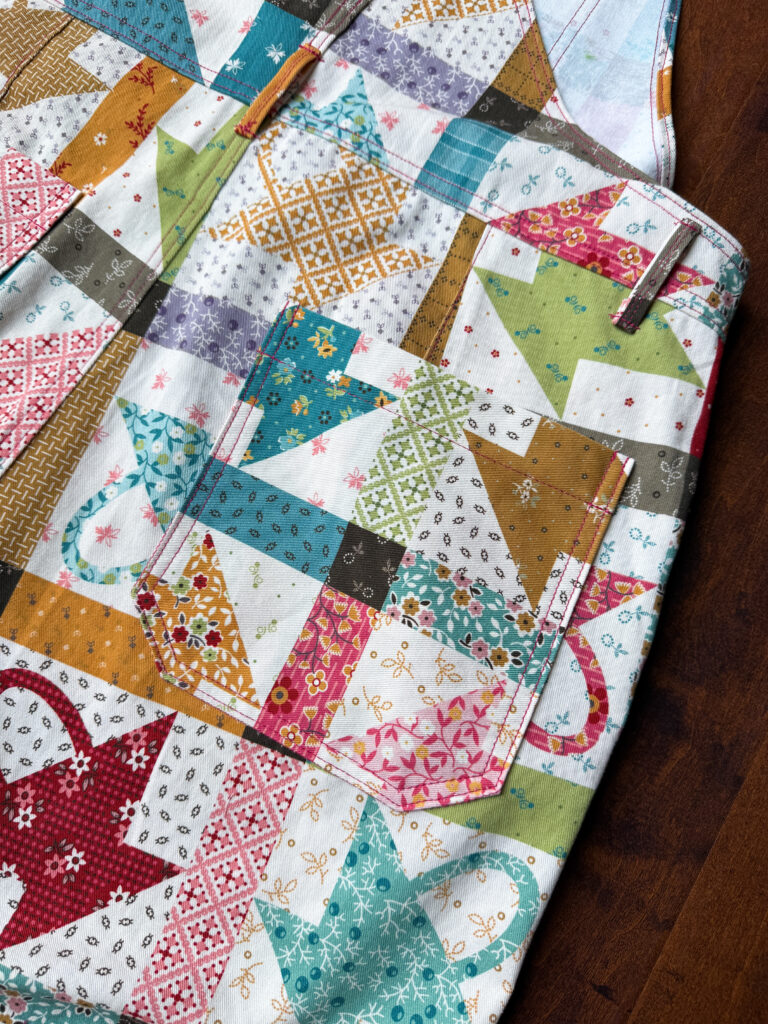
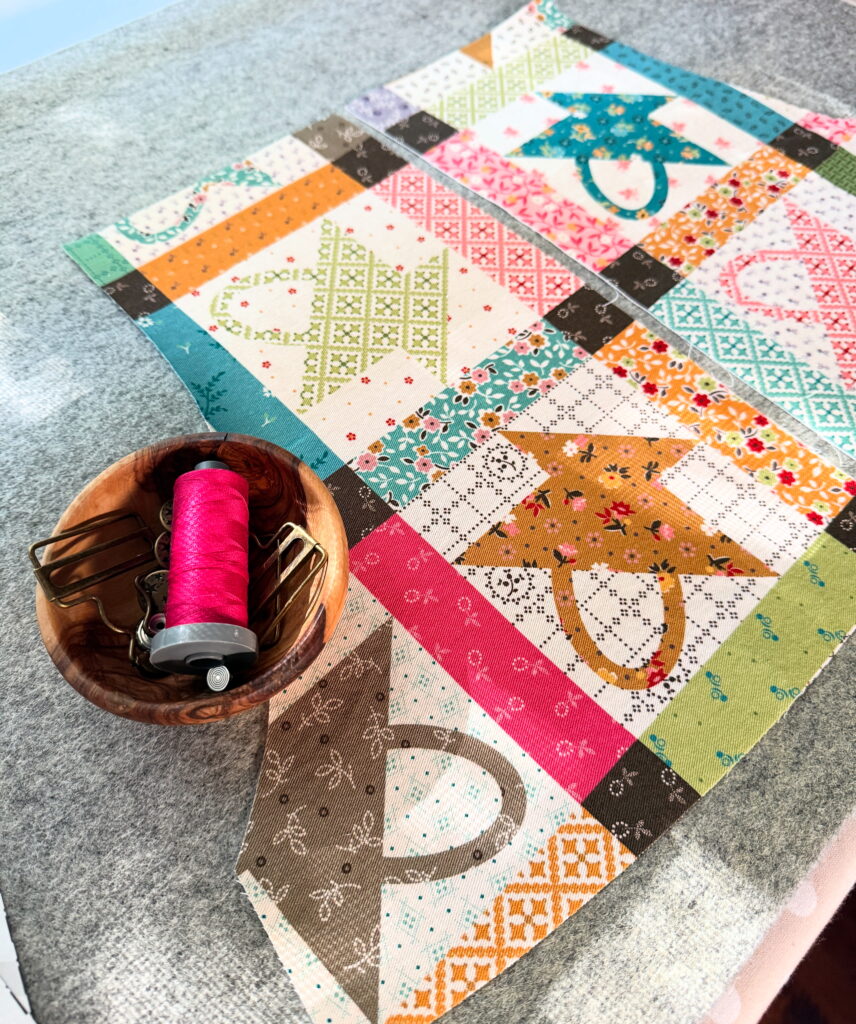
I used Aurifil 28 wt. thread in shade 4020, a beautiful and bold fuschia for the extensive topstitching involved in this make. I love how this heavier weight thread pulls out some of the darker pink shades in the fabric and ties it all together.
In a perfect world, I would have ordered extra fabric and matched patterns on the legs and pockets and fussy cut the different pieces, but with these being the first pair I’ve ever made, I’m just glad they fit. They are fun and also a bit wild, but listen, I am FINALLY at the point in my life where I can wear something I truly love without caring a bit about what anyone else might think. I asked my husband if he thought they were amazing or ridiculous, and he said, “I guess it depends on where you’re wearing them to.” I had to laugh. He’s been to QuiltCon with me twice now and I know exactly what he means by this. These are so comfy and definitely added to my weekly me-made rotation.
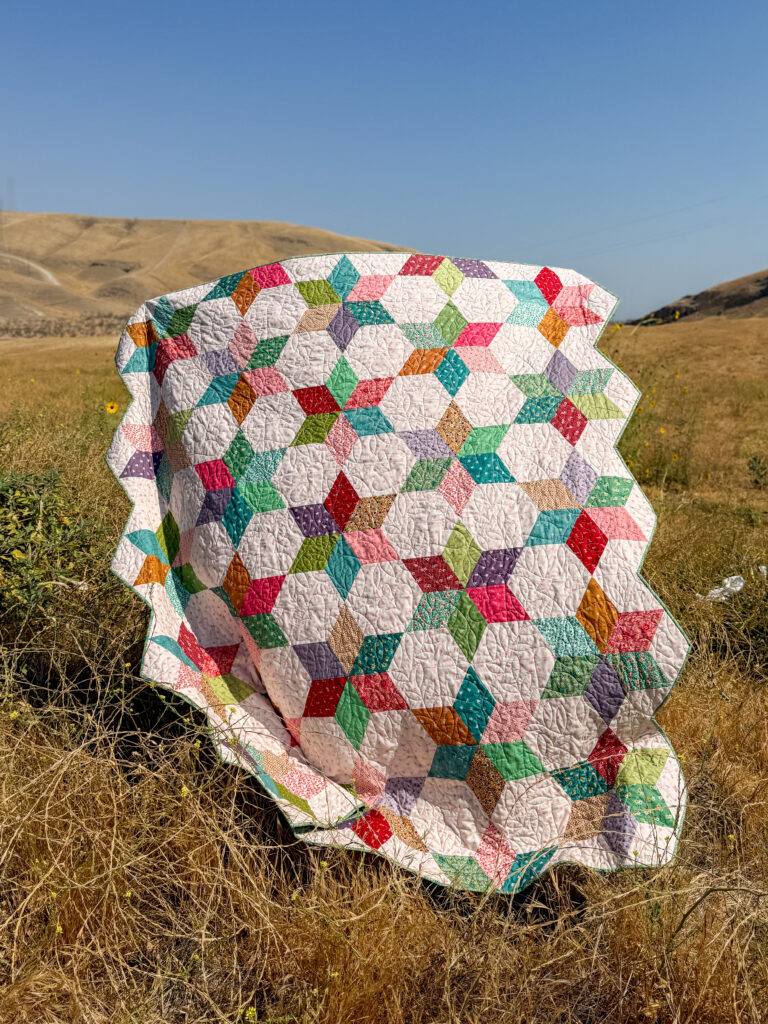
Hexie Diamonds Quilt
Now, for what I think you’re most likely here for – a tutorial for this fun Hexie Diamonds Quilt!
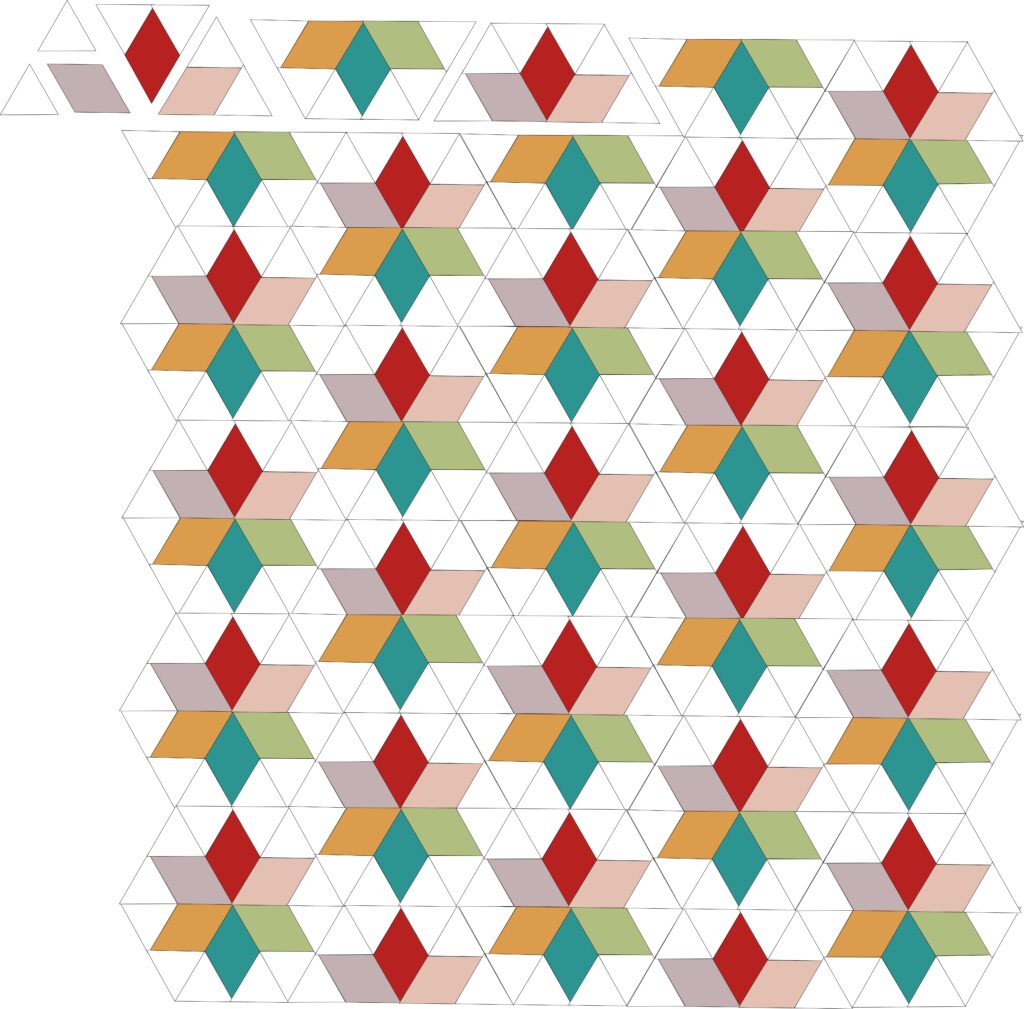
I’ve been playing with 60-degree diamonds and equilateral triangles over the last few weeks and I love that you can make a hexie out of 6 of these units. There are many quilt patterns out there that feature this shape, I highly encourage you to play with triangles and see what you come up with!
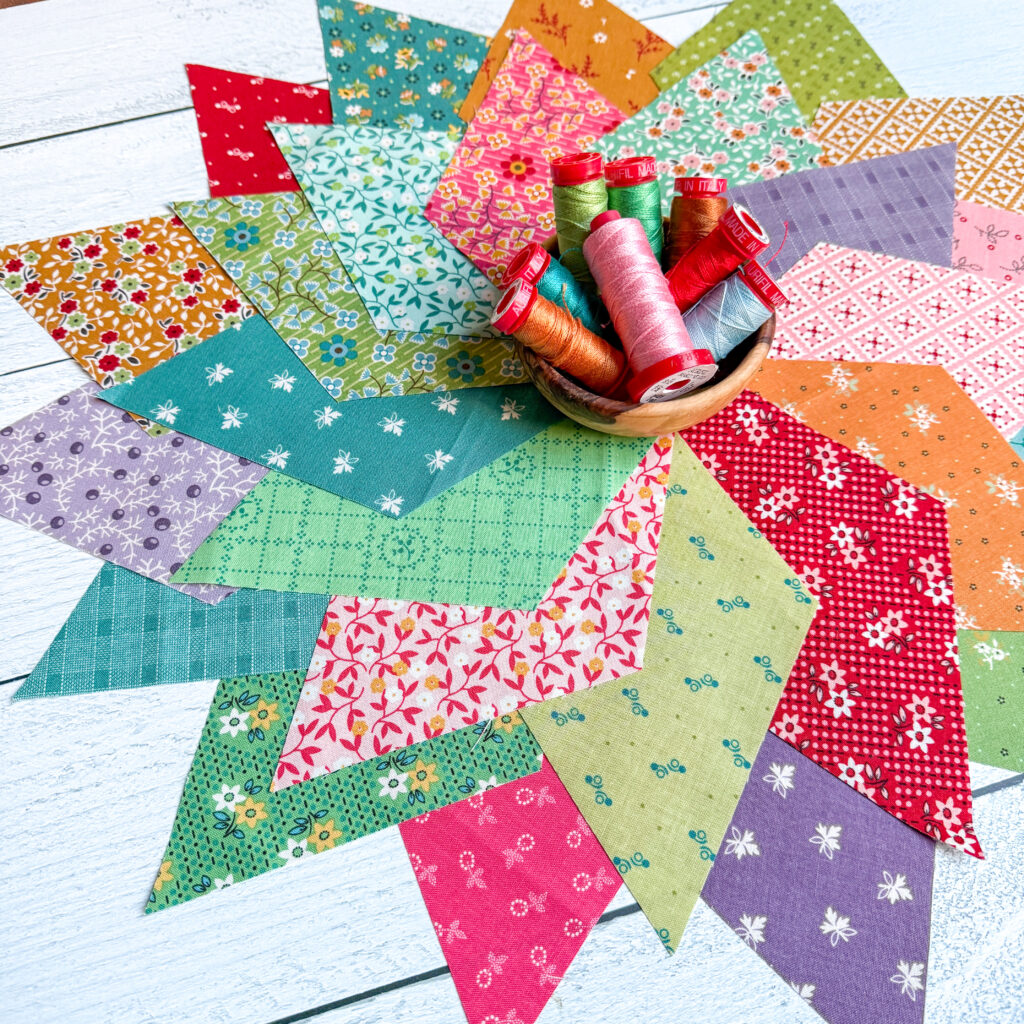
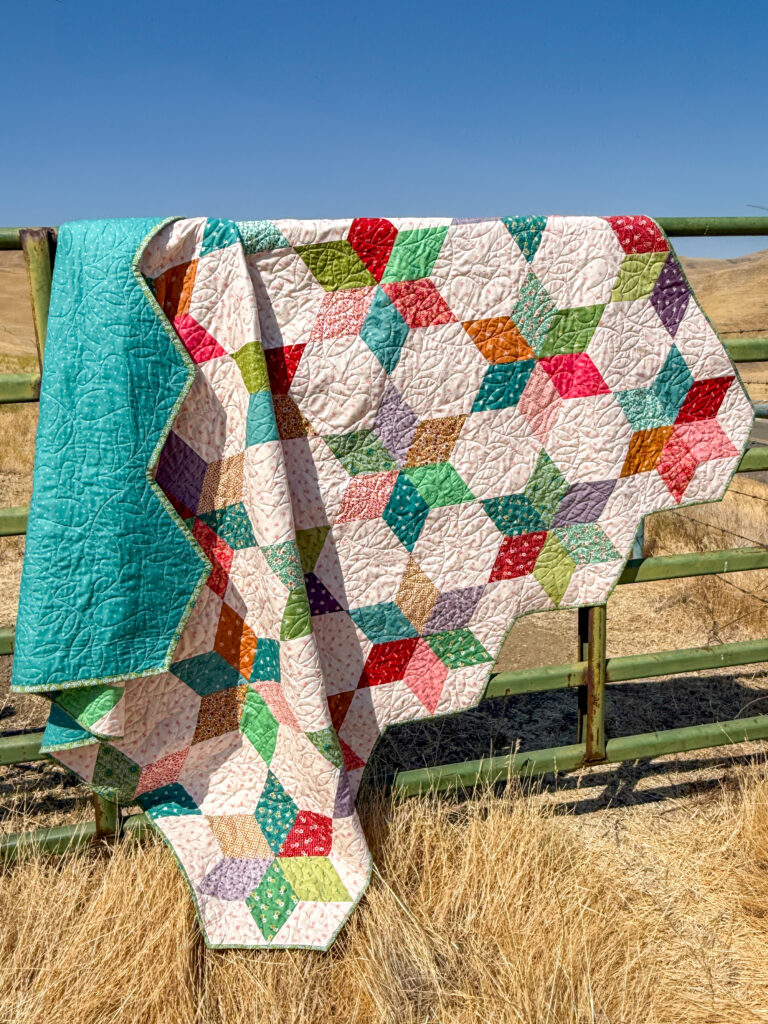
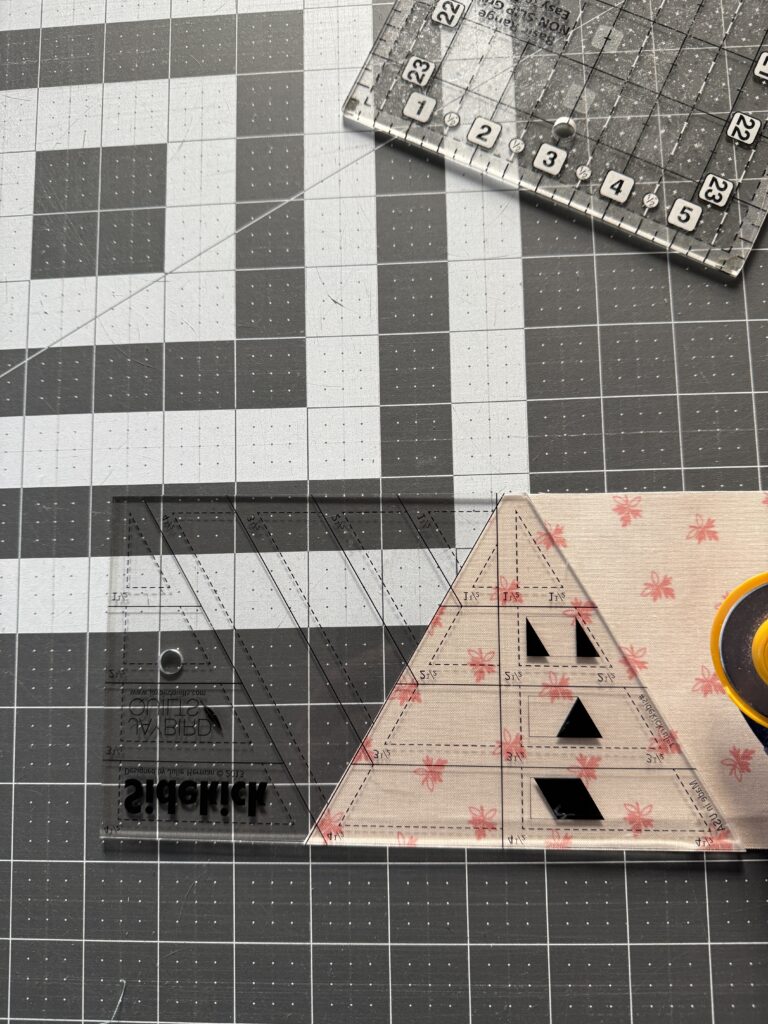
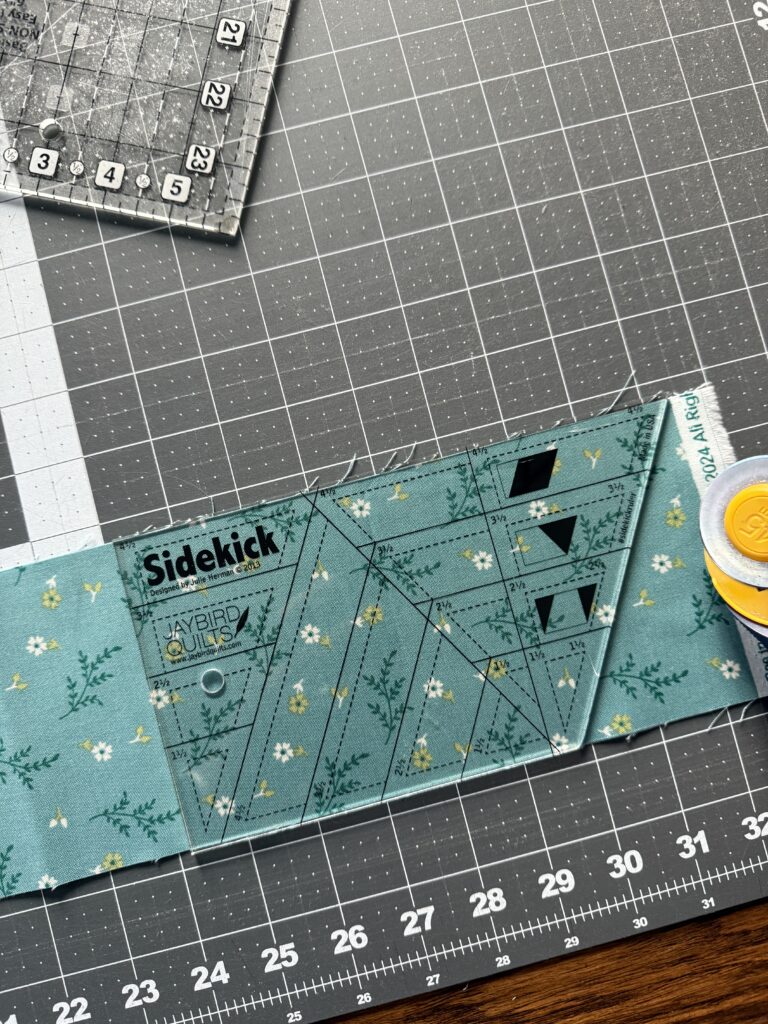
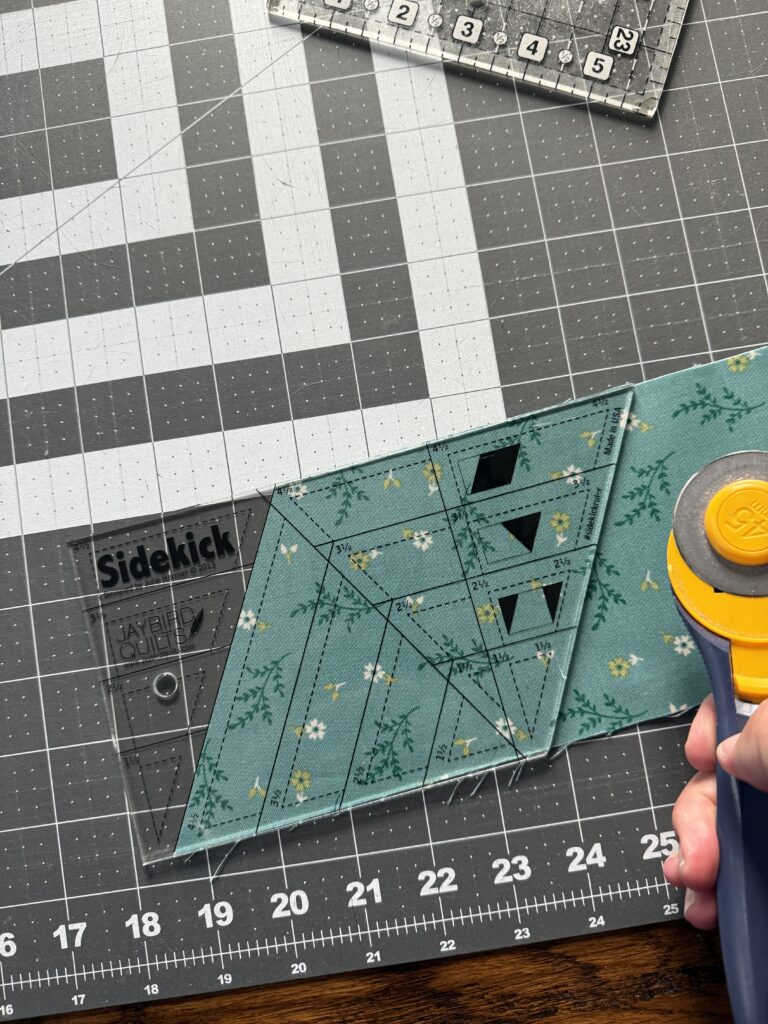
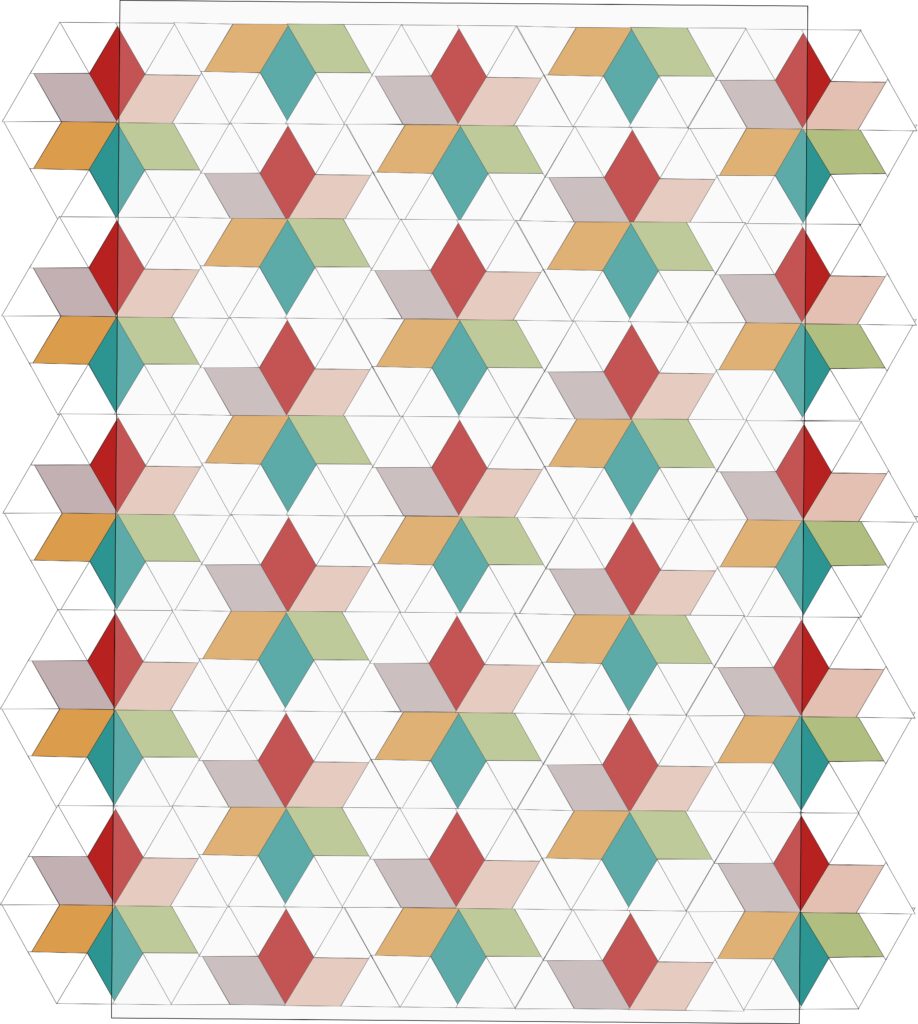
For this quilt, we are using 4 1/2″ 60-degree diamonds – this means each diamond is 4 1/2″ wide from side to side, with 60-degree angles at the two narrowest points. We are also using 4 1/2″ equilateral triangles as setting blocks for the diamonds. The EASIEST way to cut the pieces for this quilt is to use the Sidekick Ruler by Jaybird Quilts – find it HERE or check your local quilt shop. See below for the fabric requirements to make the 71″ x 78″ throw I made with these units.
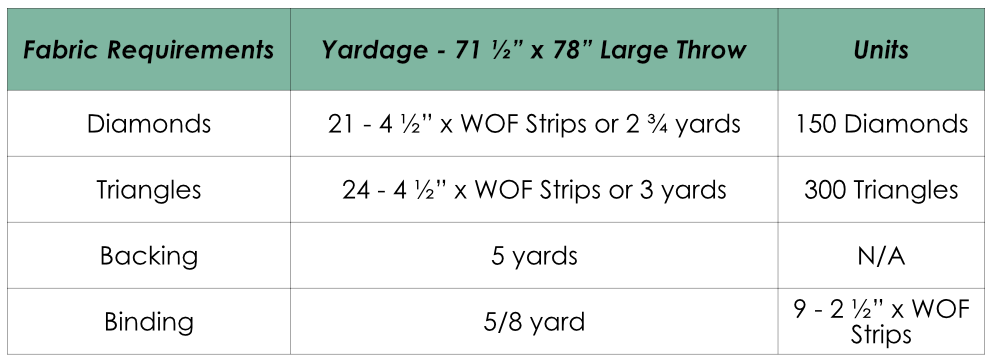
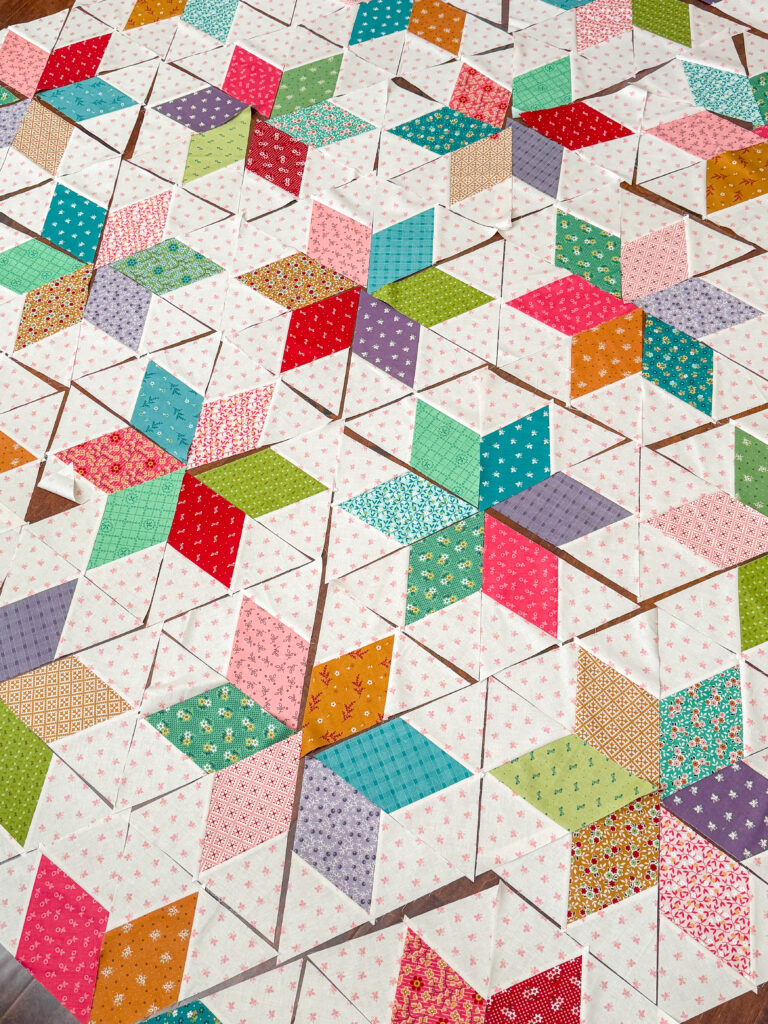
Of course, this would be a great quilt to make out of your scraps. For the diamond pieces, you will need 150 – 4 1/2″ diamonds to make the size I made. The easiest way I found was to cut 4 1/2″ x width of fabric (WOF) strips. You can get about 7 diamonds from a 42″ WOF strip and will need a total of 21 total strips. For the background, you need 300 – 4 1/2″ triangles. You can cut about 13 triangles from a 42″ x WOF strip or 24 total WOF strips.


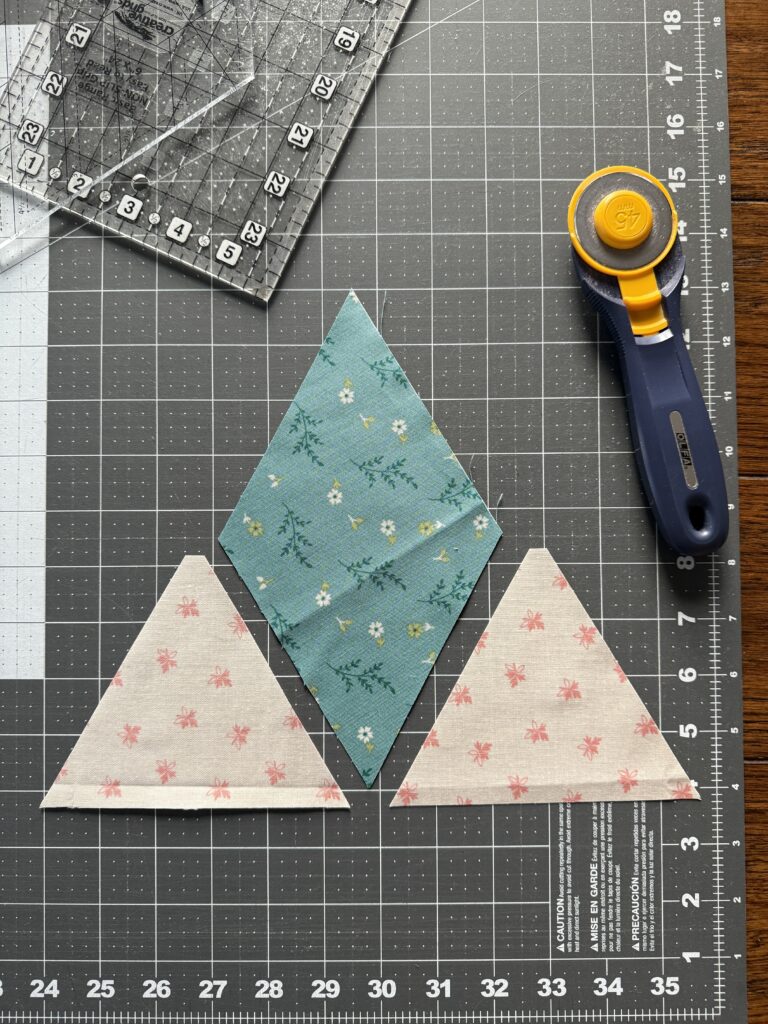
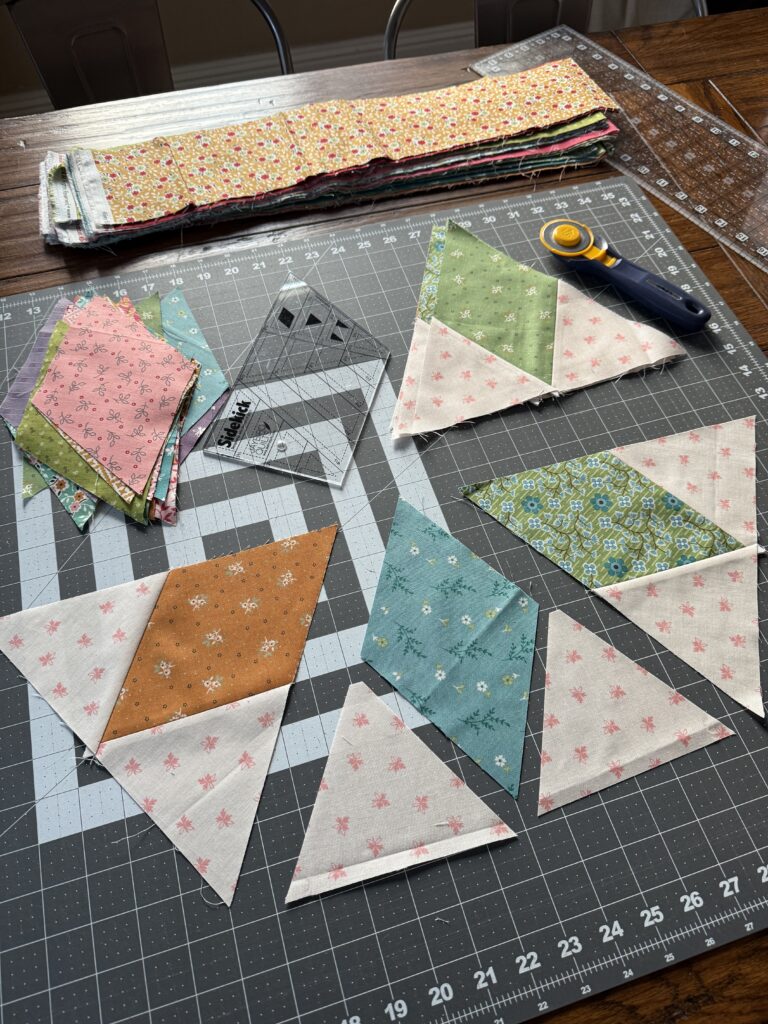
Each diamond has two background triangles sewn to each bottom edge to create a larger equilateral triangle. These triangles are then arranged into half-hexagon shapes and sewn together in rows. For this quilt, we are using 15 triangles in each row (5 half-hexagon units) by 10 rows.
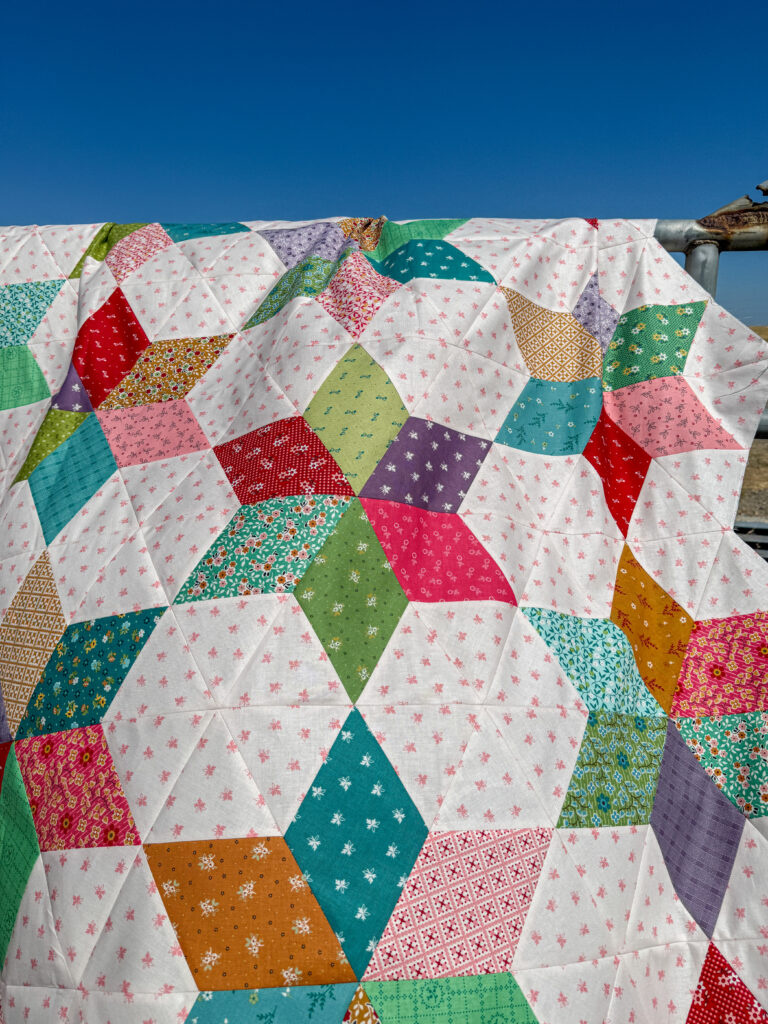
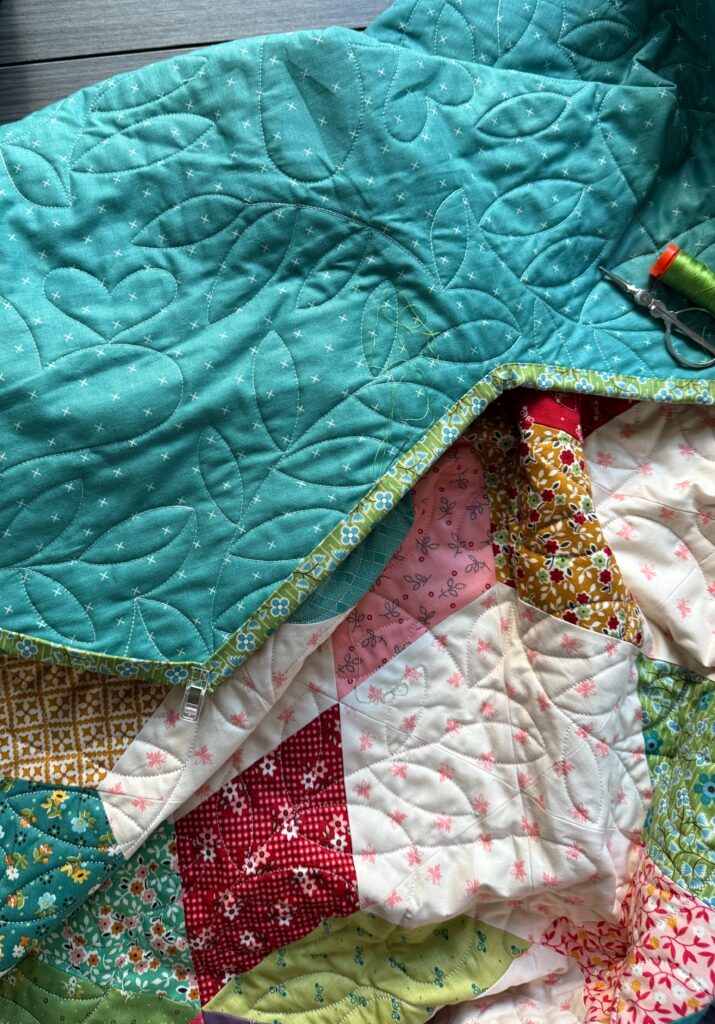
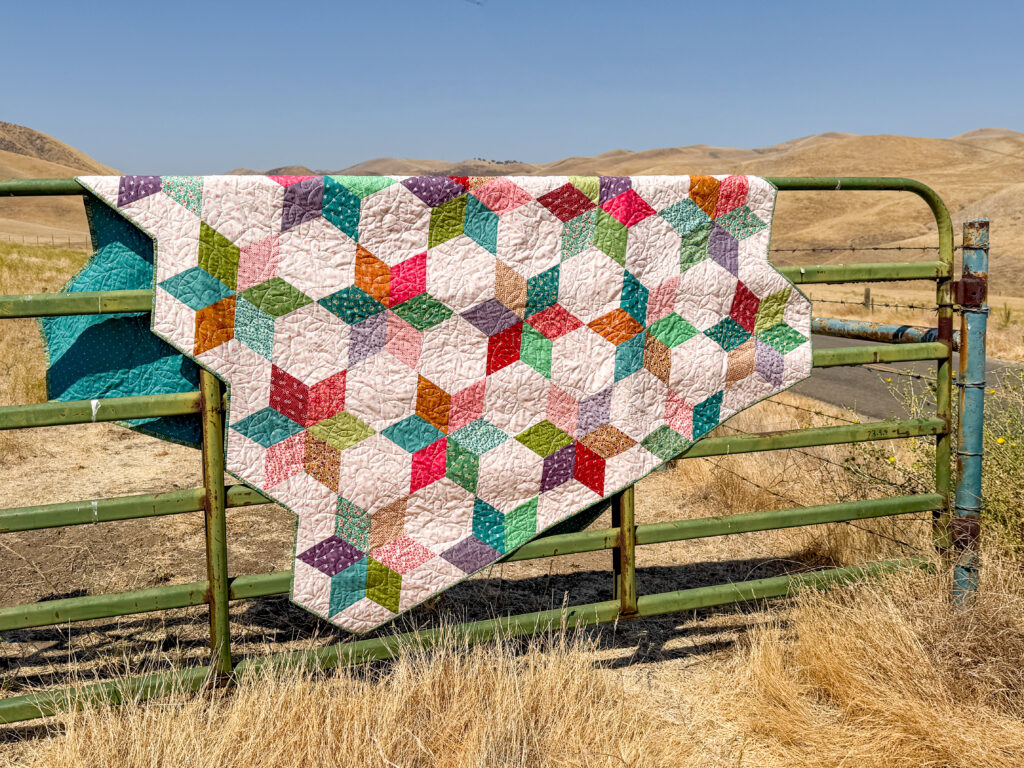
Donna Larson of Featherbed Quilting worked her magic for me once again (you can find her on Instagram HERE). She used the Heart Vines pantograph by Sew Shabby Quilting (click HERE for a link to the pattern in her shop!). I love the hearts mixed with the leafy vines and how it softens the sharp edges of the diamonds. Also, can you believe this gate and post I found along the roadside? I could not have asked for a more perfect spot to take a few pictures of this lovely make.
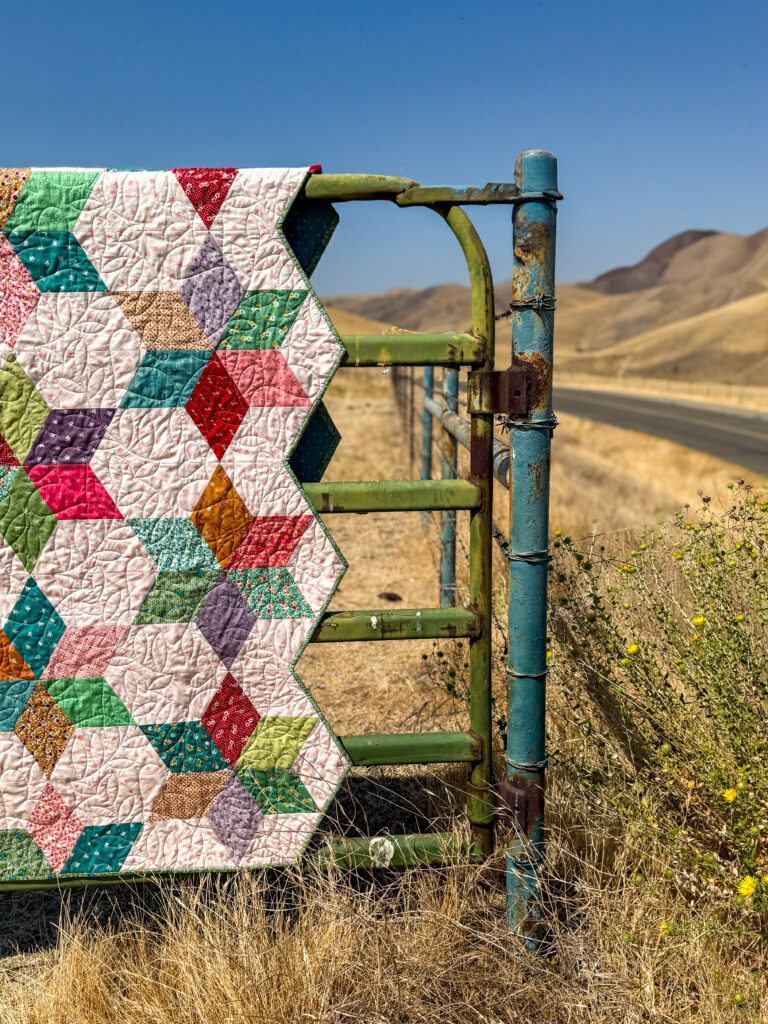
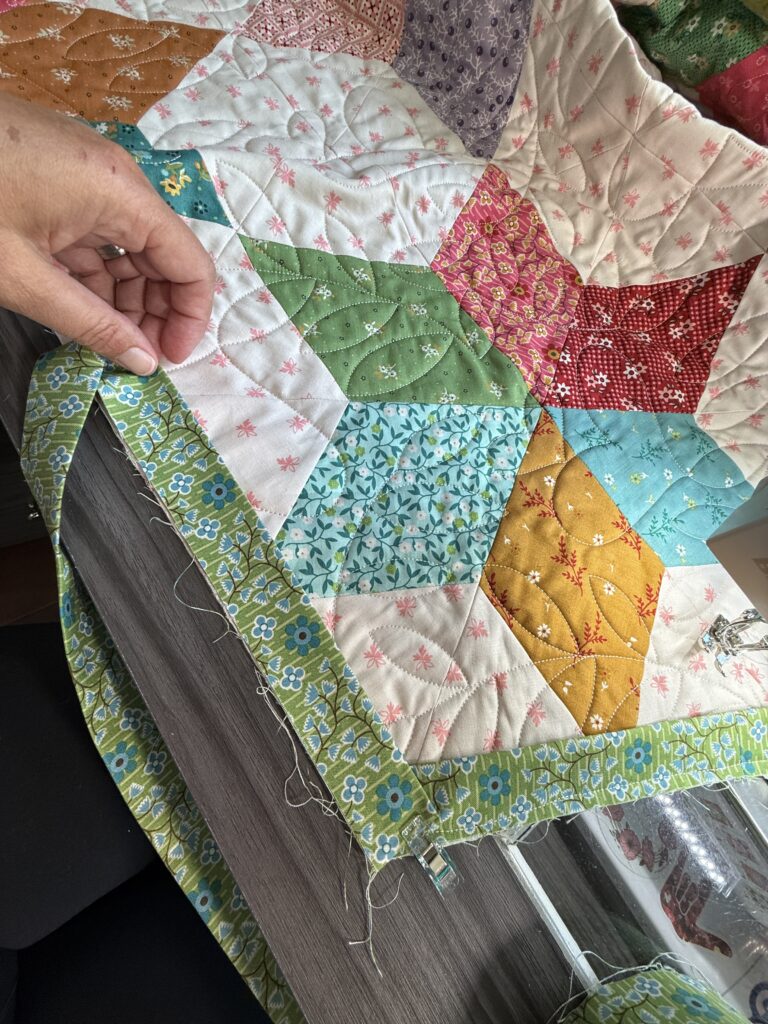
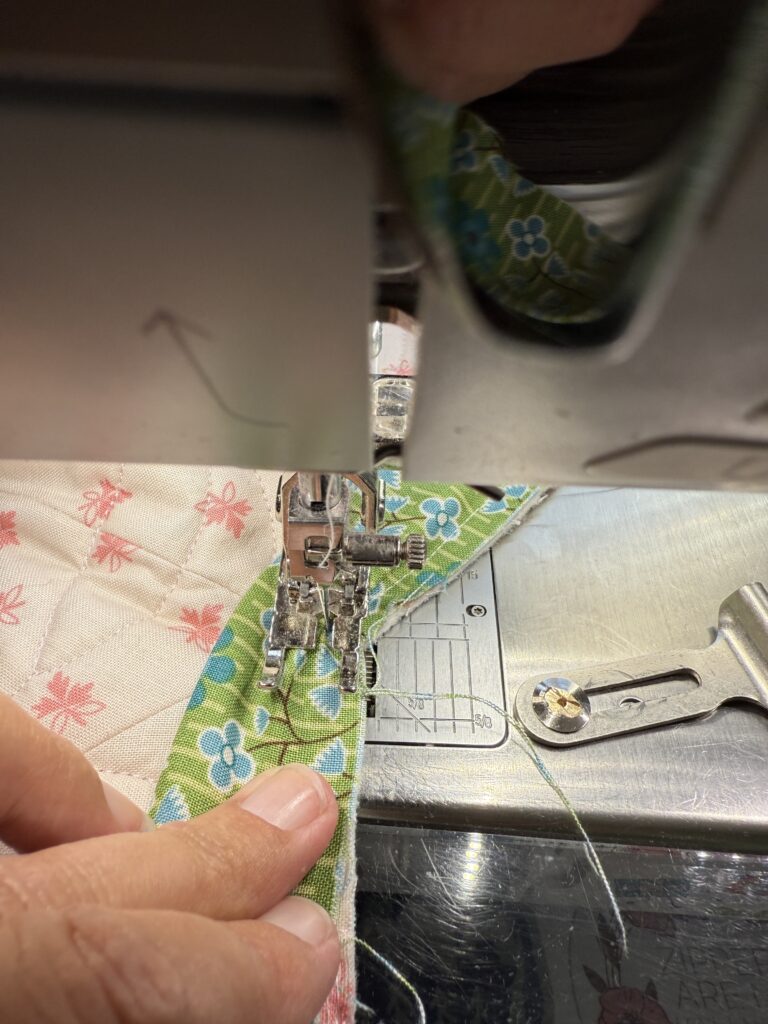
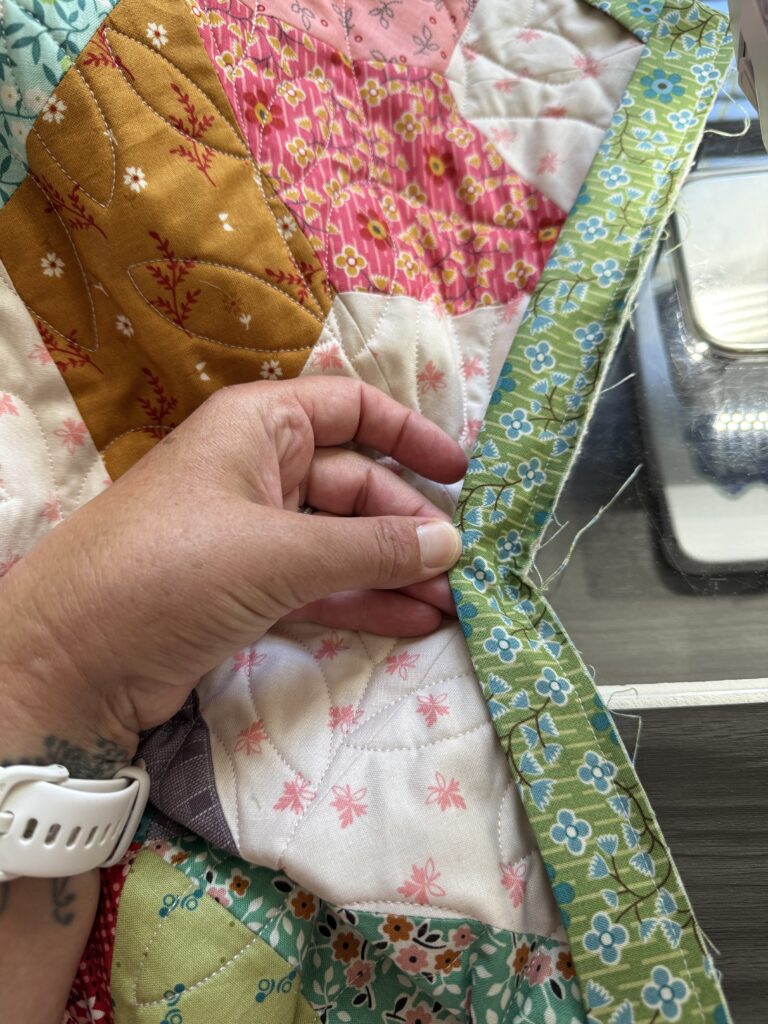
Now, as you may have noticed, I decided NOT to square this quilt up and to leave the hexagon edges intact. I was greatly inspired by the Heart Cookies Quilt pattern by Krista Moser I made earlier this year (find my post about that quilt HERE), and I love that unique finish. This does take a bit of extra effort to bind, but on the bright side, it doesn’t require bias binding, so there is that. I’ve put together a little tutorial on how to bind the inner and outer corners of a quilt like this that aren’t 90 degrees. You can find it on my YouTube channel HERE! Have you ever bound a quilt that wasn’t square? Let me know in the comments!
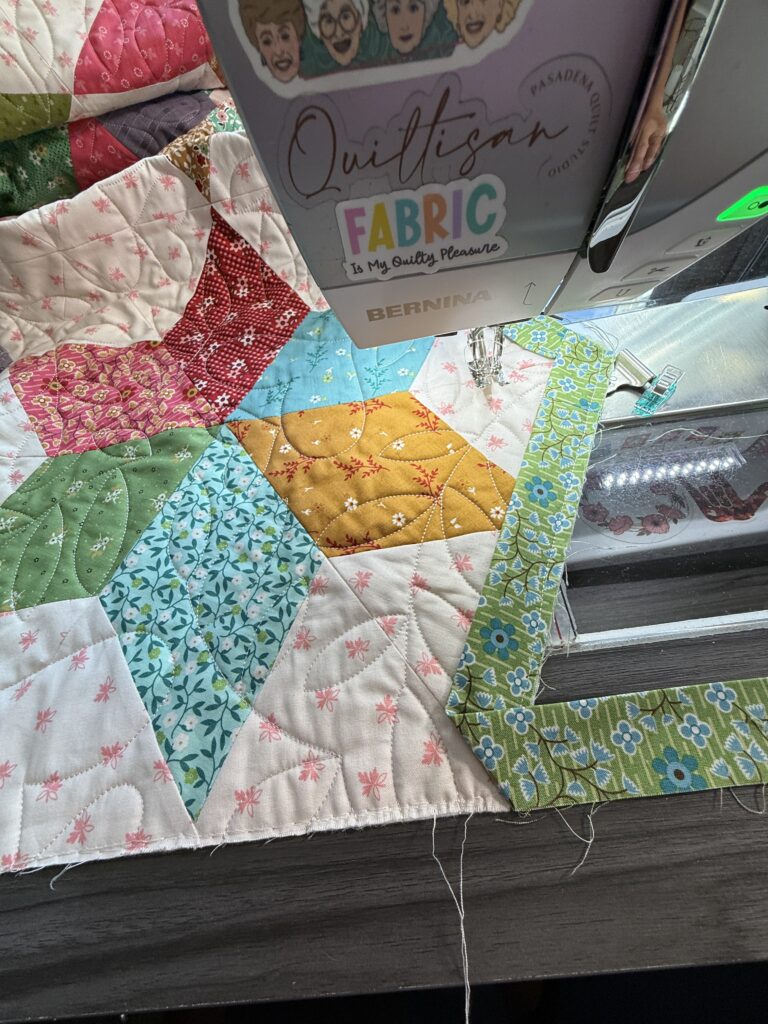
Now, while I promise this isn’t as hard as it might seem, it would be easy to square up this quilt and bind it conventionally. See the graphic below on how you might want to do this! It would require about 20 less diamond units, and would also shrink the width of the quilt down to about 56″ x 78″.
I can’t tell you how much I enjoyed working on these two projects with these colorful, happy fabrics from the Gentler Times collection. Make sure to tag #hexiediamondsquilt if you make your triangle quilt and give me a shout, I’d love to see what you make!
Now, I’ve always got some new sewing shenanigans on deck, be sure to give me a follow on all the socials and see what I’m up to next!
Happy Sewing!
Mary Burroughs-Mayer – Ember Craft Company


5 Comments
Erica
So cute!! Thank you for the tutorial and photos!
Mary Burroughs-Mayer
Thanks so much, I hope you enjoy!
Vanessa
I’m gonna have to try this!
Melanie
Love the overalls ! I’m sure they be a joy to wear!
Kim Thoresen
I absolutely love your overalls. The decor weight fabric is wonderful. I hadn’t seen that design. Well done!