
Desert Daydreams Design of the Month Liz
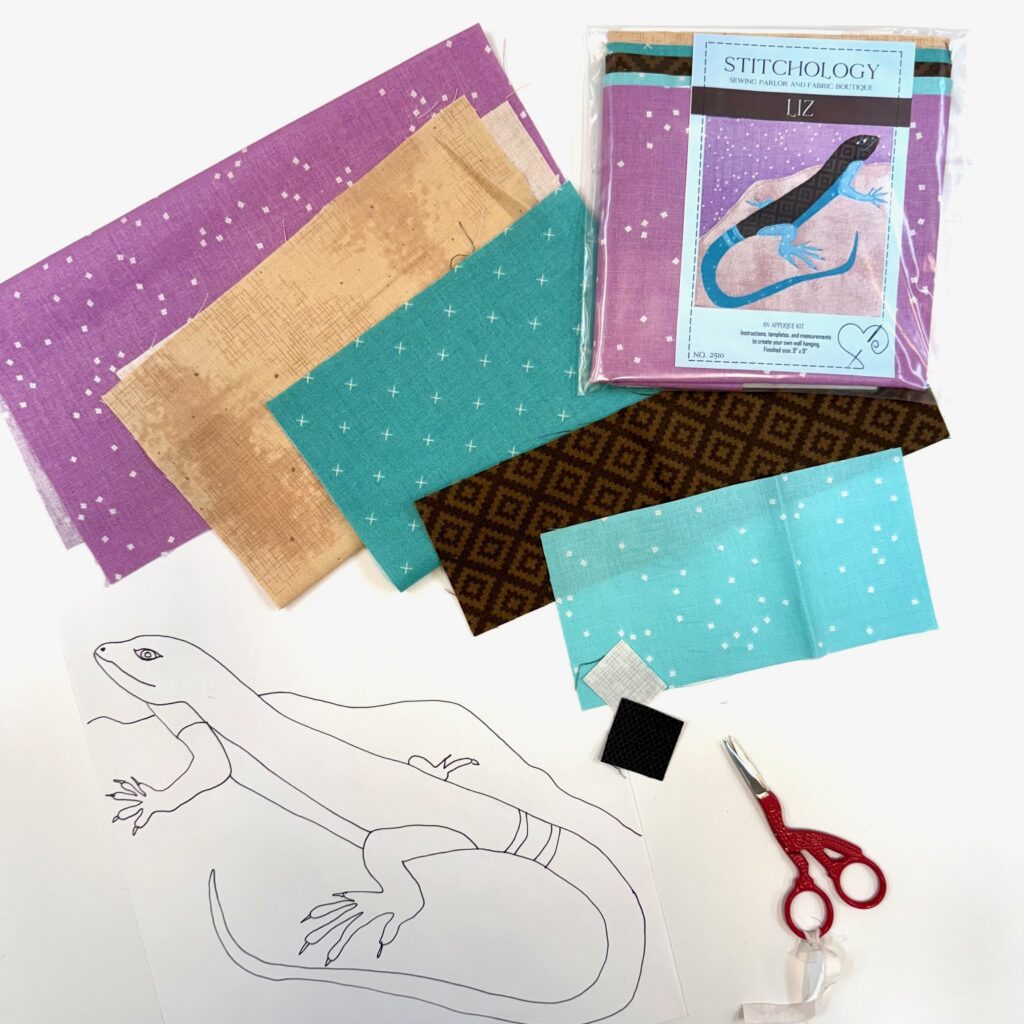
Hi there, all you cool Pins and Needles! It’s Melisa from Stitchology. I’m back today to share with you our 4th block in the 2025/2026 Design of the Month program. On the 2nd Friday of each month, I release a new nine-inch raw edge applique block kit. This year’s theme, Desert Daydreams, is inspired by my childhood in New Mexico. In addition to the monthly blocks, we will release a quilt that incorporates all 12 blocks as we approach the finish line. The blocks are available as kits or PDF downloadable patterns and once the month is over that kit will no longer be available, so you will need to be sure to check back monthly to see the new design and to grab your kit while you can!
Kits can be purchased here:
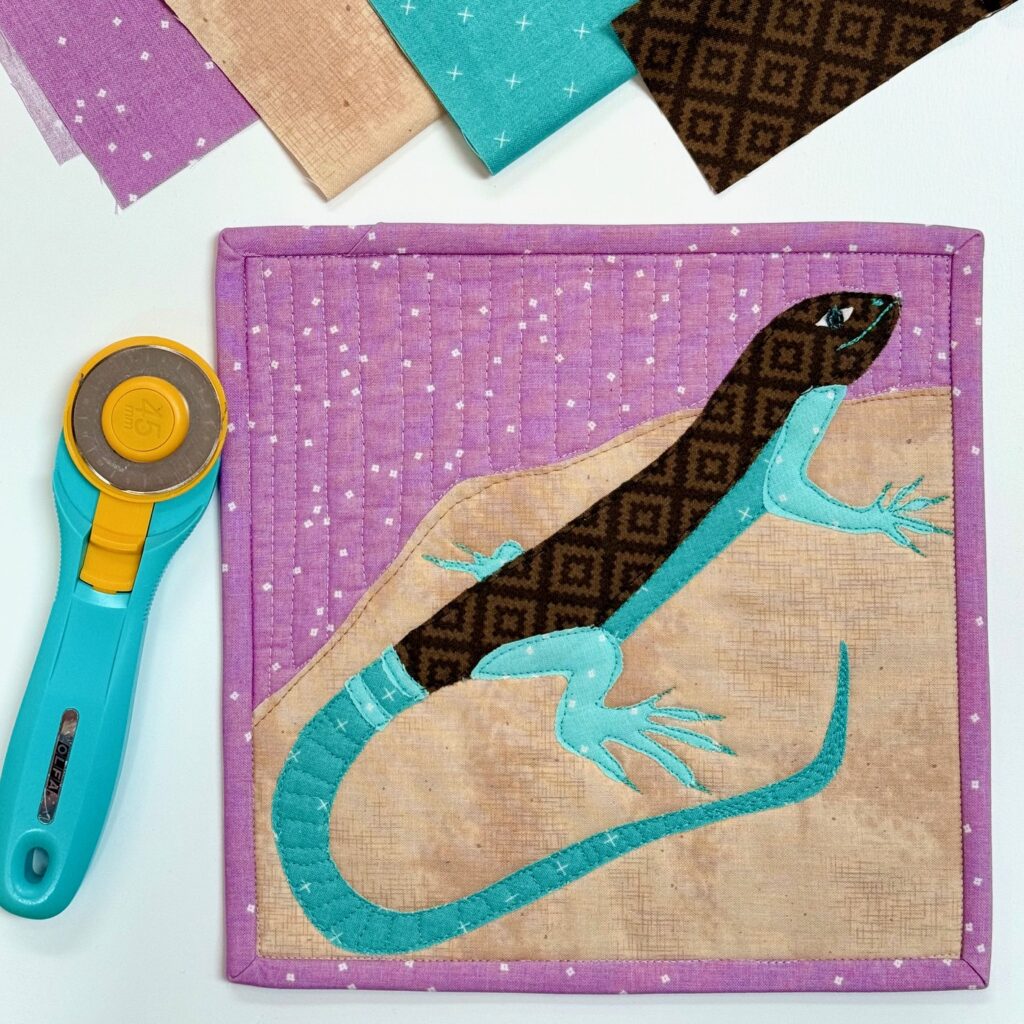
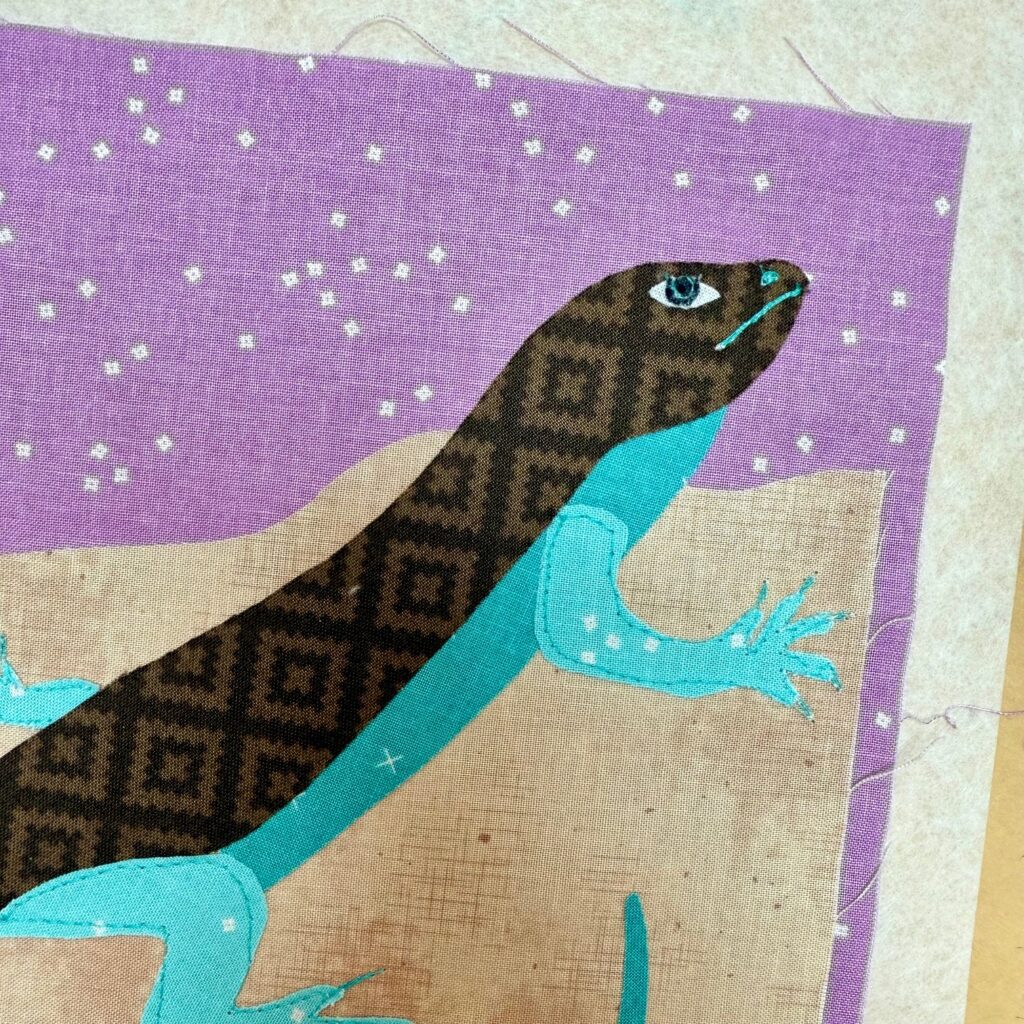
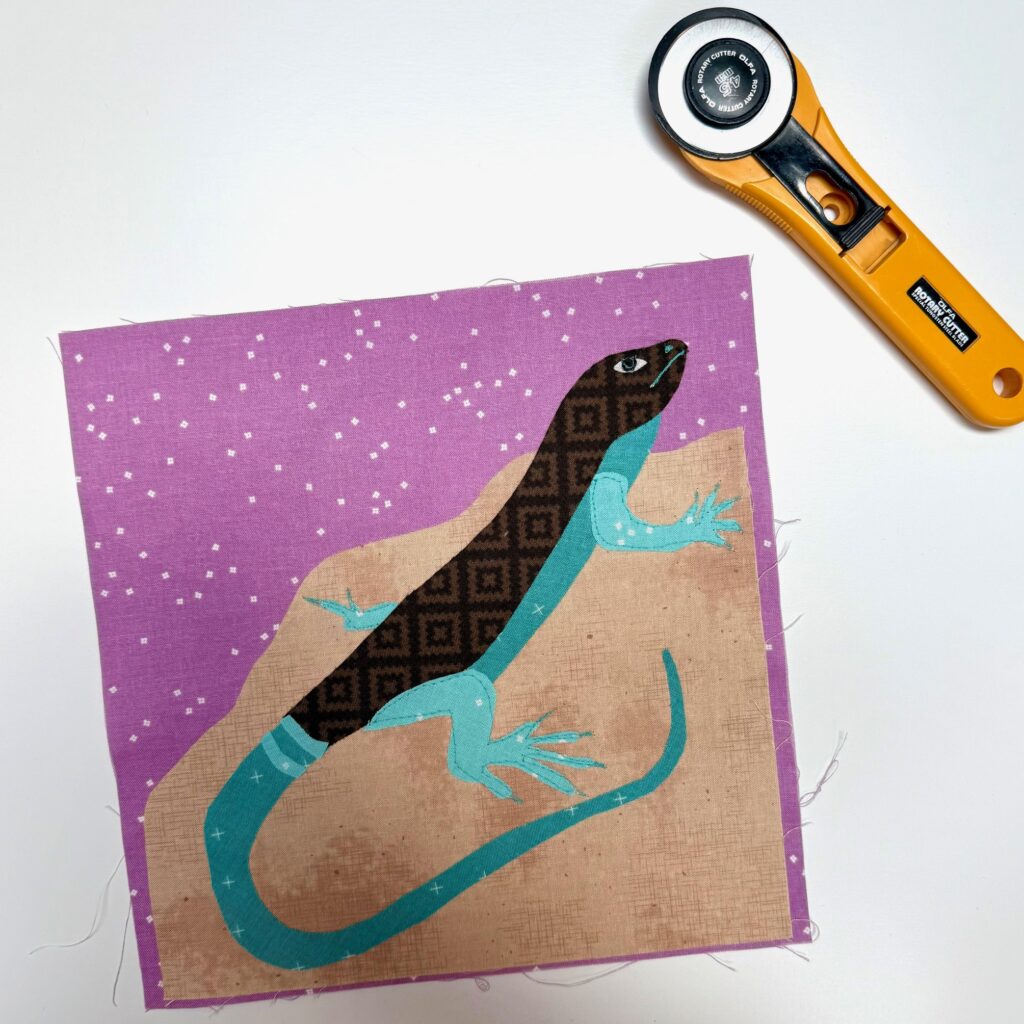
Our fourth block features Liz the lizard. Whiptail lizards are a common sight around the Stitchology porch as well as my yard at home. I’m especially fond of this block because it reminds me of my childhood violin teacher. She turned practicing scales into a song by giving them lyrics that went “see the pretty lizard, sitting on the hot rock, looking for a nice spot”. Those lyrics are forever ingrained in my brain so every time I look at this block I think of her.
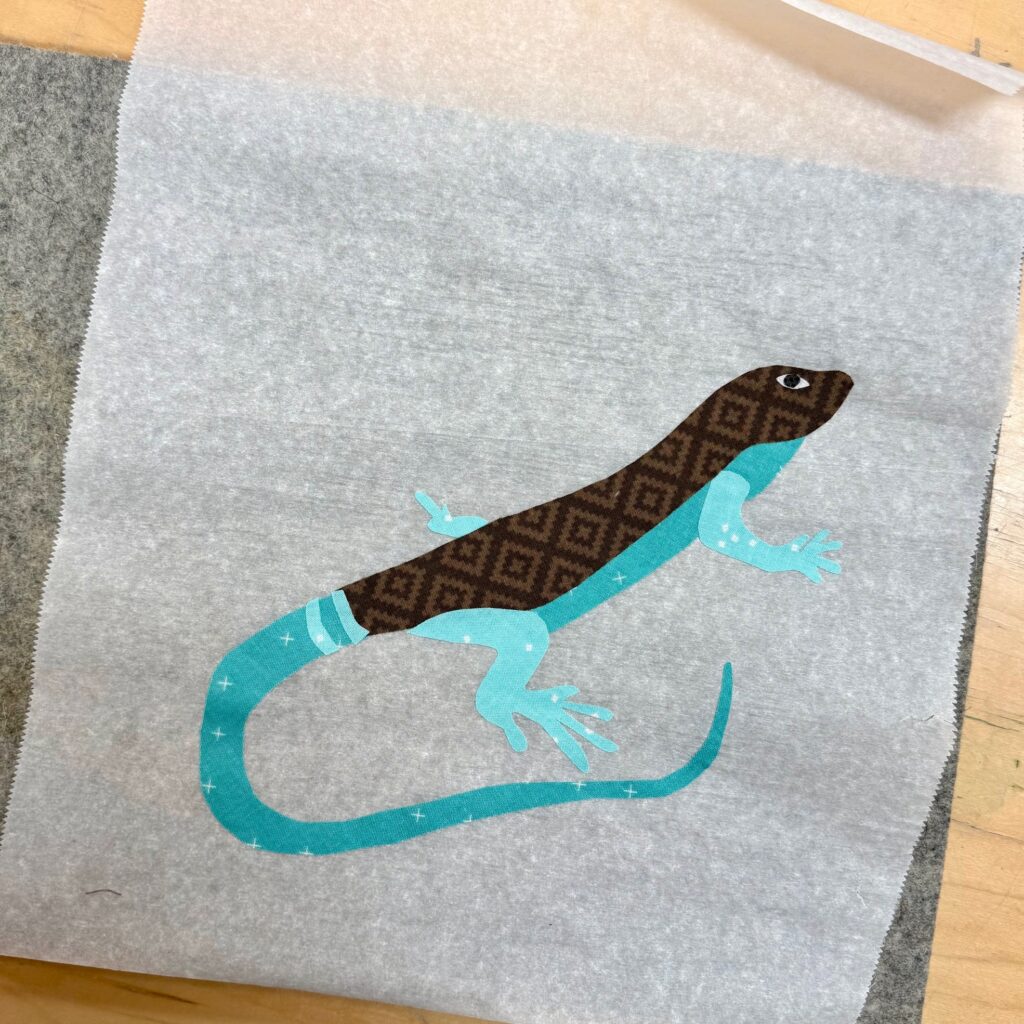
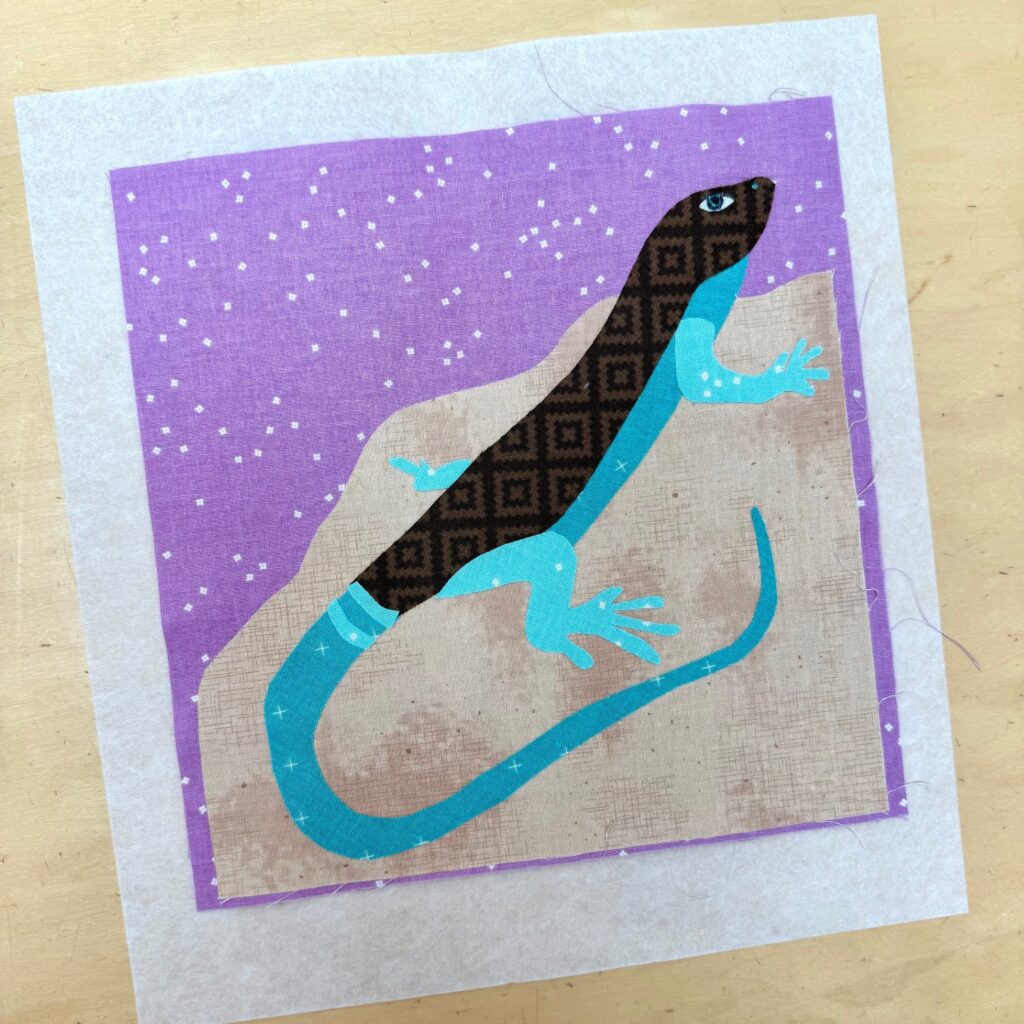
This block is the ideal time to use the parchment paper technique I talked about last month. You can find that tutorial here:
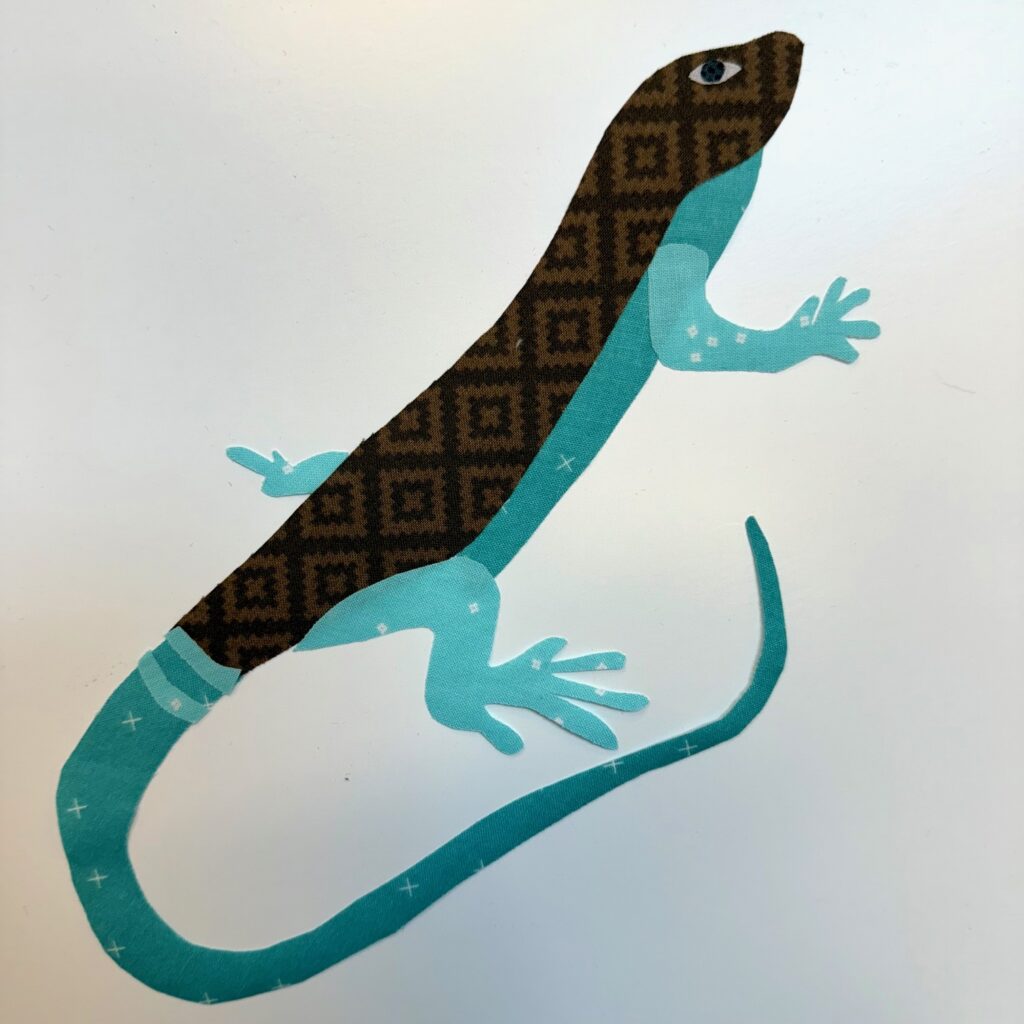
I built the lizard on the parchment and now she’s easy to place exactly where I want. I finished fusing the block as shown in the Coyote post found here:
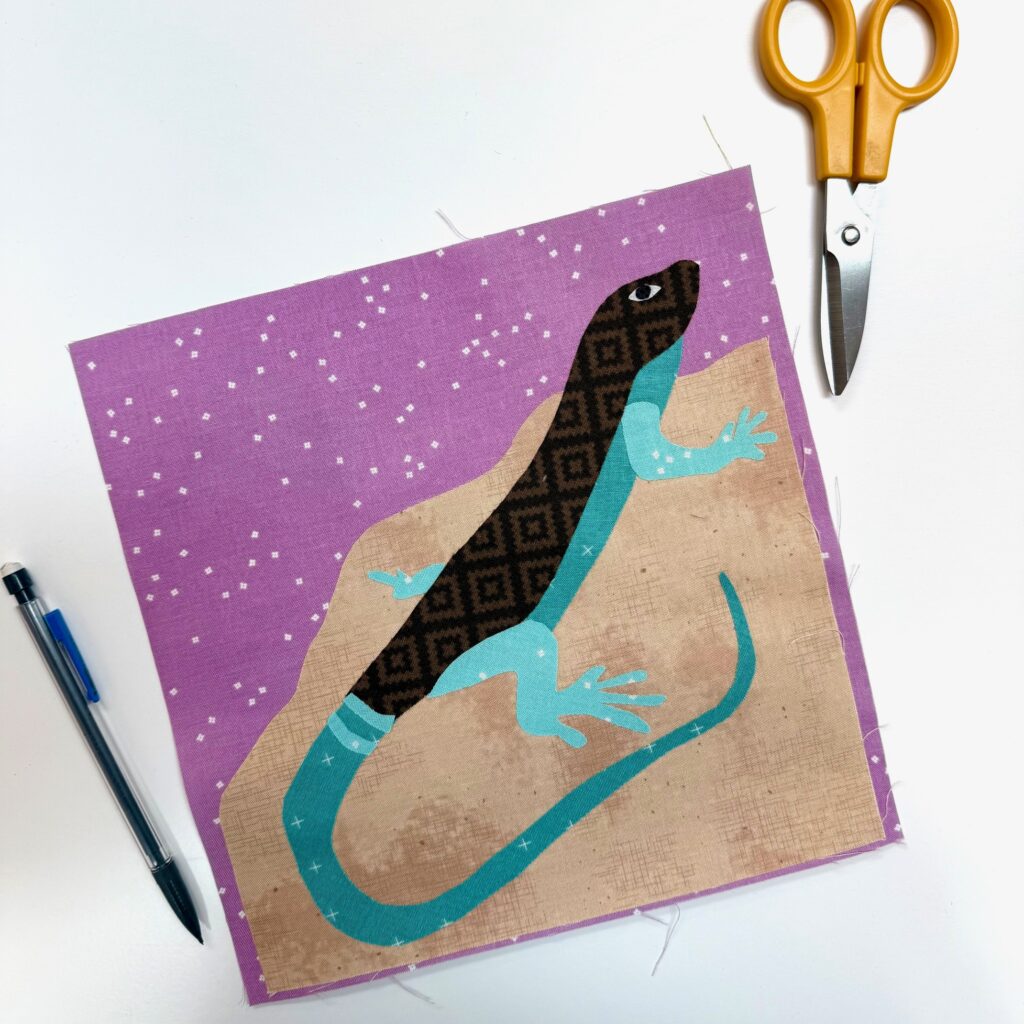
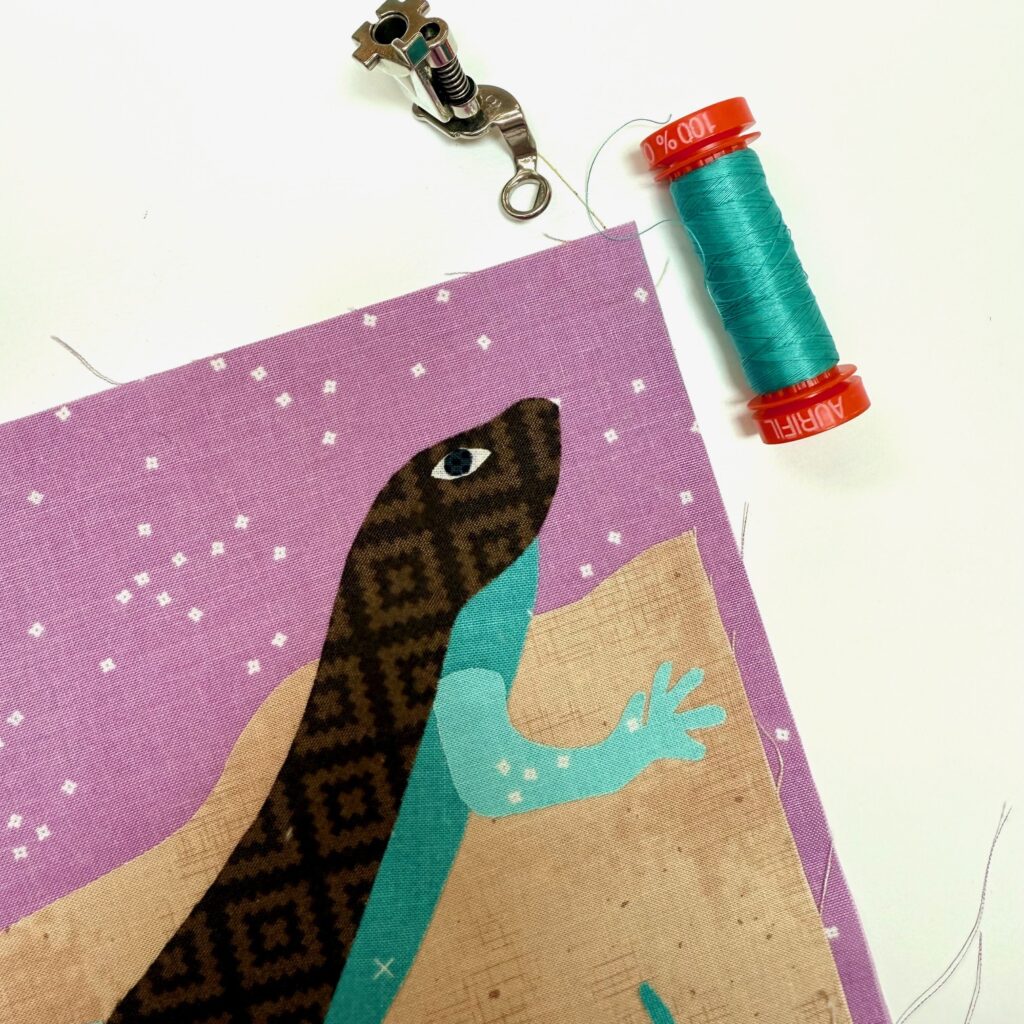
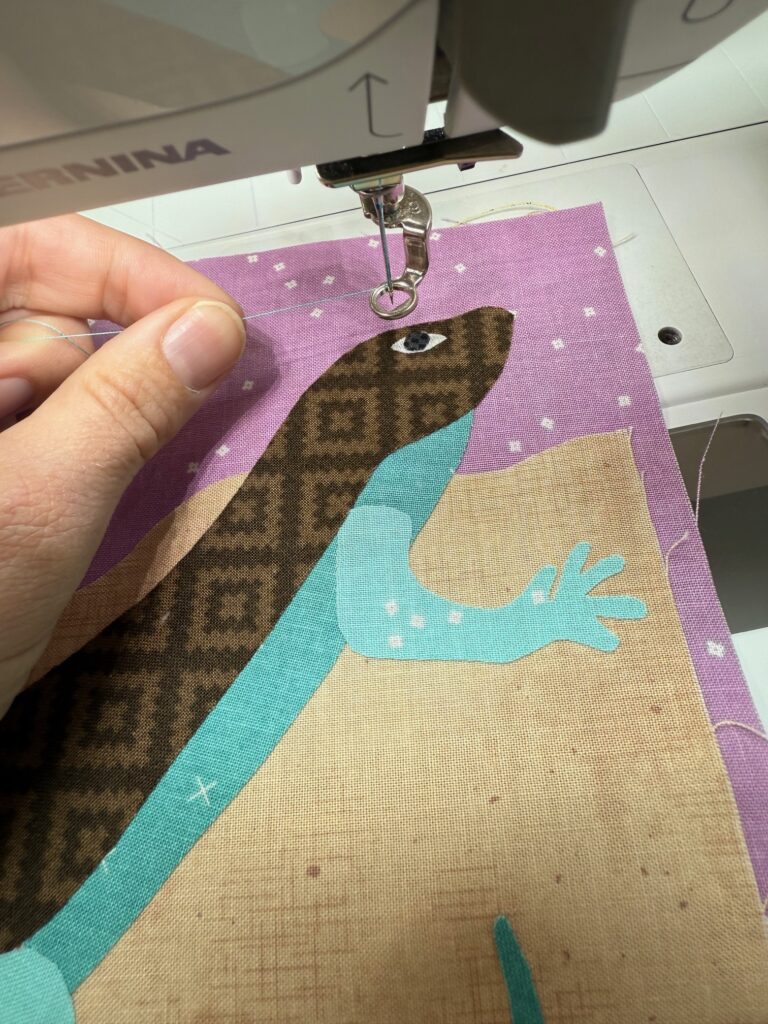
After you fuse your raw edge applique, it is common to stitch around the edges of each piece. Typically, I like to leave this step until after I have completed my entire quilt top so I can incorporate this stitching into the quilting of the project. With our lizard however, I want to use thread painting to add some more details and I am going to go ahead and stitch around some of her parts at this point.
I will be using the free motion quilting technique, so the supplies I will need are
- A free motion quilting foot of my choice
- Thread in a pretty color-I used Aurifil 50wt
- Tear-away stabilizer
Start by cutting a piece of tear-away stabilizer slightly larger than the block. Place the block on top and moving forward treat them as a single layer.
Thread the machine and attach the free motion quilting foot.
Lower the feed dogs on the machine. There is usually a button on the side of the machine, but you may need to refer to your owner’s manual.
Slide your block under the pressor foot and start by pulling the bobbin thread to the top of the block. To do this, keep the pressor foot in the up position and hold the top thread. Turn the hand wheel towards you until the needle goes all the way down and comes back up. Pull the top thread until the bobbin thread loops up. Grab the looped thread to pull the bobbin thread all the way to the top of the fabric. Hold both threads to the side and out of the way.
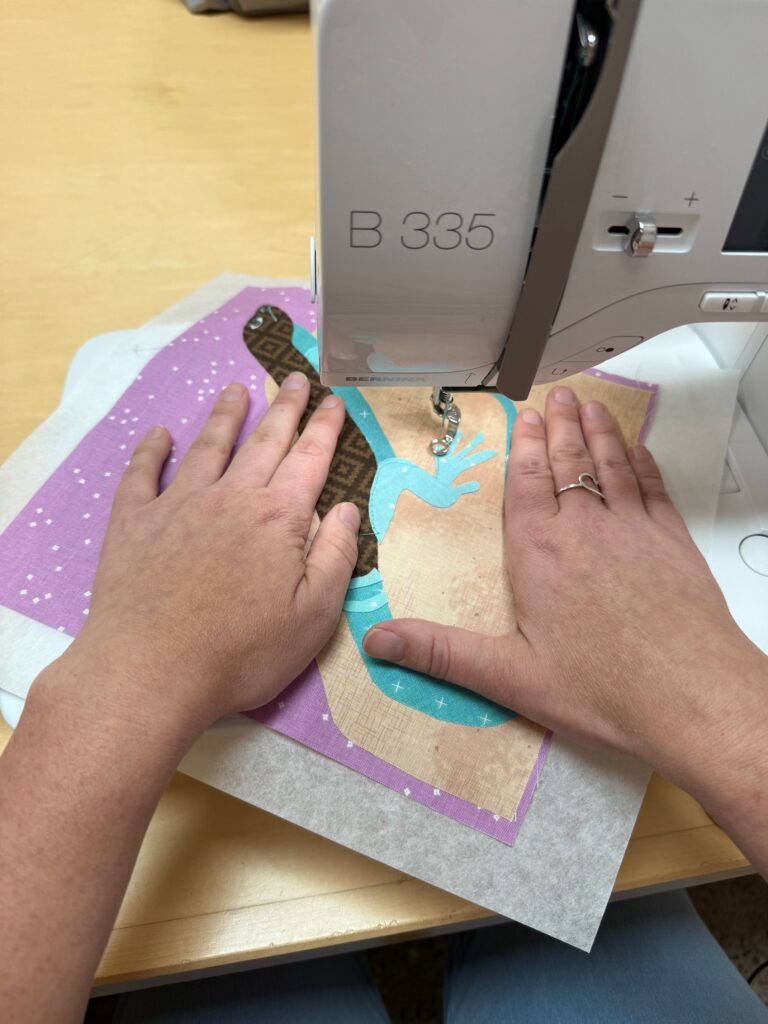
Start stitching and take a few stitches in place to secure the threads. You will be in charge of moving your fabric so place your hands on either side of the needle and gently slide the fabric around the make the design you want. Stitch a little bit and trim your threads so they don’t get tangled in the stitching. When you finish, you will want to stitch in place several times to secure the threads.
I used this method to stitch in Liz’s nose, mouth and claws and it helps give her some personality!
Keep in mind, if you are sewing too fast or moving the fabric slowly you will have short stitches, and if you are sewing too slow, or move the fabric too fast your stitches will be long. Practice to find the right rhythm. Sometimes listening to music with a steady beat can help, and I find staying relaxed helps a lot! Embrace the imperfections and this will be a much easier technique to master.

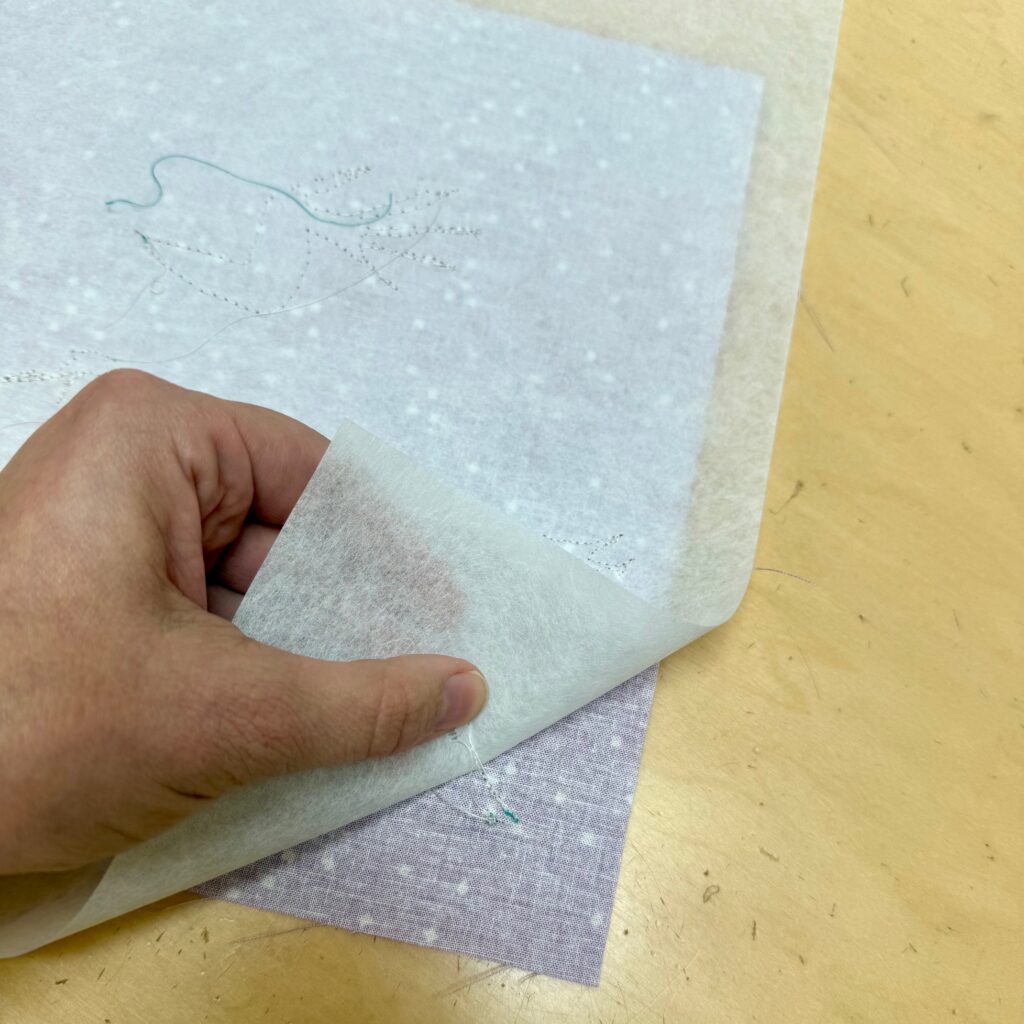
Once you are finished stitching, you can carefully remove the tear-away stabilizer.
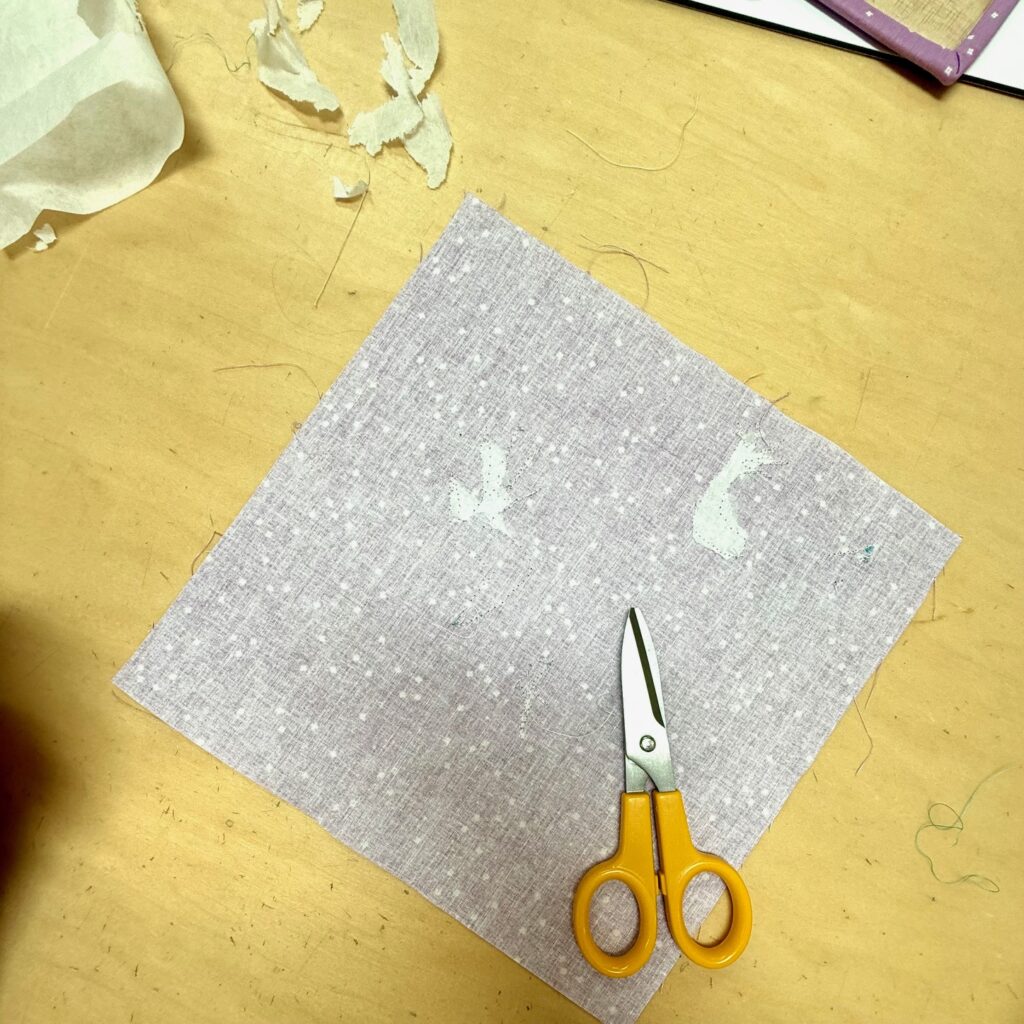
You have now completed the Liz block and she can be set to the side until all the blocks are finished, or you can quilt her now and make her a small wall hanging. We will be back next month with some more tips on raw edge applique.
Thanks for reading!
Melisa


One Comment
Pingback: