Creating a Gradient Quilt with Colorful Batiks
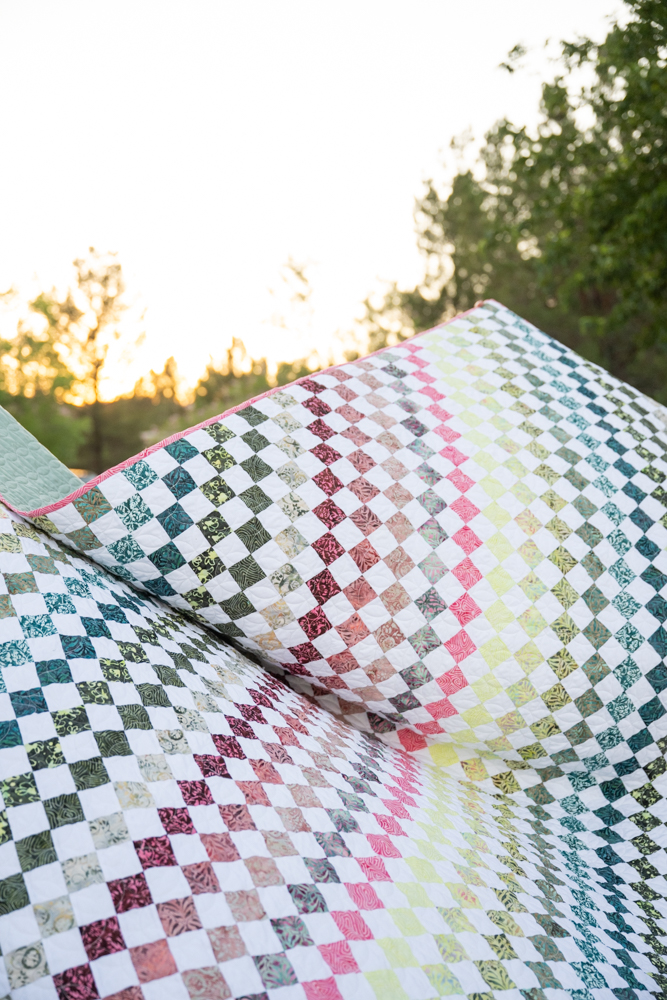
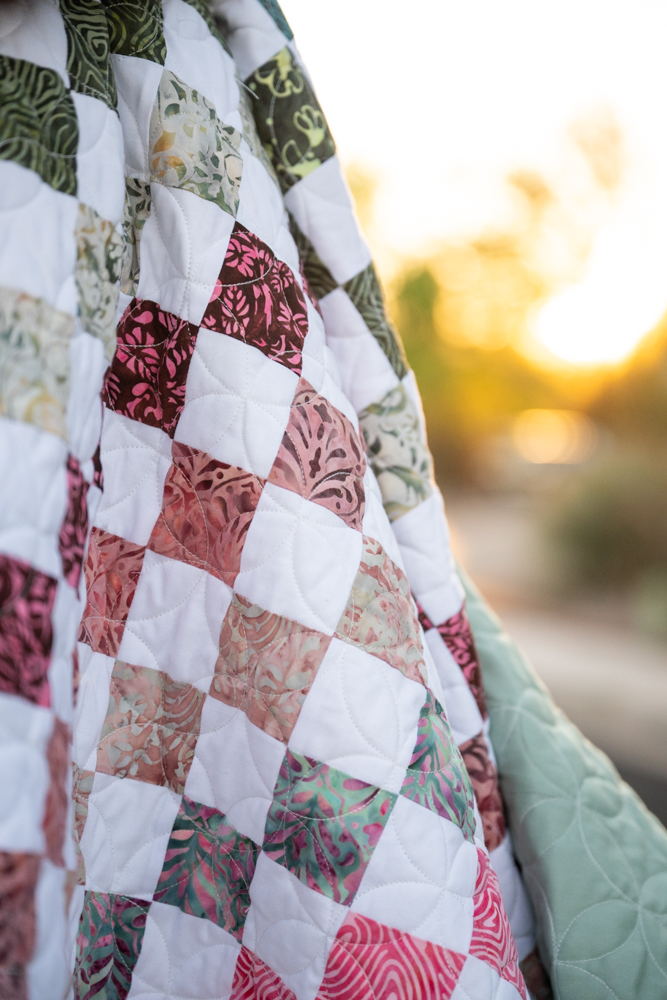
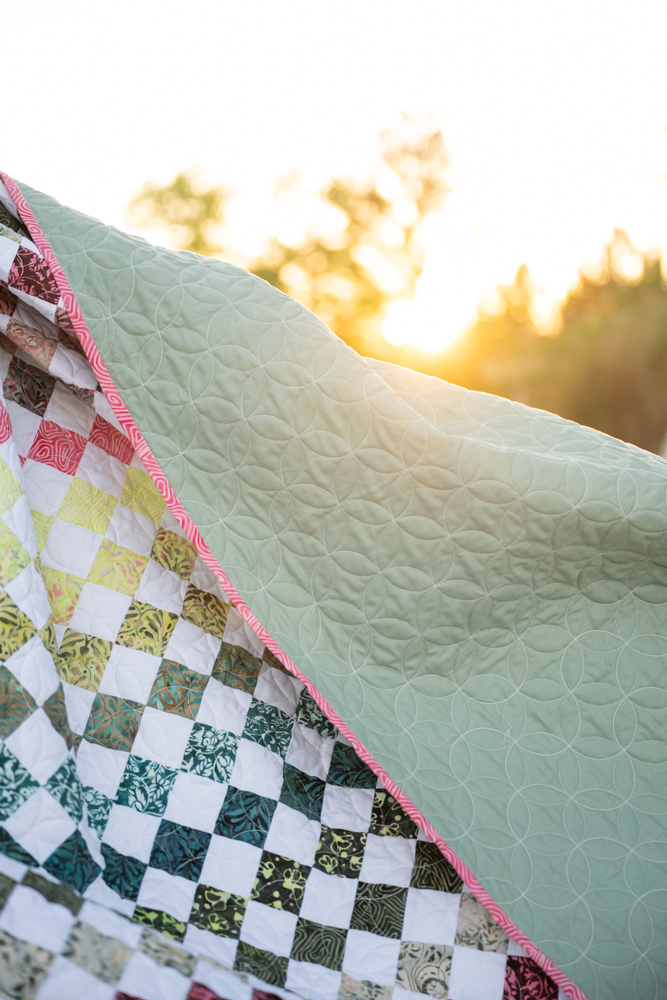
There’s something deeply satisfying about making a quilt with nothing but fabric, a rotary cutter, and an idea. My most recent quilt was created from 2 ½ inch squares using colorful Ornamental batiks and Riley White in a diagonal gradient checkerboard pattern—and I didn’t use a pattern to make it.
Instead, I followed my instincts and let the fabric guide the process. Here’s how I made this quilt from start to finish, and how you can too.
⸻
- Plan Your Gradient
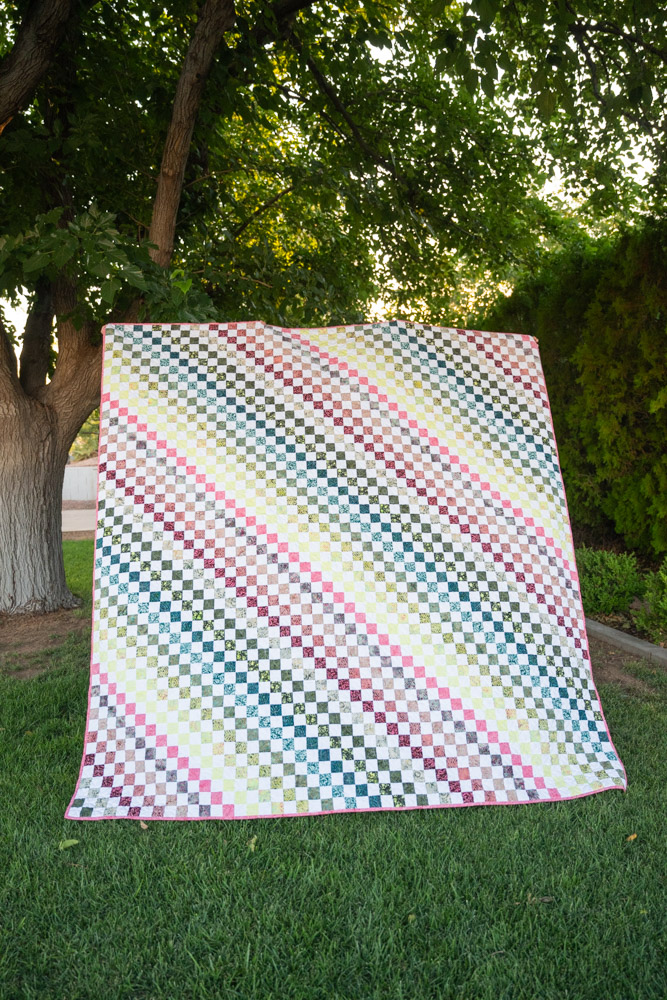
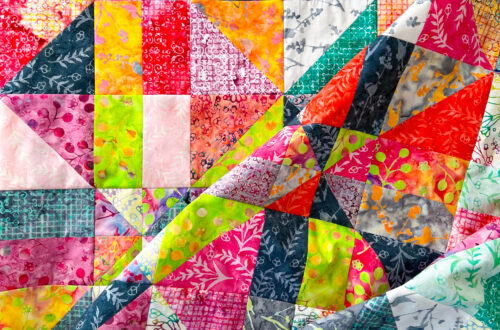
This quilt is all about color flow, but instead of transitioning from top to bottom, the gradient shifts diagonally, moving across the quilt in soft, wave-like bands.
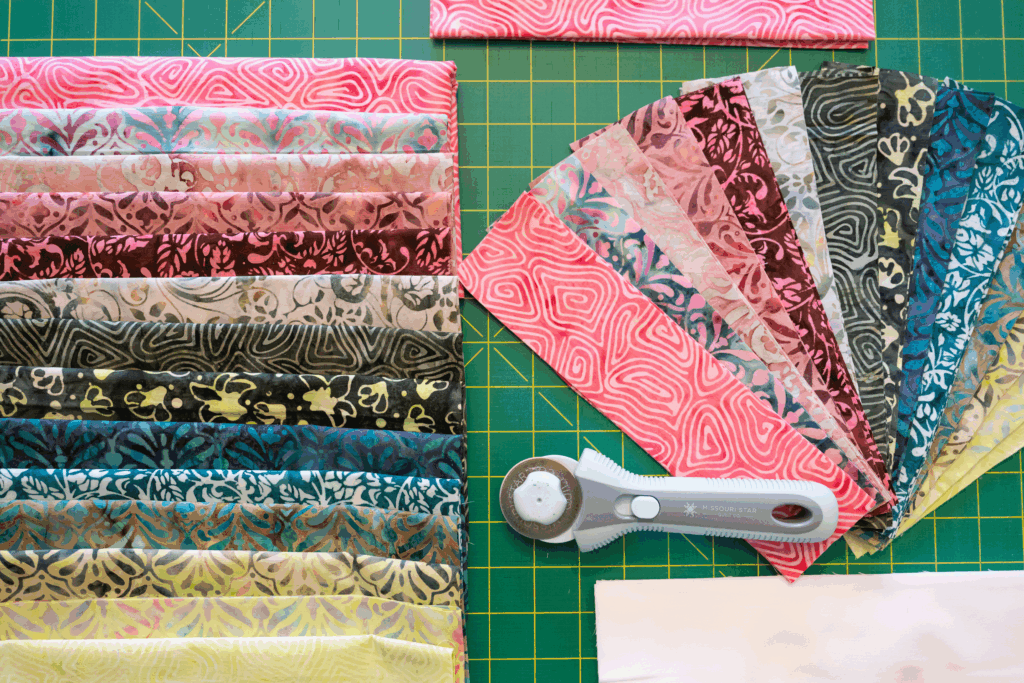
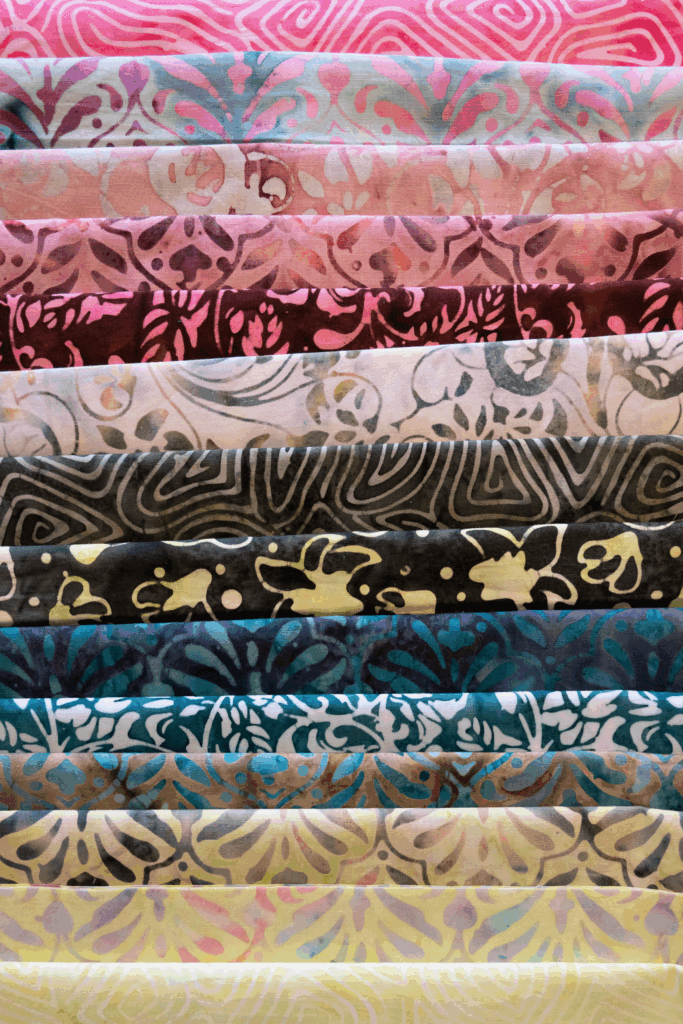
• Choose your color style: I chose a rainbow gradient using the Ornamental batik line, which has rich tones from reds to pinks, lime greens, teals, navies, and earth tones.
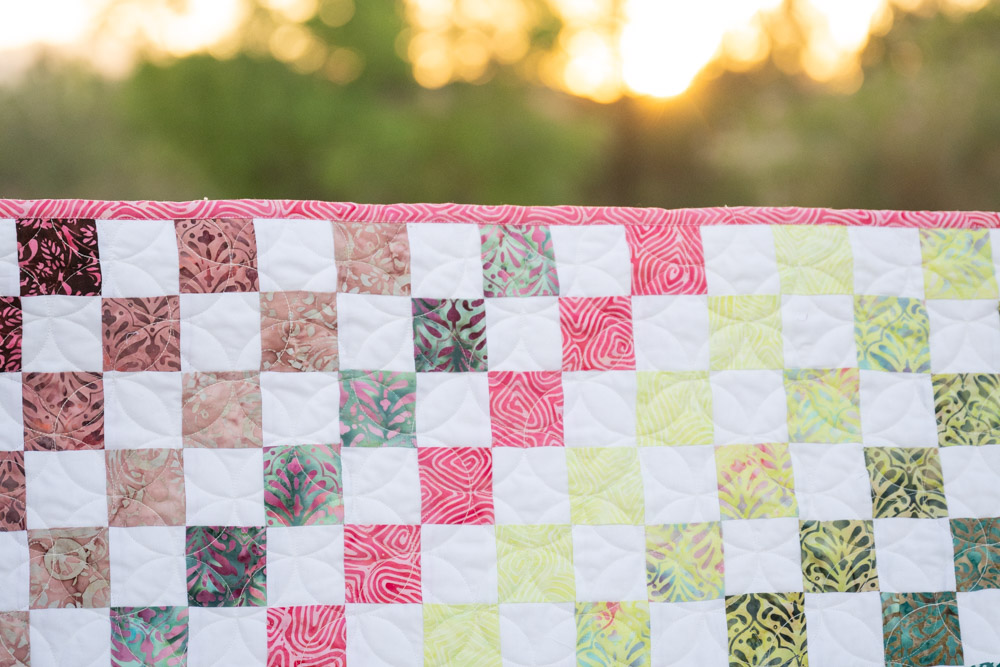
• Order your fabrics: I laid out all my batik fabrics in a rough gradient, then refined it by placing the lighter/brighter fabrics (like yellow-lime and hot pink) near the center diagonal line of the quilt. From there, the colors deepen and cool as they radiate outward diagonally toward the corners.
• Think diagonally: Each diagonal row of colored squares represents a gradual shift in color. This is what gives the quilt its movement and dimension. Rather than changing color row-by-row horizontally, I adjusted the color diagonally to create soft transitions.
⸻
- Prepare Your Fabrics
The checkerboard design requires two contrasting fabrics in each square: one batik (Fabric A), and one Riley White square (Fabric B). Here’s how I cut and prepped:
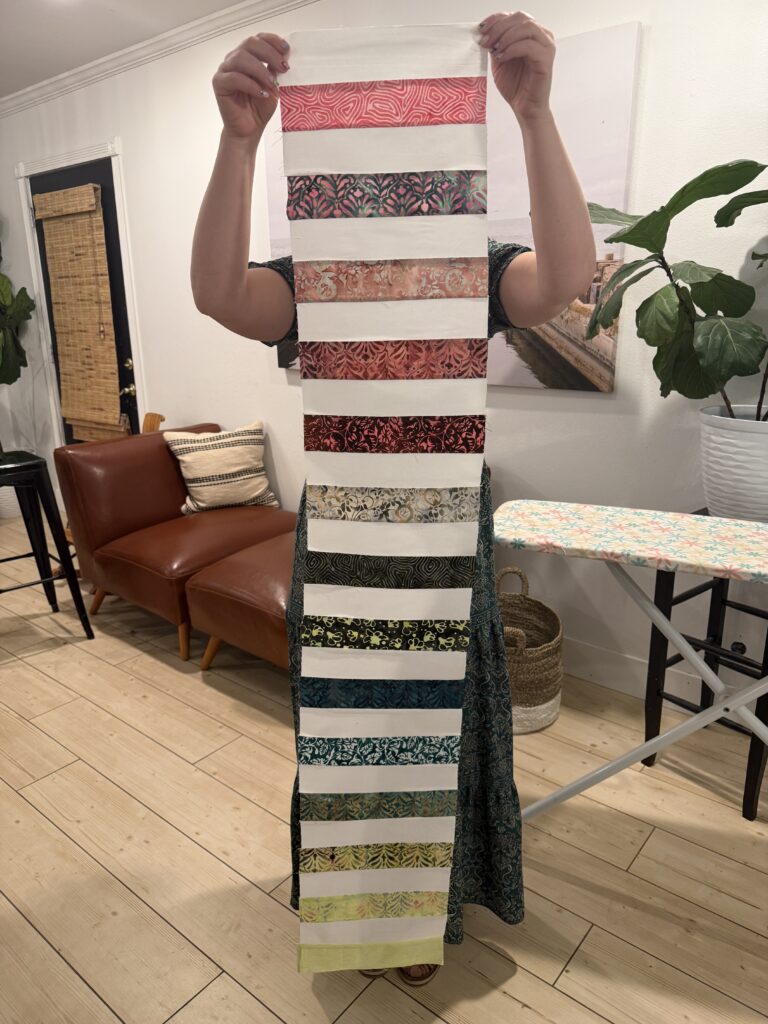
• Cut strips first: I cut all fabrics into 2 ½ inch wide strips.
• strip piecing: sew a batik strip and a white strip together, then subcut them into 2 ½ inch units to save time. I did this in rows where I repeated a single color consistently.
⸻
- Construct Your Rows
Here’s where the checkerboard really starts to come together.
• Sew squares into rows: Each row alternates Riley White and batik fabric squares. I began every other row with the opposite fabric to maintain the checkerboard effect.
• Build diagonals: To create the gradient, I carefully placed batik colors so they would move on a diagonal across the rows. For example, if I had pink batiks starting near the center, I’d place another pink one up and to the right in the next row, and continue building that diagonal “band.”
• Press your seams: I pressed the seams in each row toward the batik squares (the darker fabric), so the rows would nest easily when joined.
⸻
- Assemble the Quilt Top
Now it’s time to see your design really come alive.
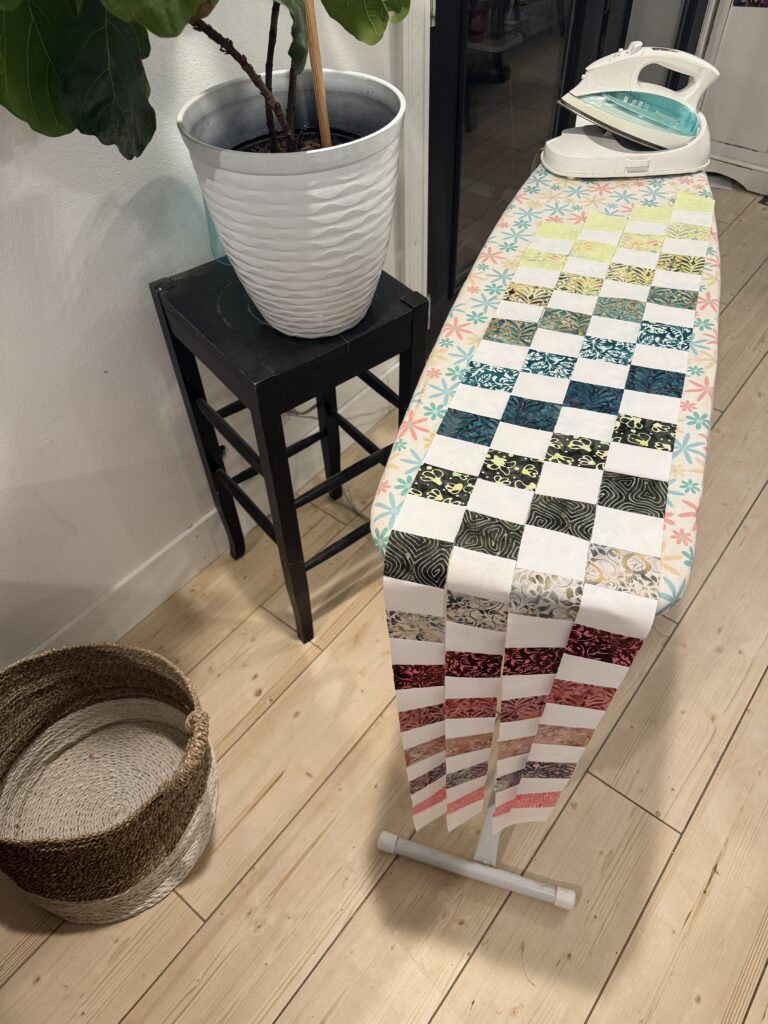
• Lay out your rows: With your checkerboard rows ready, lay them out in the order you planned. The gradient should move diagonally from one corner to the other, with white squares anchoring the pattern.
• Sew the rows together: Join the rows, pinning at intersections to keep your points crisp. Press the seams in alternating directions (up, down, up…) for perfect nesting.
⸻
A Few Tips That Helped Me
• Step back often: I laid my quilt top out on a design wall (or the floor) and stepped back to squint at the color flow. I rearranged squares as needed until the gradient looked natural.
• Don’t stress perfection: This quilt thrives on movement and texture. A few spontaneous changes or color surprises only make it more interesting.
• Label your rows before sewing them together—especially if you’ve got a large quilt like this one. I used painter’s tape with row numbers.
⸻
This quilt is one of my favorites—not just because of how it looks, but because of how it came together: no pattern, just a plan and a vision. The combination of Ornamental batiks with Riley White gave the quilt both boldness and balance, and the checkerboard layout made the gradient feel structured and dynamic.
If you’ve been eyeing your stash and thinking about trying something new, I highly recommend experimenting with a checkerboard gradient design. It’s perfect for 2 ½ inch squares, easy to adapt to your fabric style, and endlessly satisfying to watch come together.
Have questions about creating your own gradient layout? Want to share your version? Drop a comment or tag me—I’d love to see what you make!
Xo- Liz https://www.instagram.com/joystitched?igsh=NmtpZDRqZGRoOTli&utm_source=qr


2 Comments
Teresa Evenhouse
Absolutely breathtaking!
Katey
How many yards of fabric did you use for this quilt?