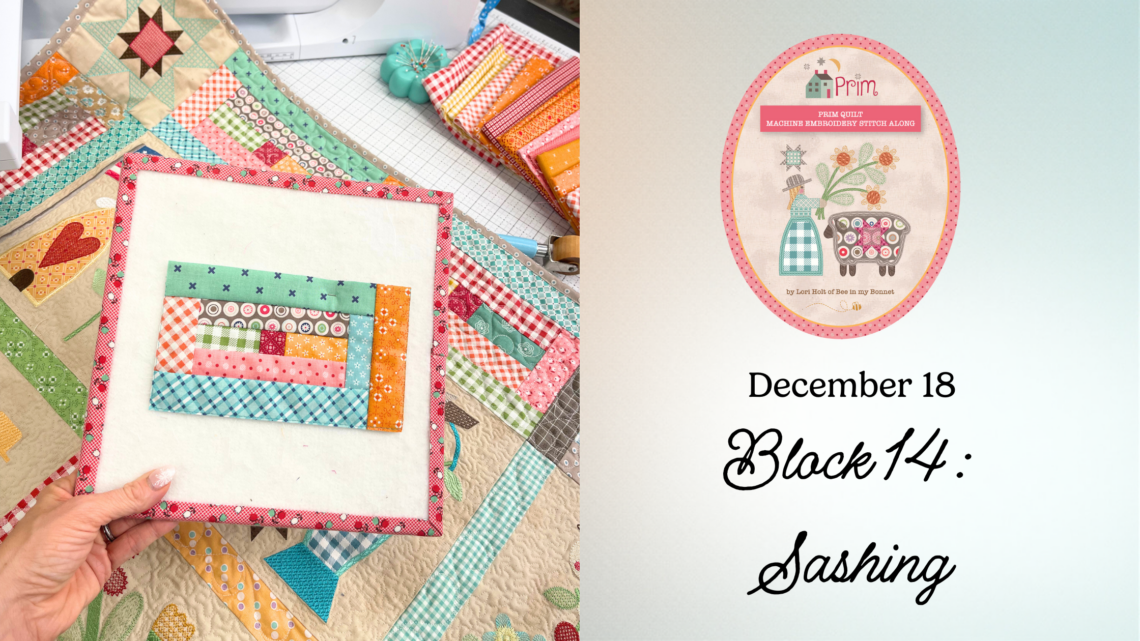
Prim Machine Embroidery Stitch Along – Block 14
Block 14: Prim Steps (A–N)
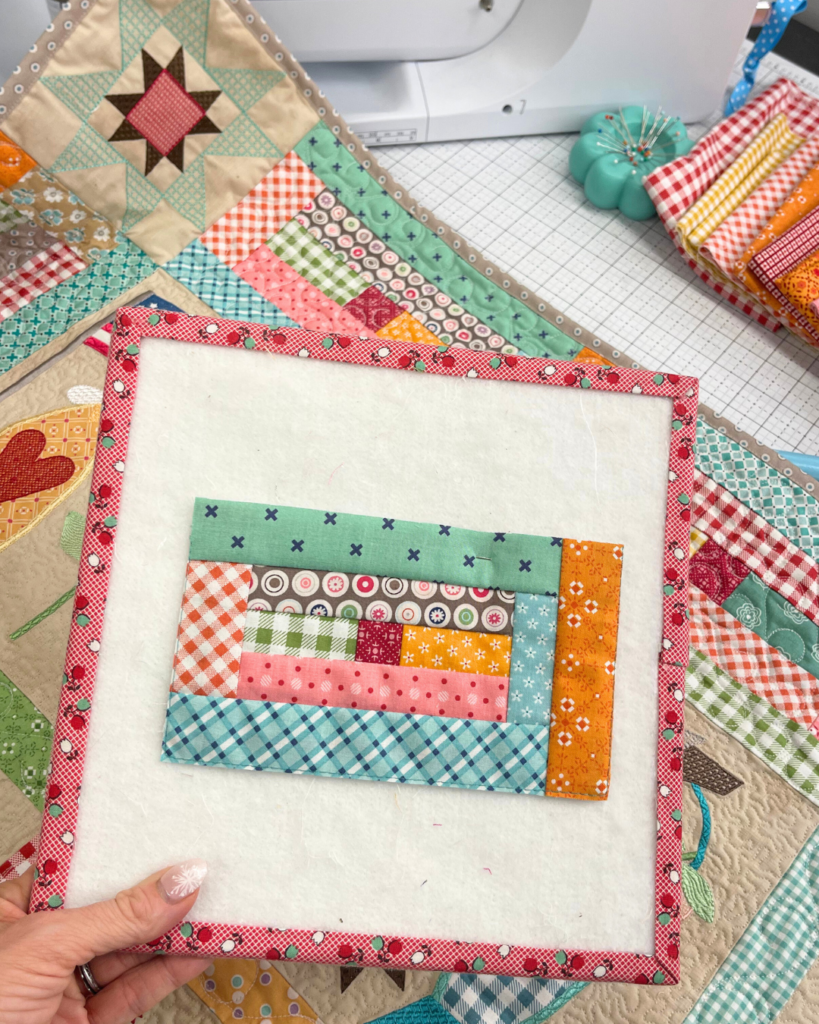
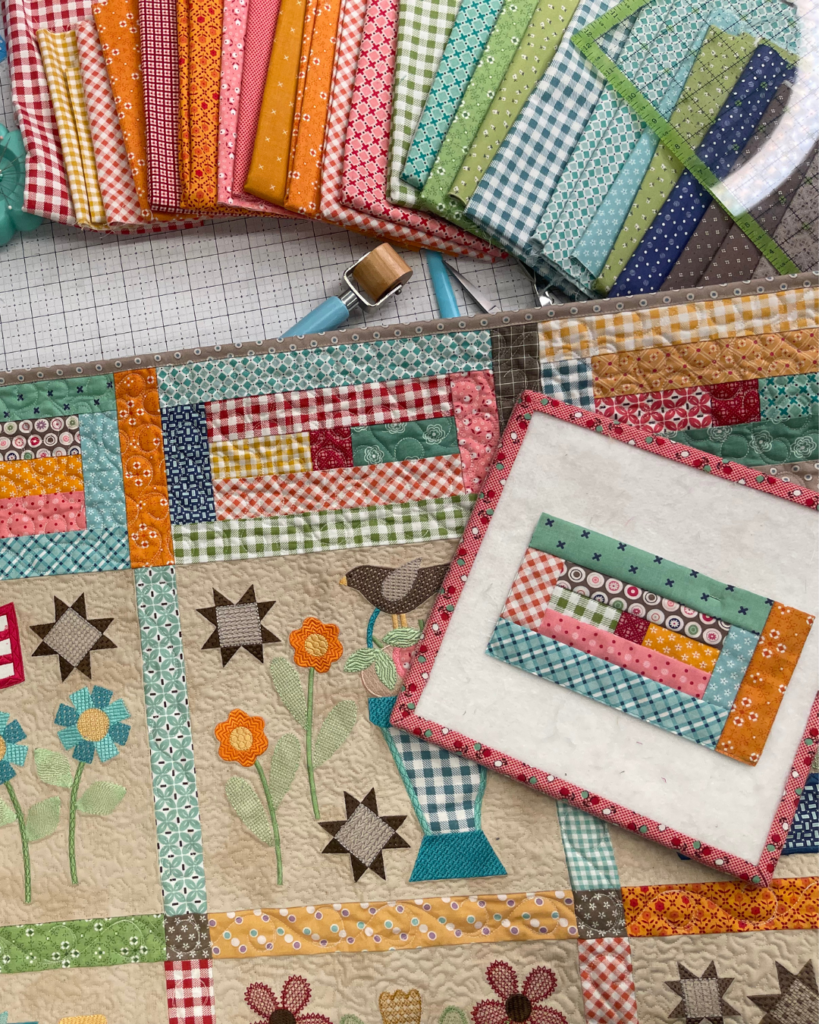
Sashing
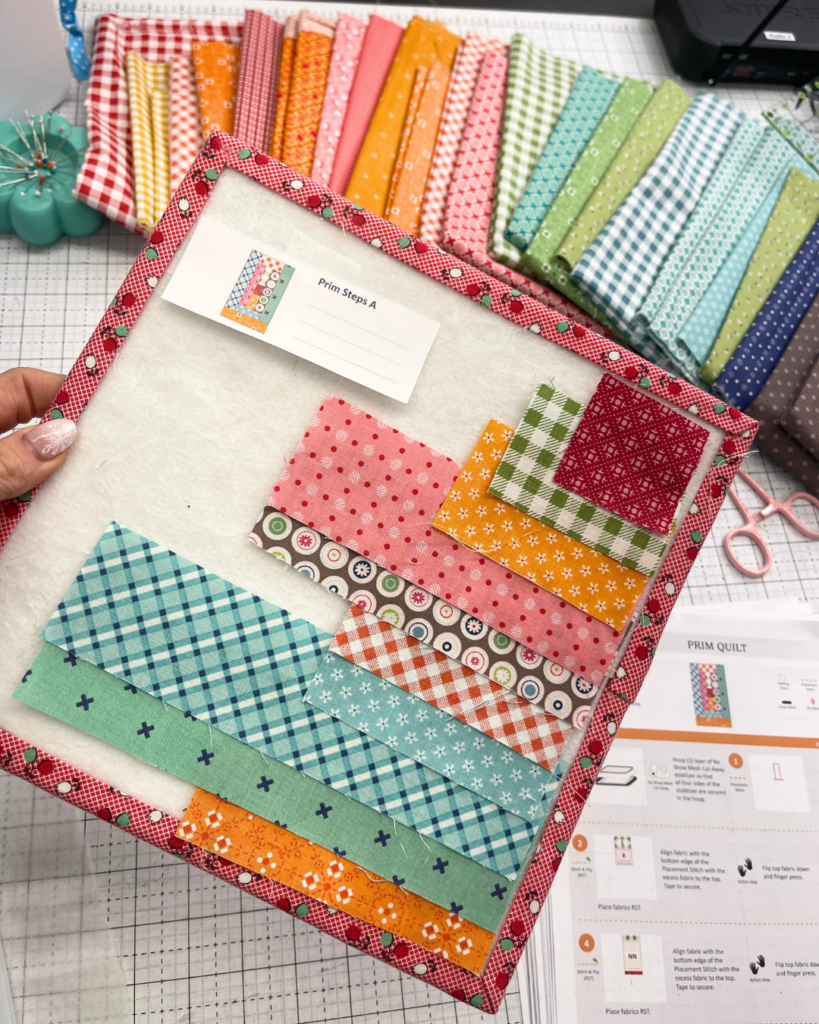
The Prim Steps blocks (A–N) create the foundation of the quilt layout, tying all of the individual motifs together with clean, simple movement. Though these blocks may look straightforward, they’re incredibly satisfying to stitch and they give you the chance to enjoy one of the most accurate and enjoyable techniques in machine embroidery: the stitch-and-flip method.
These repeating blocks showcase how precision and fabric play can transform simple shapes into beautifully consistent sashing for your Prim quilt.
Stitch-and-Flip: Simple, Fun, and Incredibly Accurate
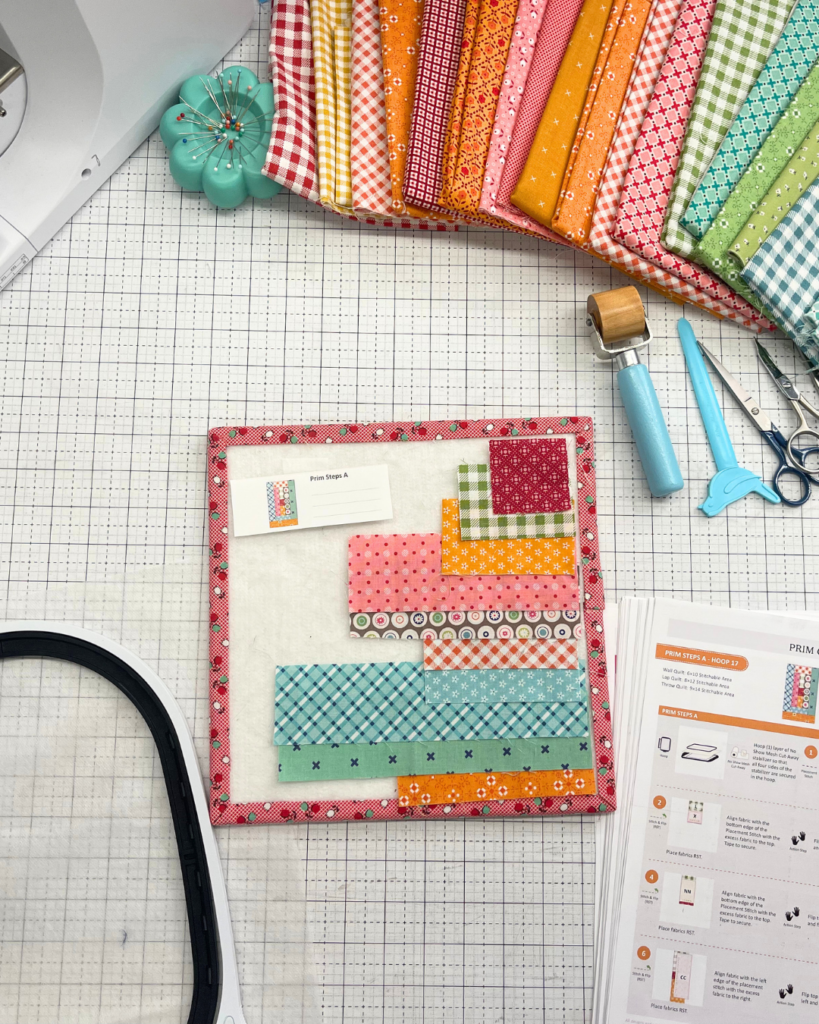
The Prim Steps blocks rely almost entirely on stitch-and-flip construction, which creates crisp angles and even spacing throughout the sashing. It’s a method that feels almost like piecing a quilt, but with the added accuracy of your embroidery machine.
Why it works so well here:
- The placement stitches show exactly where each piece goes.
- The tack-down stitches secure each fabric cleanly.
- The flip reveals a perfectly angled piece every single time.
- Repeating the process across multiple blocks builds consistency with no guesswork.
These blocks stitch quickly and give you a rhythm you can settle into, making the sashing portion one of the most enjoyable parts of the entire quilt.
Play With Fabric Choices
Because the Prim Steps appear throughout the quilt, they offer a wonderful opportunity to explore fabric variety while still maintaining cohesion.
You can:
- Use several coordinating prints for a scrappy, vintage feel.
- Repeat a single print throughout for a more unified look.
- Feature small-scale or directional prints to add subtle detail.
- Match your fabrics to the motifs they sit near on the quilt layout.
Each step block is small, so even tiny fussy-cut moments can shine.
Precision Matters: Trimming With the Guide Stitch + Size Chart
Unlike the earlier blocks, which rely heavily on Trim-It™ Rulers, the Prim Steps blocks require a slightly different approach.
Each step block includes a guide stitch outline sewn at the end of the embroidery sequence. This outline tells you exactly where to trim.
For best results:
- Compare the guide stitch outline with the measured size chart in the pattern.
- Trim directly along the guide stitch for accuracy.
- Confirm your final measurement matches the block size listed for your stitchable area (6×10, 8×12, or 9×14).
- Keep trimming consistent across all steps so the sashing assembles cleanly.
This combination, visual guide + measurement check, ensures every step block fits perfectly.
Stabilizer: A Change for the Prim Steps
The Prim Steps are stitched differently from the motif blocks.
Instead of Heavy Weight Tear-Away, these sashing blocks use No Show Mesh Cut-Away Stabilizer.
Why this stabilizer is ideal here:
- It supports the lighter stitch density used in the steps.
- It prevents distortion along the long, narrow block shapes.
- It keeps the finished blocks soft and flexible for quilt assembly.
- It ensures seams stay smooth and accurate when joining multiple steps.
Hoop a single layer of No Show Mesh Cut-Away, making sure all four sides are evenly tensioned before stitching.
Watch and Stitch Along
You can follow the complete Prim Steps tutorial on the Riley Blake Designs YouTube channel:
The video demonstrates stitch-and-flip in action, trimming with the guide outline, and tips for achieving perfectly consistent sashing.
Share Your Progress
Post your Prim Steps in the RBD & M.E. Facebook Group — it’s always inspiring to see how different makers approach their fabric choices for these repeating blocks.
Share your progress on social media using #RileyBlakeDesigns, #RBDandMe, and #PrimStitchAlong.
Credits:
- Prim Quilt designed by Lori Holt of Bee in My Bonnet
- Machine Embroidery Files by Riley Blake Designs
- Blog and education by Jennifer Long, Machine Embroidery Manager, Riley Blake Designs


You May Also Like
Join the Ultimate Precut Party
Night Before Christmas Stocking featuring EPP and In the Afterglow