On the Dot: A Free Ohio Star Block Tutorial!
Hi everyone! Mary Burroughs-Mayer from Ember Craft Company here, with a free block tutorial featuring the new On the Dot fabrics by Sew Yeah Quilting for Riley Blake Designs!
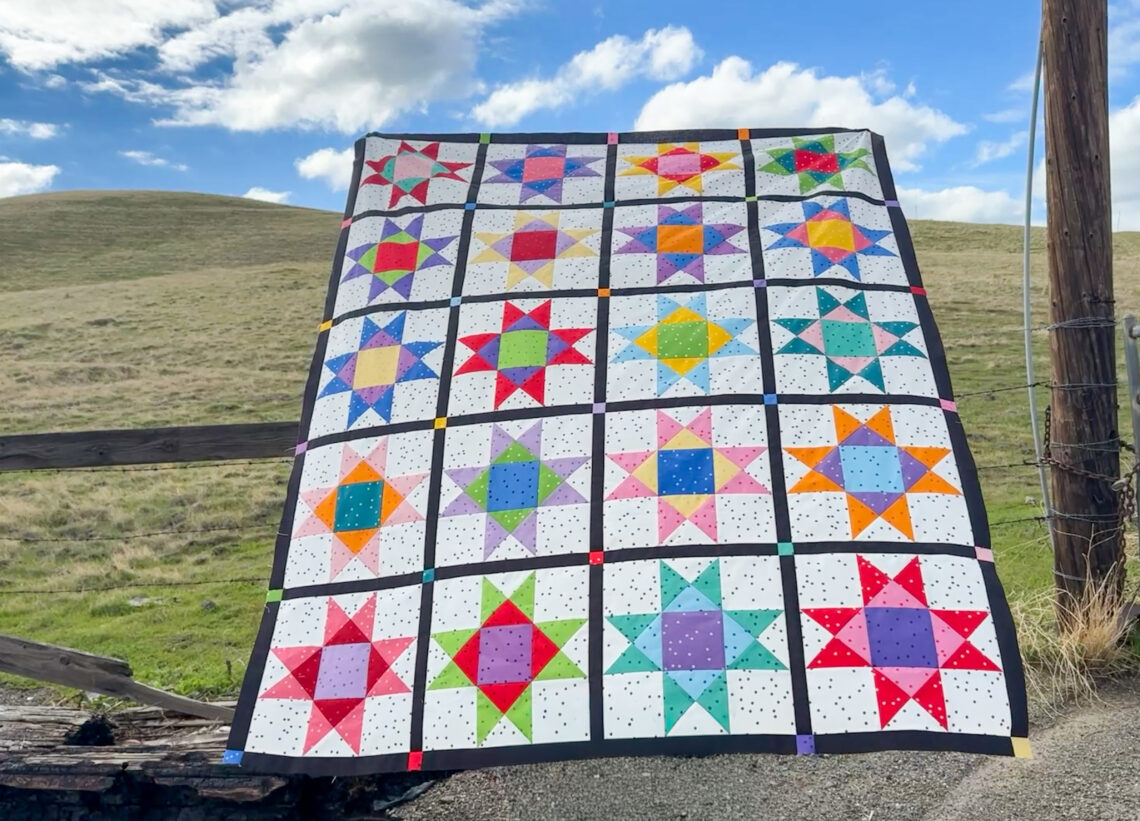
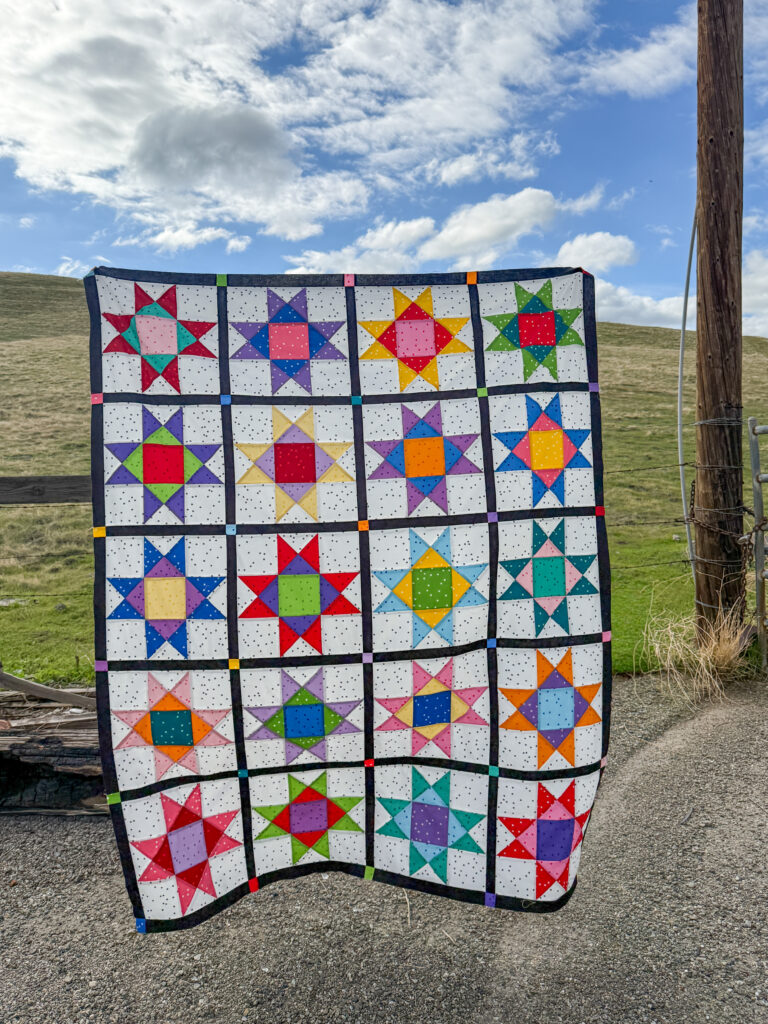
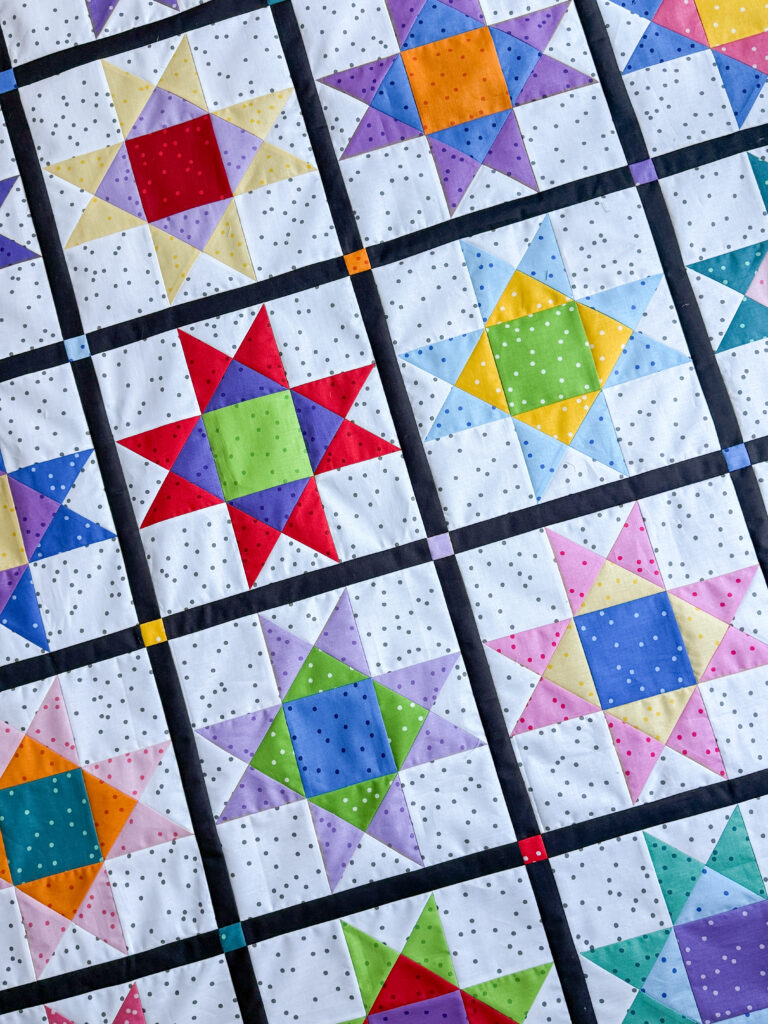
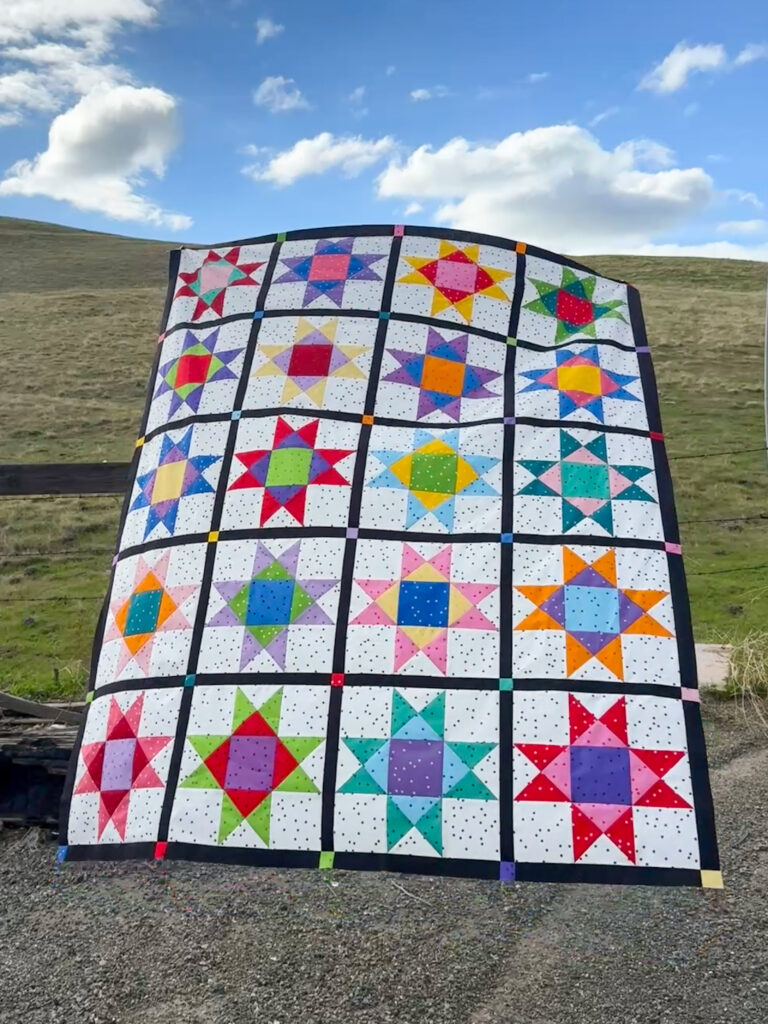
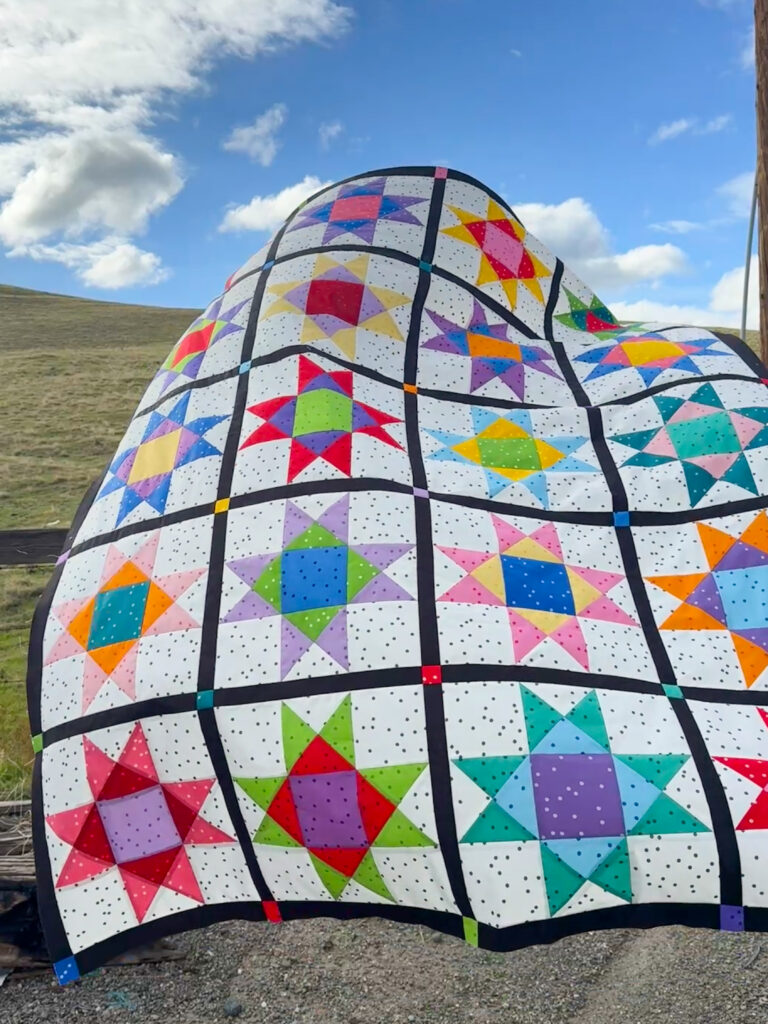
This is a beautiful collection with more than 20 colors (you can find it HERE), all featuring scattered polka dots across each print. I had a great time mixing and matching all the shades in my latest FREE pattern – the Rainbow Ohio Stars Quilt!
Continue reading below for a free tutorial to make your own Rainbow Ohio Star block, and sign up for the Ember Craft Company newsletter HERE for a free downloadable PDF of this pattern. The Ohio Star is a timeless, classic quilt block and it was so fun to reimagine it using the bold, bright colors of the On the Dot Collection.
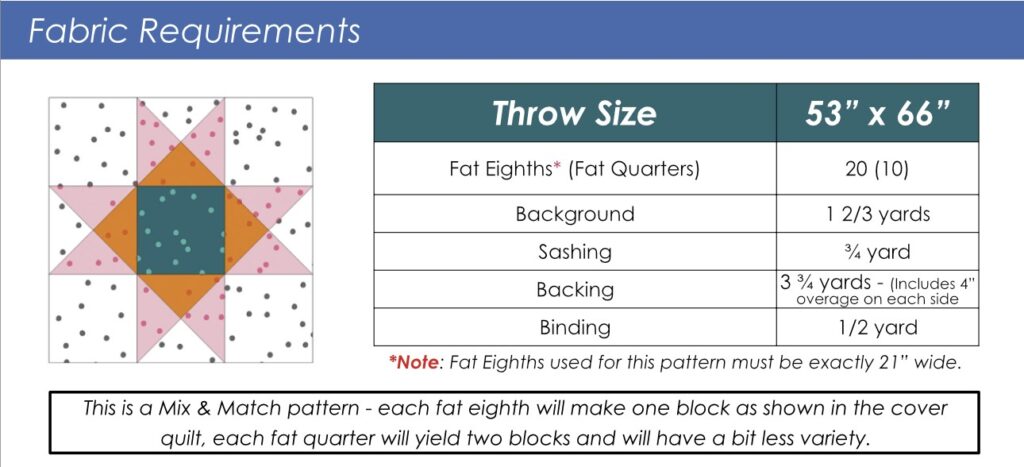
Fabric Requirements
I designed this pattern to use fat eighths to show off ALL the colors in the line. Fat quarters work well too, but will have a little less variety in the blocks than fat eighths. This would also be a great pattern to use with scraps!
Here are the full fabric requirements to make a throw size quilt using these blocks:
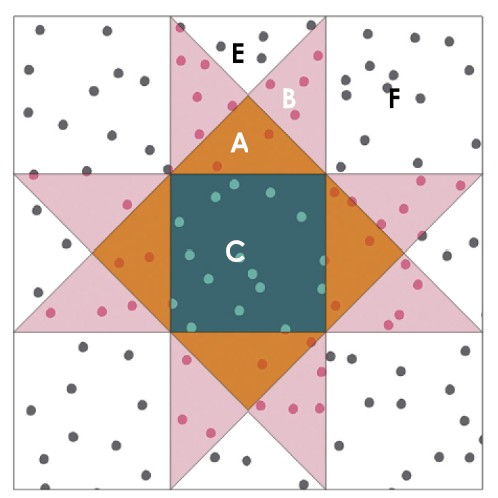
For one block, you will need the following:
1 – 5 1/2″ square (Piece A); 2 – 5 1/2″ squares (Piece B); 1 – 4 1/2″ square (Piece C); 1 – 5 1/2″ square (Piece E); and 4 – 4 1/2″ squares (Piece F).
For full cutting instructions, get the free downloadable PDF above!
Making the Quarter Square Triangle Blocks
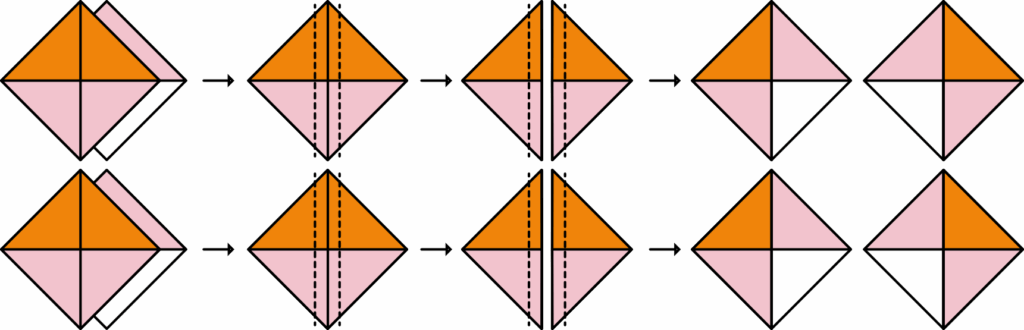
For the Quarter Square Triangle or QST blocks, we’ll start by making two sets of Half Square Triangle (HST) blocks. Gather one Piece A – 5 1/2″ square, two Piece B – 5 1/2″ squares and one Piece E – 5 1/2″ square.
Using an erasable pen, draw a diagonal line from one corner to the other on the wrong sides of each Piece B as shown in the diagram below. Match up one Piece B with a Piece A square right sides together and pin to secure. Repeat with the remaining Piece B and Piece E. Sew a seam 1/4″ away from each side of the drawn line on both sets. Cut down the drawn line of each set. Press toward Piece B on both sets. You will have 2 -BA HSTs and 2 BE HSTs.

With an erasable pen, draw a diagonal line on each BA HST from one corner to the other as shown in the diagram below. Pair one BA HST with one BE HST, right sides together, making sure Fabric B is on opposite sides and the seams nest. Sew a seam 1/4″ away from each side of the drawn line on both sets. Cut on the drawn line. I like to press these seams open to reduce bulk, but feel free to press as desired. Trim each QST to 4 1/2″ square. You will have 4 QSTs as shown in the diagram below!
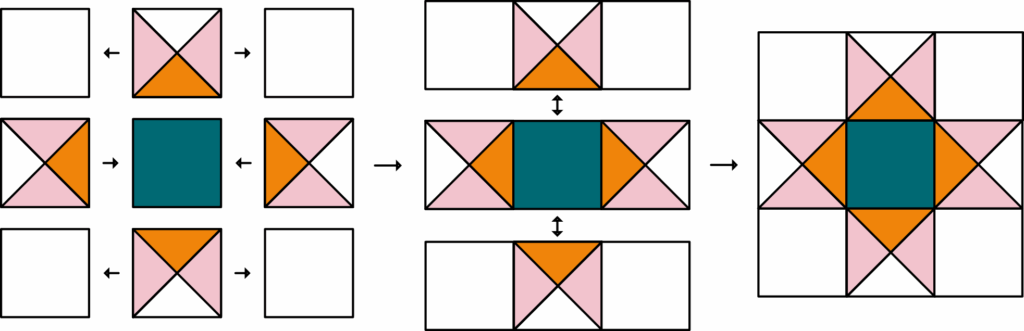
Assembling the Block
Gather the HSTs made in the previous step, one Piece C – 4 1/2″ square, and four – Piece F – 4 1/2″ squares. Paying close attention to the orientation of the QSTs, layout the block as shown in the diagram below. With a 1/4″ seam allowance, sew the squares into rows, pressing according to the arrows in the diagram below to nest seams in the block or as desired. Sew each row together with a 1/4″ seam allowance. I like to press the row seams open to reduce bulk, but feel free to press as desired. This Ohio Star Block should measure 12 1/2″ unfinished.
To Make the Quilt
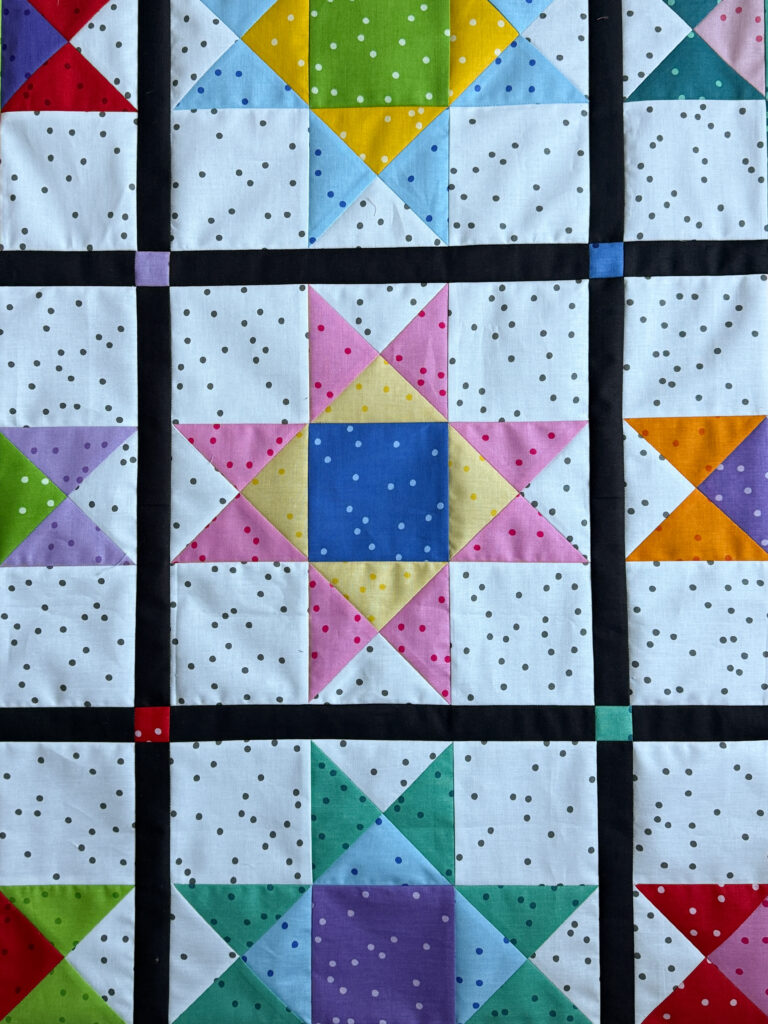
To make the Rainbow Ohio Stars Quilt, you will need 20 of these Ohio Star Blocks. I’ve used Confetti Cottons in Licorice for the sashing – you can find it HERE. The black really sets off the rainbow colors in the blocks and I love how it frames each one. I’ve also added cornerstones from the fat eighth scraps to add an additional splash of color. For full cutting and assembly instructions, download the free pattern by signing up for my newsletter HERE.
I’d love to see your version! Tag me on Instagram – @embercraftcompany – so I can cheer on your progress and share your makes!
As always, thanks so much for following along with me here. I’m always working on some kind of sewing shenanigans, make sure to follow me on all the socials to see what I’m up to next!
Happy Sewing!
Mary Burroughs-Mayer – Ember Craft Company


One Comment
Lisa MacDonald
Looking forward to it