Cover Stitches: Clean Edges and Confident Finishes
If you’ve ever finished an appliqué project and thought, “I love it… but I wish the edges looked a little cleaner,” you’re already thinking like an embroidery designer. That final edge treatment is exactly what cover stitches are for. They’re the finishing stitches that turn an appliqué shape from “stitched down” into “finished on purpose.” They add structure, protect the edge, and give your project a confident outline that holds up through handling, washing, and real life.
At Riley Blake Designs Machine Embroidery, we talk about cover stitches a lot because they do so much heavy lifting. They’re not simply decorative. A well-built cover stitch is both a design choice and a functional tool, and when you understand how they work, you can troubleshoot nearly every “why does this look wavy/pulled/puffy?” moment that pops up in embroidery.
What cover stitches are really doing
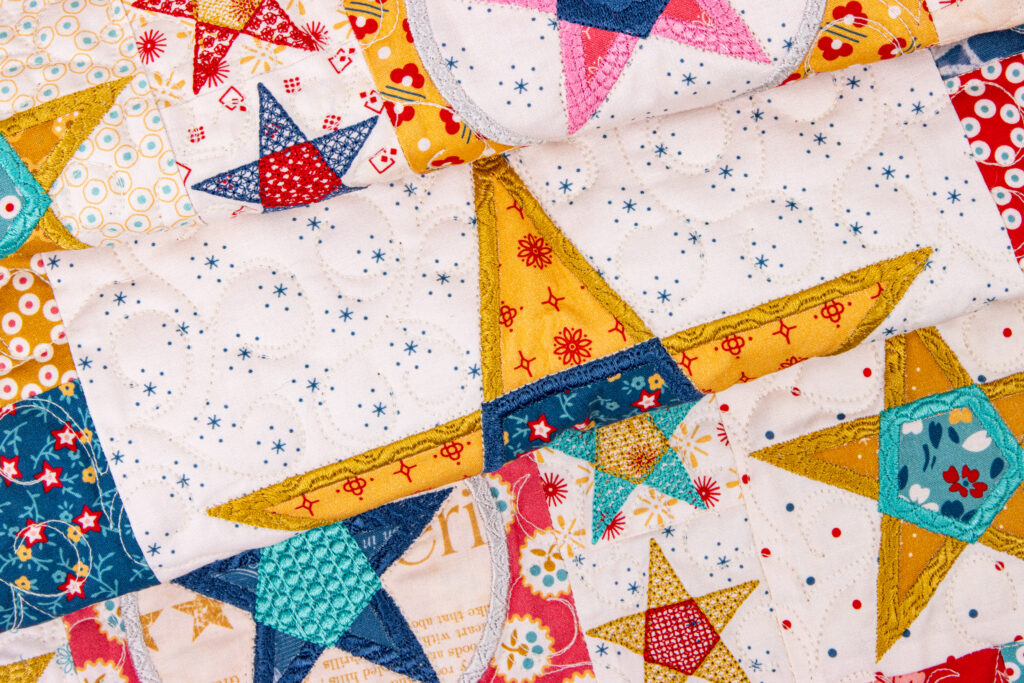
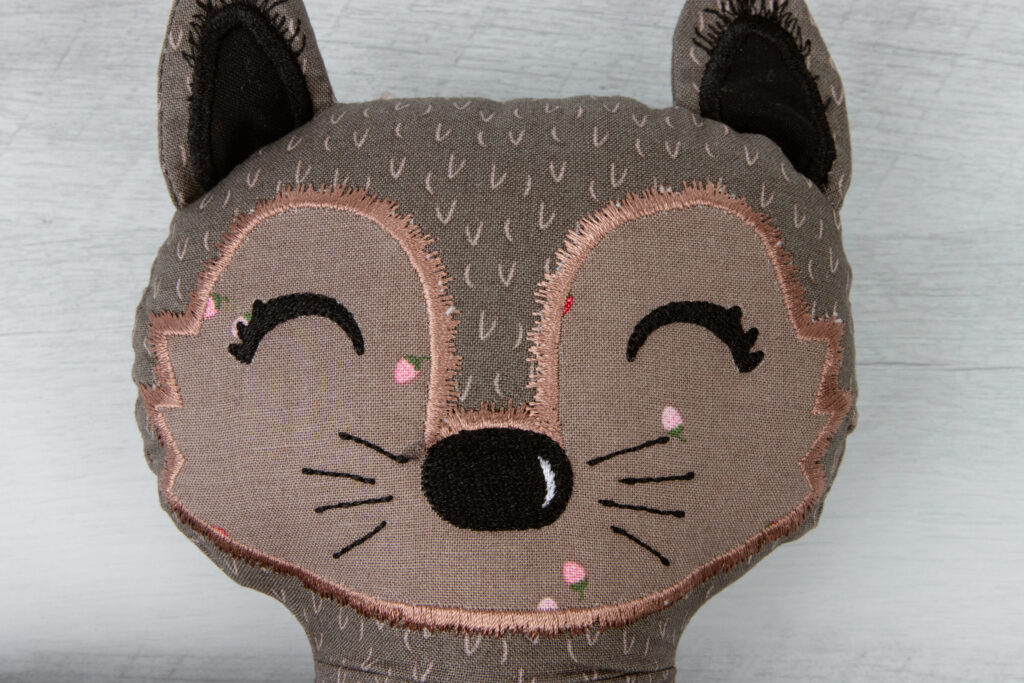
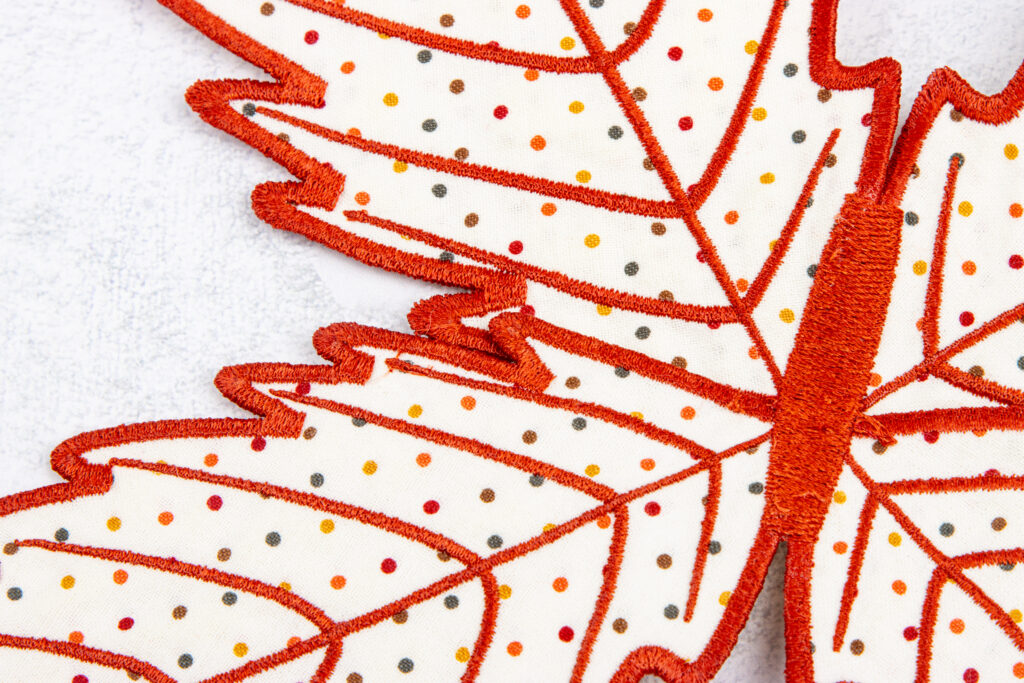
A cover stitch is the visible stitch that finishes the edge of an appliqué or raw-edge detail. It’s the stitch your eye naturally follows, and it’s usually the final step that defines the shape. On something like a label, a quilt block motif, a bag accent, or a doll clothing piece, that edge is what makes the design look crisp and intentional.
But there’s another piece of the story that matters just as much: what’s happening underneath.
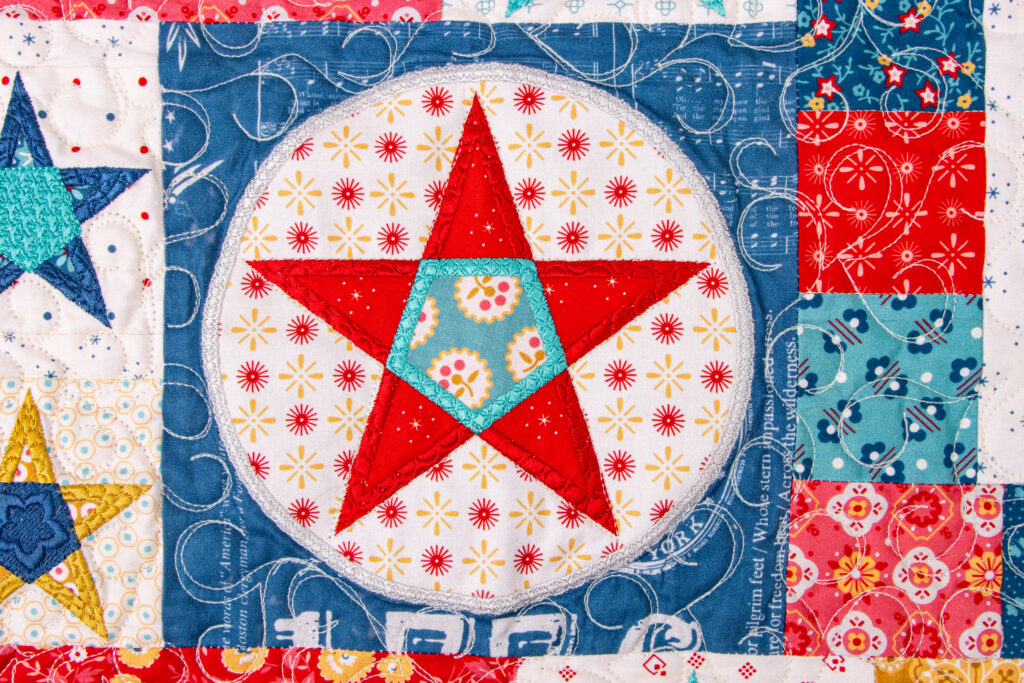
In our designs, we use two rows of tack-down stitching underneath the cover stitch, and that construction changes the whole experience for you as the stitcher. Those two tack-down passes create a strong foundation, which means you can trim tightly without that nervous feeling of, “If I cut one wrong thread, will the edge unravel?” The double tack-down helps lock the fabric in place, supports the shape, and gives the cover stitch a stable base to sit on. The end result is cleaner trimming, smoother edges, and a finish that holds up better over time.
When to use a cover stitch, and why it matters
Cover stitches shine any time you need an edge to look polished or durable. They’re especially helpful on appliqué shapes, raw-edge details, and free standing appliqué pieces where the edge is exposed and needs to look finished. They’re also a quiet problem-solver when a fabric wants to fray, stretch, or shift, because a good cover stitch doesn’t just sit on top, it secures the edge and reinforces it.
And from a design perspective, cover stitches are one of the easiest ways to change the “vibe” of an embroidery project without changing the motif. The same shape can feel classic, sketchy, textured, modern, or whimsical depending on the stitch you use to finish the edge. That’s why we’re intentional about offering different cover stitch personalities across our designers and collections.
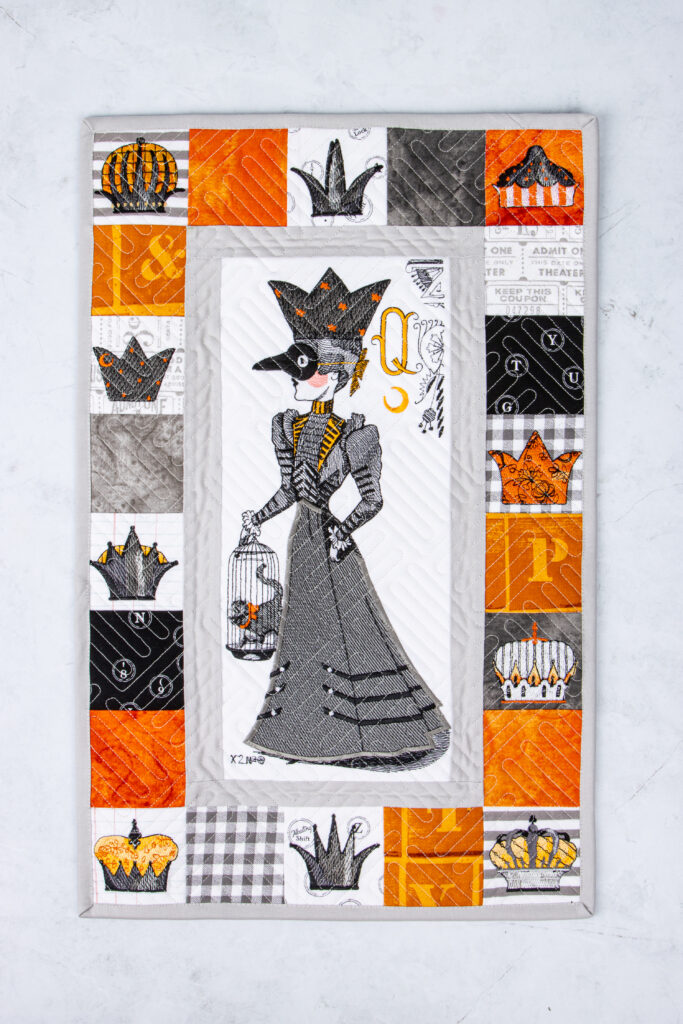
Three cover stitch looks you’ll see in RBD Machine Embroidery
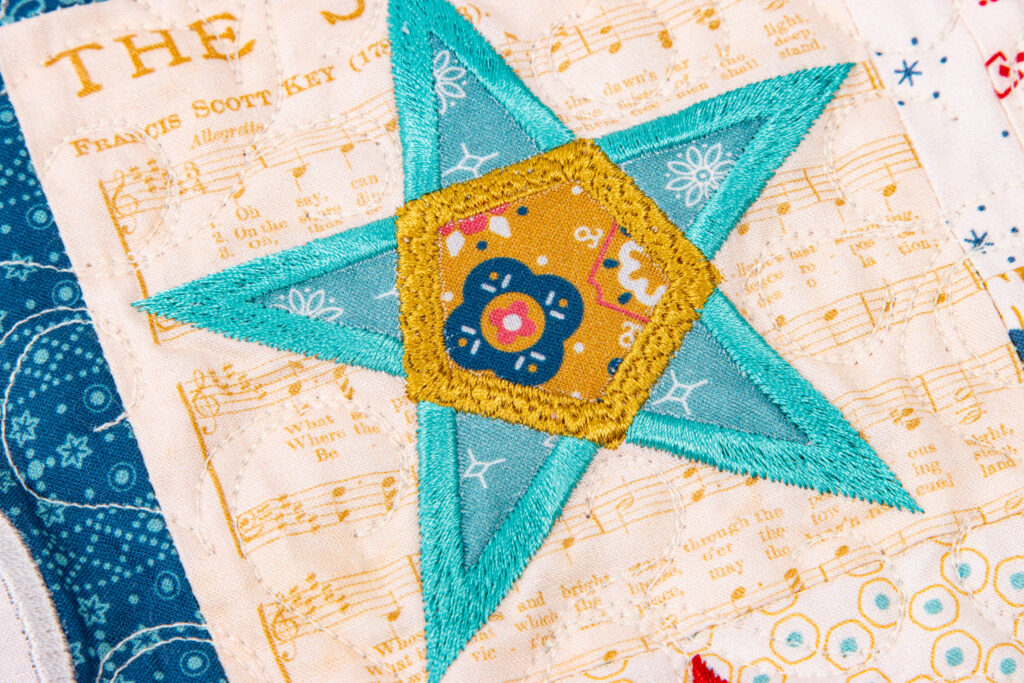
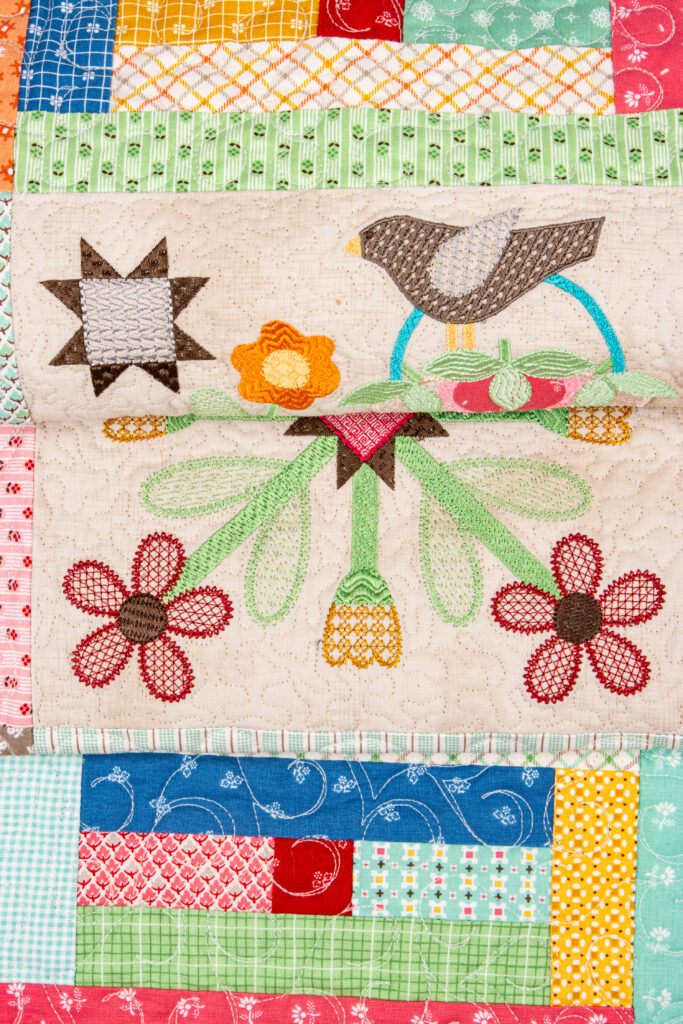
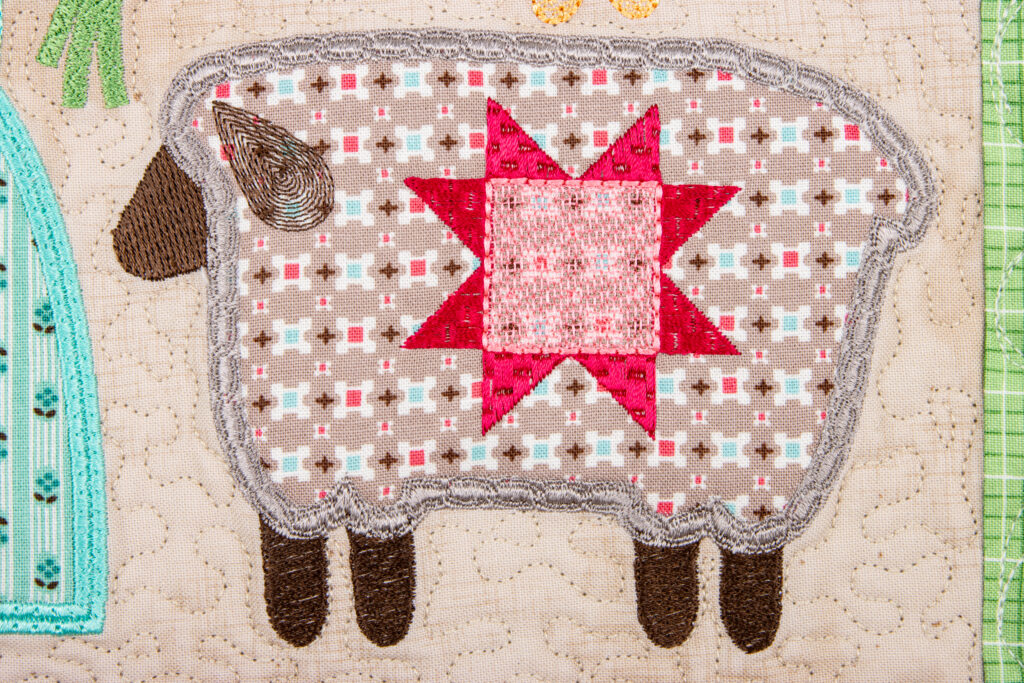
One of the most charming examples is the Bee in My Bonnet exclusive approach to cover stitches. These are designed to feel a little bit embossed, like they’re echoing the texture and personality of her fabrics. Instead of looking like a standard border, the stitch itself becomes part of the fabric story. When you pair this style with a tone-on-tone thread choice, it can create that beautiful effect where the edge looks dimensional but still soft and cohesive, as if it belongs to the print.
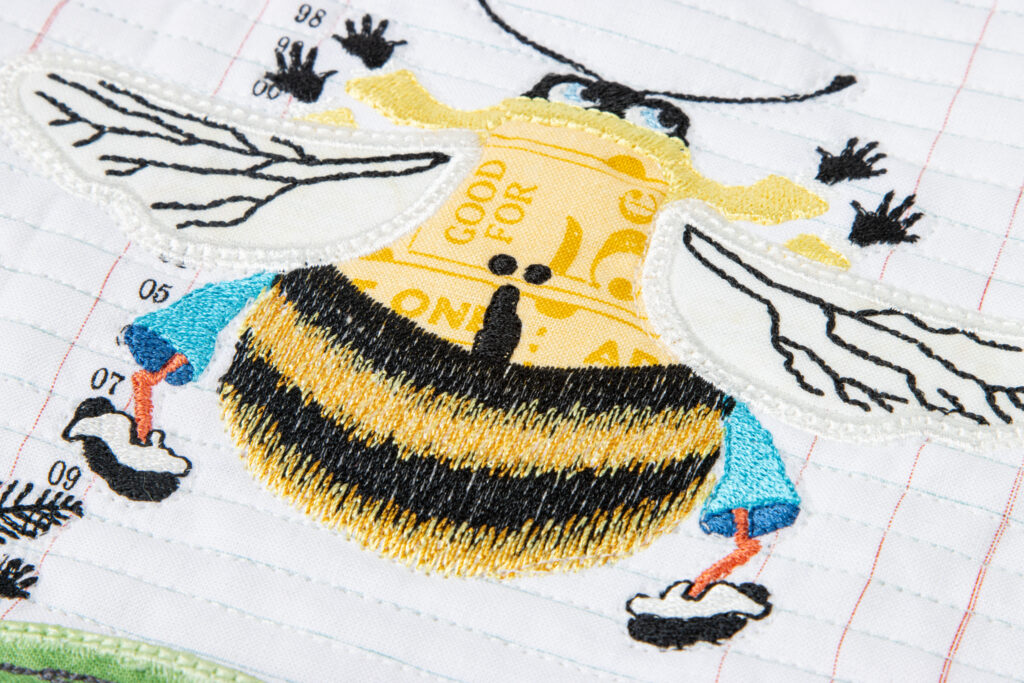
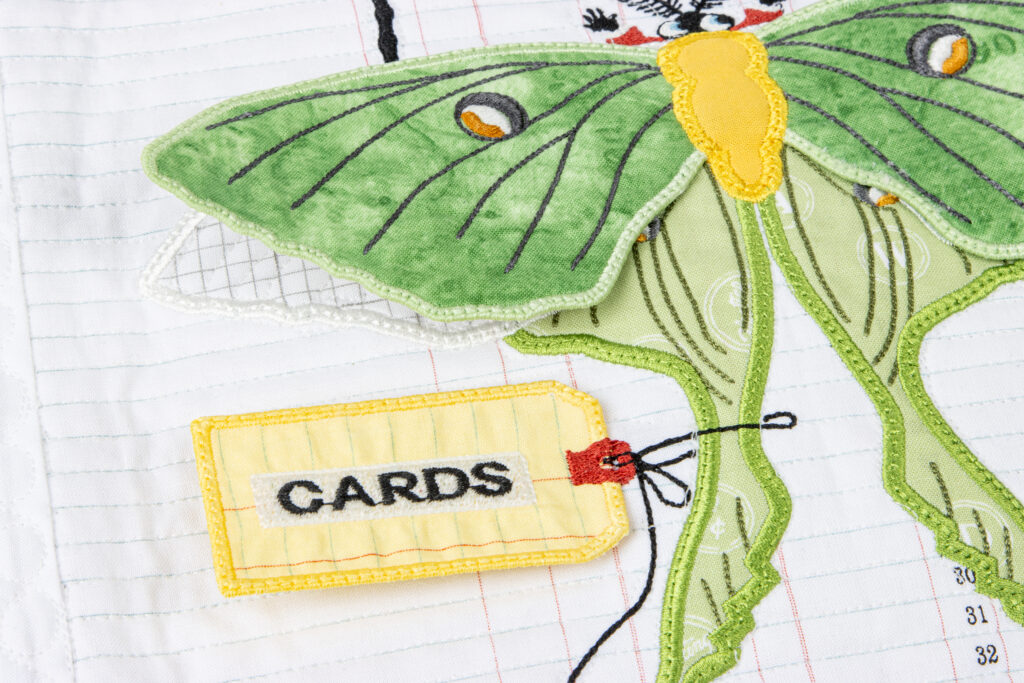
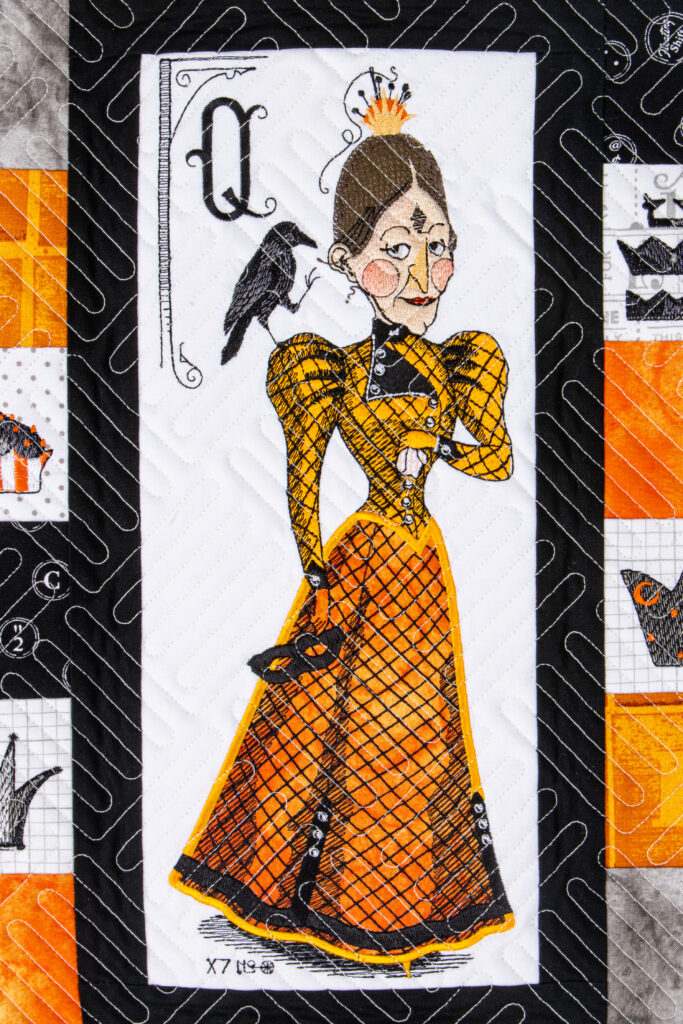
Then there’s the JWFrish look, which I love for how expressive it is. Her cover stitches lean hand-drawn and sketchy, almost like you traced the edge with a pencil or pen. This style is perfect when a traditional satin edge feels too formal. It’s an intentional “imperfect” line in the best way, and it adds motion and personality to whimsical motifs. If you want your embroidery to feel illustrated, this is one of the simplest ways to get that effect.
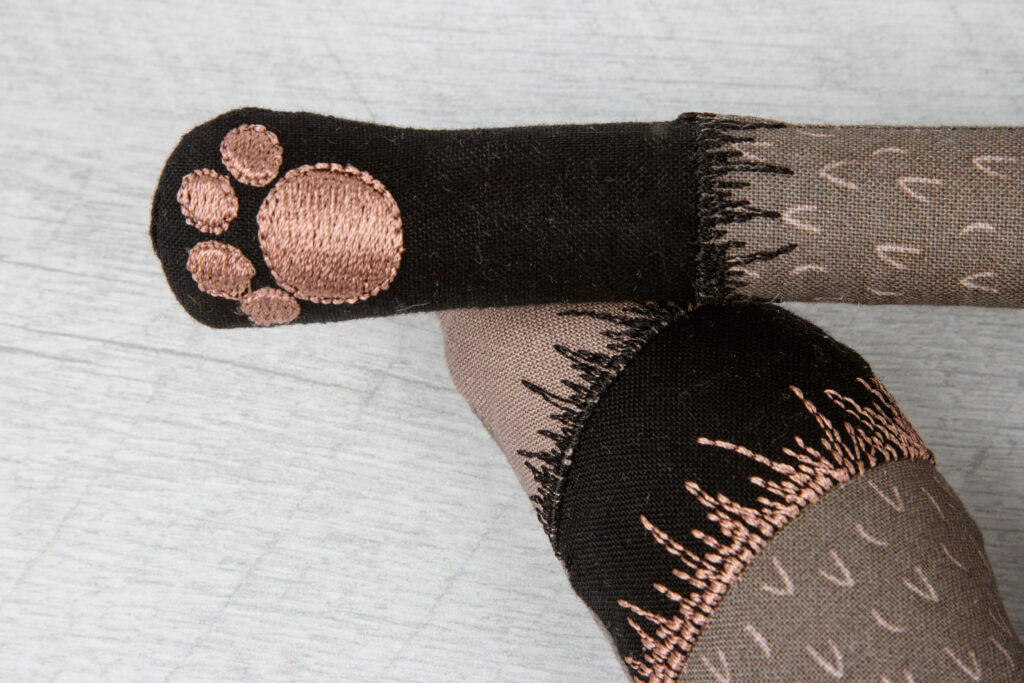
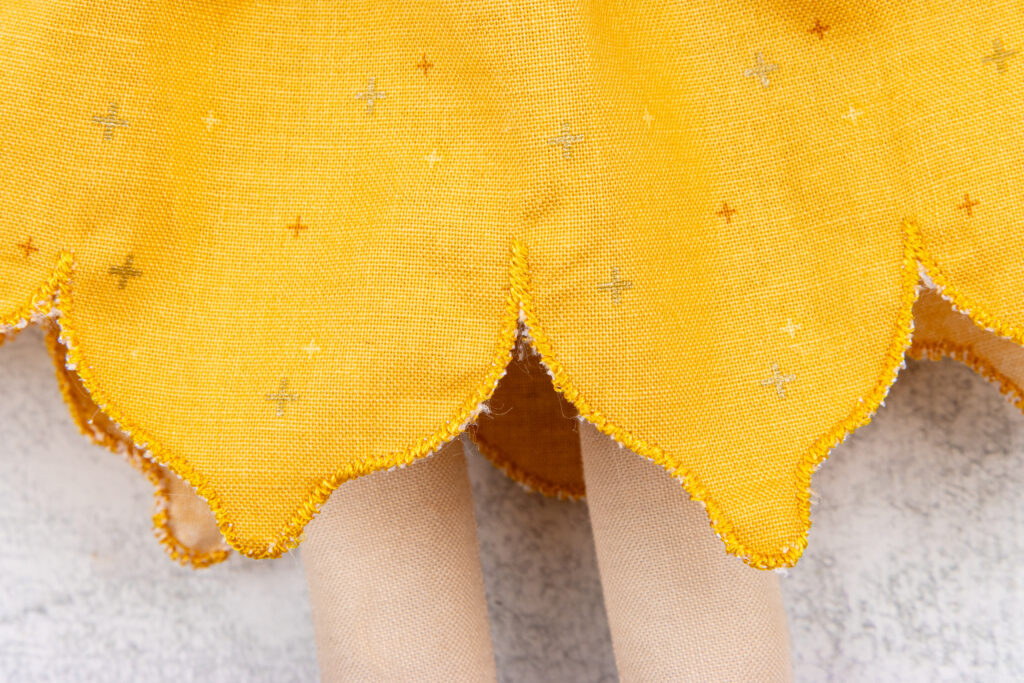
Finally, cover stitches play a huge role in our doll appliqué and free standing appliqué (FSA) pieces, especially for things like skirts and clothing items. These pieces are handled more, pulled on, played with, and generally loved hard. A good cover stitch isn’t only about looking cute, it helps the piece hold its shape and finish cleanly along the edge. When you stitch a skirt or accessory as an FSA item, the cover stitch becomes part of the structure, giving the edge strength and helping it feel “complete” when it’s removed from the stabilizer.
Understanding density, width, and tension (without getting overwhelmed)
If cover stitches are giving you trouble, it almost always comes back to a balance between density, width, and tension.
Density is how much thread is being laid down in a small space. When density is too high, stitches can build up and start to push the fabric around. That’s when you’ll see stiffness, puckering, or a ridge forming along the edge. When density is too low, you can end up with gaps that expose the trimmed fabric edge or make the outline look uneven. The goal is coverage that looks smooth without forcing the fabric to behave unnaturally.
Width matters because it affects both coverage and appearance. A wider cover stitch can be very forgiving, especially if you’re trying to hide trimming lines or working with fabrics that fray. Narrower cover stitches can look delicate and refined, but they require more precise trimming and tend to show every little wobble in the edge. In general, tight curves and small shapes often look cleaner with a slightly narrower finish, while bold appliqué shapes can handle a wider stitch beautifully.
Tension is the behind-the-scenes setting that controls how the thread sits on the fabric. When tension is off, you’ll see it quickly: bobbin thread popping up, top thread pulling too hard, or edges drawing in. Small changes go a long way here. If you’re troubleshooting, it’s better to adjust slowly and test than to swing wildly and create a new problem.
Preventing tunneling and fabric pull
Two of the most common issues with cover stitches are tunneling and fabric pull. Tunneling looks like a raised ridge along the stitch line. Fabric pull shows up as ripples or waviness near the edge. Both are usually a sign that the stitch is demanding more stability than the fabric is currently getting.
A good place to start is stabilization. If the fabric is soft, stretchy, or loosely woven, it needs more support to stay flat under a heavier finishing stitch. This is also where “how” the fabric is secured matters as much as “what” stabilizer you use. If a fabric is stretched while it’s secured, it often relaxes after stitching and creates ripples. If it’s stable and supported, the stitch line stays clean.
The second place to look is density. If the stitch is overly dense, it can create tension and pull even on well-stabilized fabric. Reducing density slightly often fixes the problem without changing the look of the stitch in a noticeable way.
Thread weight and sheen: the design knob you can actually control
Thread is one of the easiest ways to change the effect of a cover stitch without changing the file. If you want a clean, classic finish, a standard 40 weight rayon or poly gives you crisp coverage and a little sheen. If you want that hand-drawn feeling, especially with sketchy cover stitches, matte threads or a slightly finer thread can soften the look and make it feel more illustrated. If you want the edge to feel bold and graphic, heavier thread can create a statement, especially on larger motifs.
Sheen plays into this too. A shiny thread highlights texture and can make embossed cover stitches feel even more dimensional. A matte thread tends to blend more and reads as softer and more hand-finished.
A simple way to build confidence quickly
If you’re ever unsure how a cover stitch will behave on your chosen fabric, one small test sample can save a lot of frustration. Stitch a single motif or edge on the same fabric and stabilization setup you plan to use, trim it, and look closely at the edge. If it’s smooth, covered, and flat, you’re ready. If it’s pulling or tunneling, you’ll know before you’ve committed to the full project, and you can adjust stabilizer, density, or thread choice with confidence.
Cover stitches are one of those skills that feel technical at first, but once they click, they unlock a whole new level of polish in your embroidery. They give you clean edges, stronger appliqué, and the freedom to choose a finish that matches the style of the designer, whether that’s Bee in My Bonnet’s textured look, JWFrish’s sketchy charm, or durable doll clothing edges that are ready for play.
By Jennifer Long – Machine Embroidery Manager at Riley Blake Designs


You May Also Like
Shop Owner Track at Garden of Quilts
RBD Block Challenge 2024 – Block 8 by Jill Finley