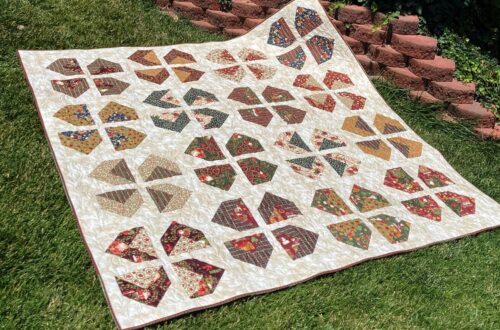
Machine Embroidery 101: Stabilizers
Stabilizers are one of the most widely misunderstood products in the world of machine embroidery, but taking just a few minutes to understand them—and maybe even doing a test sew or two—can save you significant time and frustration in the long run.
Interfacings and stabilizers are not the same thing. Interfacings provide permanent body or structure to fabrics or projects, while stabilizers, for the most part, are meant to be removed after stitching. Stabilizer is so named because it prevents the fabric from stretching during the machine embroidery process. We often recommend using a combination of interfacings and stabilizers for the best results.
When your machine embroidery machine is running and the embroidery arm is moving the hoop, there is always at least a small amount of what’s called push and pull happening on the fabric. This movement can cause puckering in a project, which is exactly why stabilizer is necessary. The needle creates more pulling and puckering on knit fabrics because they naturally have more stretch—especially when the stitching falls on a 45-degree angle, also known as the fabric bias.
Push occurs most noticeably with large and/or dense designs as the needle travels from one area of the design to another. Large designs are almost always digitized to stitch from the center outward so the design lays evenly on the fabric.
The type of fabric you’re stitching on is a great place to start when choosing stabilizers. Knits have a lot of stretch, so as a general rule, using a fusible mesh on the back is a smart choice. This stops stretch in all directions with just one layer. The fused stabilizer—whether on a T-shirt or sweatshirt—needs to be large enough that all four sides of both the stabilizer and the fabric are securely held in the hoop.
For projects like these, a topping is often used as well. A topping is a thin film placed on top of the project during machine embroidery that later washes away with water. Its purpose is to prevent stitches from sinking into the knit fabric during stitching.
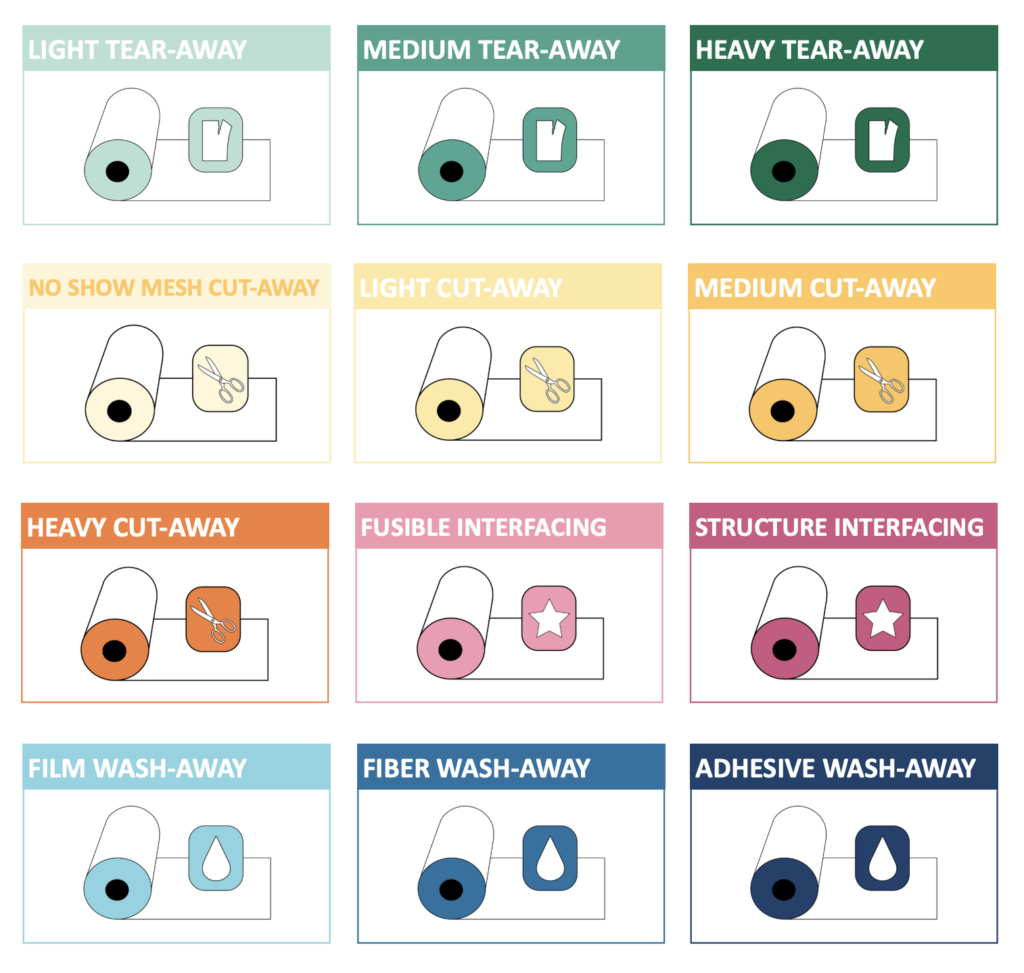
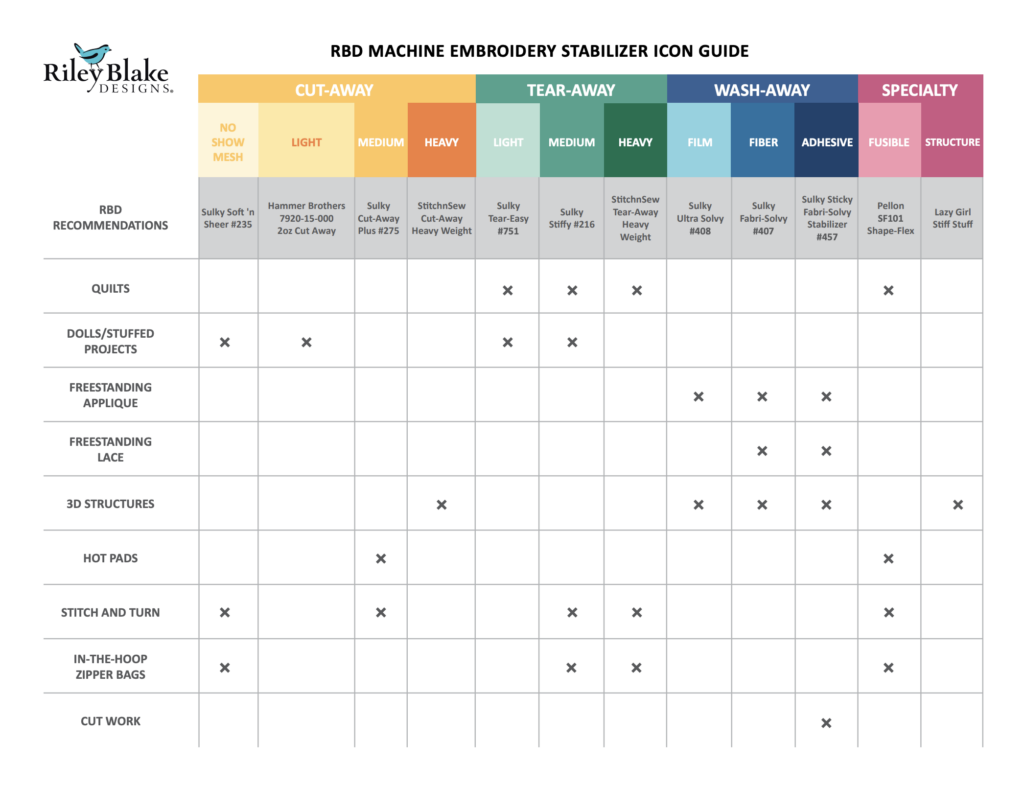
RBD & ME Machine Embroidery Icon Guide
Tear-away stabilizers are commonly used for woven fabrics and are sometimes added as extra support for knits. For best results, tear-away stabilizer should be hooped together with the fabric. This keeps everything aligned and minimizes space between the fabric and stabilizer.
In situations where the fabric cannot be hooped, a basting stitch can be used to secure the fabric to the stabilizer before the machine embroidery design is sewn. Another option is adhesive tear-away stabilizer, which is a favorite for woven (non-plush) towels such as kitchen towels. This type of stabilizer holds the item firmly in place during machine embroidery and then tears away cleanly from the edges. Any stabilizer remaining under the stitching becomes soft and flexible after washing.
At RBD & M.E., we show you exactly which stabilizers to use—and how to apply them—for the best results in every project. We test and re-test each project using the specific fabrics, stabilizers, and techniques we recommend. Our machine embroidery designs are also digitized to our standards, with those stabilizer recommendations in mind. If you choose to substitute or add stabilizers, please keep in mind that doing so may change the final results. We’re always happy to help guide you!
If there is space between the fabric and the stabilizer, the push and pull of the needle can be amplified, leading to unwanted puckering. For best results, aim to bond the stabilizer to the fabric whenever possible. Depending on the project, this might mean using a fusible or adhesive stabilizer, or hooping the fabric together with the stabilizer.
Common mistakes when substituting stabilizers include:
- Adding extra layers of stabilizer
- Using the wrong type of stabilizer
- Using materials that are not designed to be stabilizers
As tempting as it may be to substitute items like coffee filters or paper towels, these materials can damage your machine in several ways—and that’s a definite no-no. Plus, it’s not exactly fun explaining to a repair technician why they’re cleaning paper towel bits out of your machine embroidery machine.


One Comment
Sandra Kazandjian
Very interested in this series!