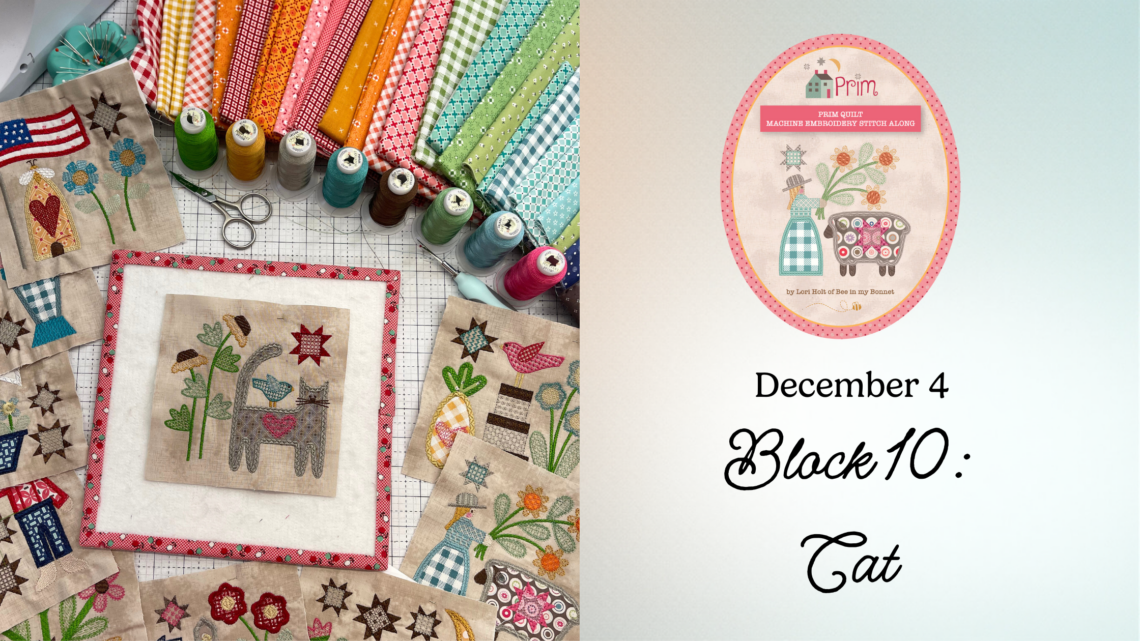
Prim Machine Embroidery Stitch Along – Block 10
Block 10: Cat
The Cat block introduces beautiful curved appliqué work and thoughtful thread detailing, making it a great opportunity to refine both your trimming technique and your understanding of how thread choices can add depth to a design. This block highlights the importance of careful trimming along curves and showcases how subtle color and texture variations can elevate a familiar motif.
Trimming Curved Appliqué for a Clean Finish
The Cat block includes several curved appliqué pieces, especially around the cat’s back, tail, and the gentle rounding of the head. These areas require slower, deliberate trimming in order to achieve a smooth, professional satin stitch edge.
For best results:
- Trim slowly and stay close to the tack-down stitch without cutting into it.
- Support the fabric with your free hand as you trim so curved edges don’t stretch or distort.
- Pay special attention to bias edges — these can shift more easily, so keeping the fabric stable while trimming prevents puckering later.
- When trimming around tight curves (like the tip of the tail), make small cuts instead of long swoops to maintain control.
A well-trimmed edge allows the cover stitch to sit cleanly over the fabric without rippling or gaps.
Depth Through Threadwork
Beyond the central cat shape, this block uses thread color changes and fill textures to bring the surrounding elements to life. This adds a subtle dimension without increasing fabric layers.
Notice the following details as you stitch:
- Leaves: Slight variations in green thread tones and fill direction create depth and movement.
- Bird: Two types of stitching in the same thread family produce a feathered look, soft fill for the body, finer detail stitches for the wings or outline.
This block demonstrates how thoughtful threadwork can mimic shading and texture, enhancing the finished quilt without additional appliqué.
Stabilizer and Hooping Setup
Use Heavy Weight Tear-Away Stabilizer to support the curved appliqué edges and the dense fill stitches in the leaves and bird.
Hoop your fused fabric and stabilizer together with even tension on all sides for the cleanest cover stitch finish.
Refer to the
👉 Riley Blake Designs Stabilizer Chart
https://www.rileyblakedesigns.com/assets/images/machineembroidery/stabilizers/StabilizerChart.pdf
Pressing and Trimming
After stitching, gently remove the stabilizer and press from the back using a warm, dry iron.
Trim the block using Lori Holt’s Trim-It™ Rulers, centering the crosshairs along the cat for balanced spacing.
Stitch Along with RBD!
Follow the complete Block 10: Cat tutorial on the Riley Blake Designs YouTube channel.
The video walks through trimming curved appliqué, controlling bias edges, and recognizing thread texture changes throughout the block.
Share Your Progress
Post your Cat block in the RBD & M.E. Facebook Group — this is a great block for comparing how different thread colors and fabric choices impact the overall texture.
Share on social media using #RileyBlakeDesigns, #RBDandMe, and #PrimStitchAlong.
Credits:
- Prim Quilt designed by Lori Holt of Bee in My Bonnet
- Machine Embroidery Files by Riley Blake Designs
Blog and education by Jennifer Long, Machine Embroidery Manager, Riley Blake Designs


You May Also Like

Attending Industry Events is a Power Move for Your Quilt Shop
2026 Kit of the Month: Our Town Quilt!